
Convert JPG & PNG Images To Multi-Layered Cut Files In Cricut Design Space
How do you create layers in Cricut Design Space?
Techniques and skills like this are essential if you want to expand the boundaries of what you can make with your Cricut cutting machine.
Thankfully we don’t have to learn it all at once to start creating with Cricut, but can take it step-by-step!
Create Layers In Cricut Design Space
My favorite way to find free images is Google Images, but be sure to check the license of each image before you download them. The image I am demonstrating the process with was free for personal use.
If you’re not familiar with the difference between JPG and PNG images, let me explain:
- JPG images still have a white (or colored) background which will need to be removed
- PNG images have no background, and only a grid pattern in the background
If you have the choice, PNG images are slightly easier to work with than JPG images. JPG images can sometimes need a lot of cleaning up (especially when trying to isolate colors into separate layers), but we’ll get into all that soon.
How To Separate An Image Into Layers In Cricut
1. Start by opening a new project in Cricut Design Space and click ‘upload’.

2. Click ‘upload image’.

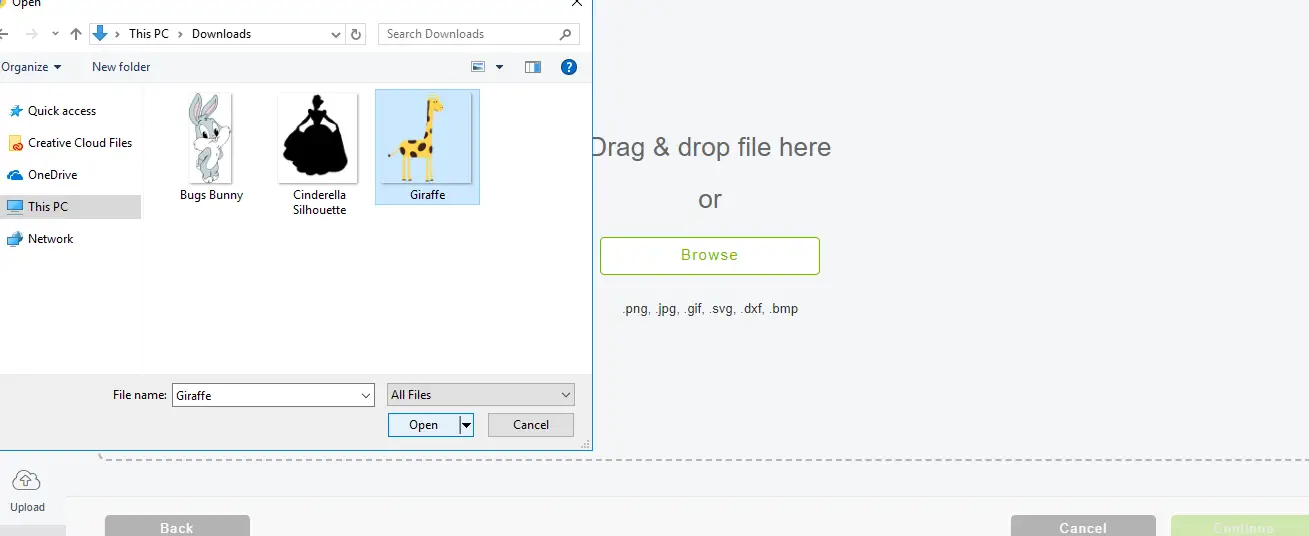
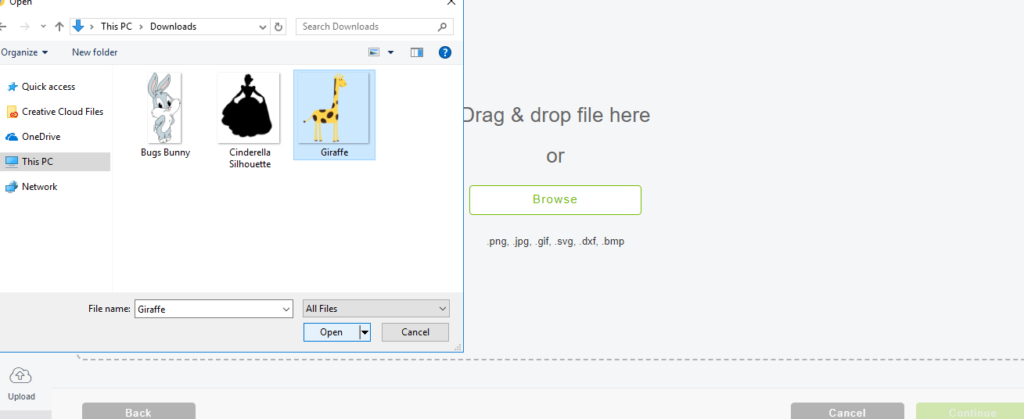
3. Click ‘browse’ to select your image, click ‘open’ and then ‘continue’.
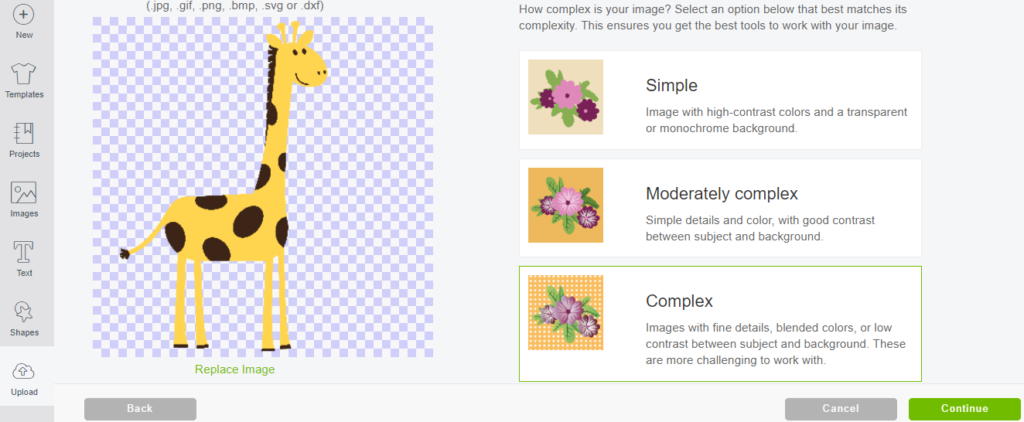
4. Select the image type. Read the descriptions of each image type and decide which category your image falls into. I could probably get away with simple or moderately complex for my image, but I’m going to go complex anyway!
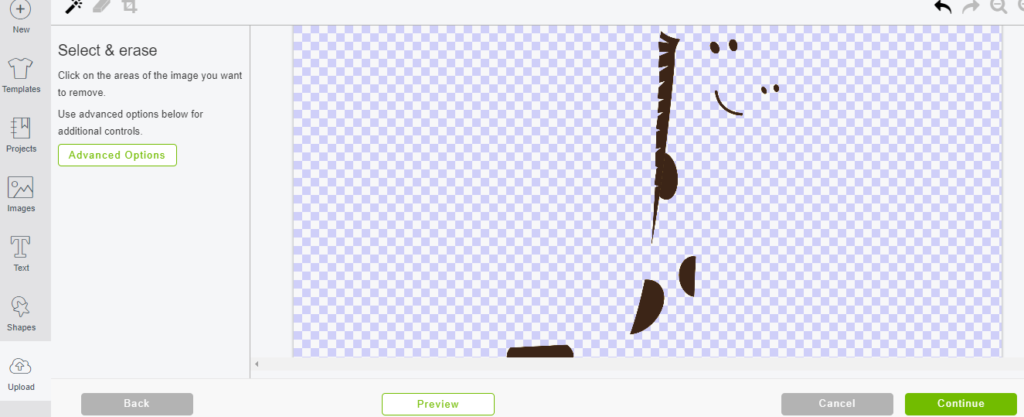
5. If uploading a JPG image, use the wand tool and click all the parts of the background to remove them. Here I’m uploading a PNG, so the background has already been removed. You’ll know when the background is removed because the grid pattern will appear instead. Zoom in and out depending on the size of your image, to make it easier to work around.
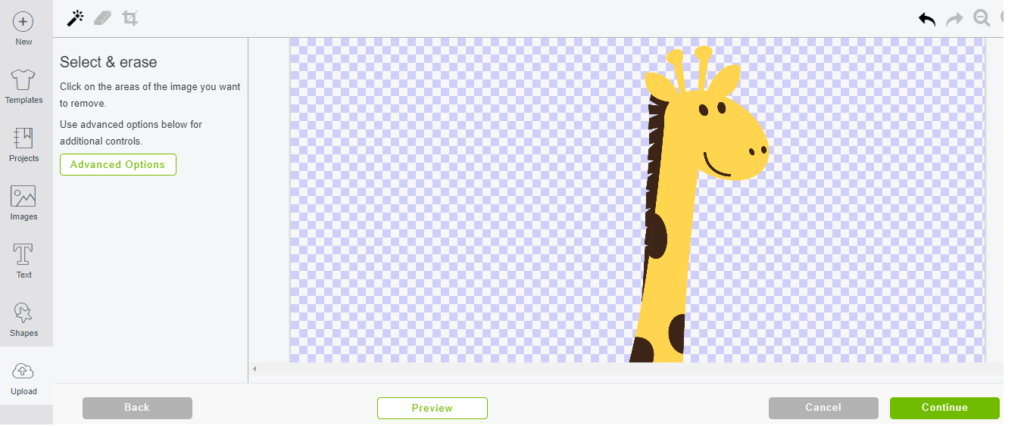
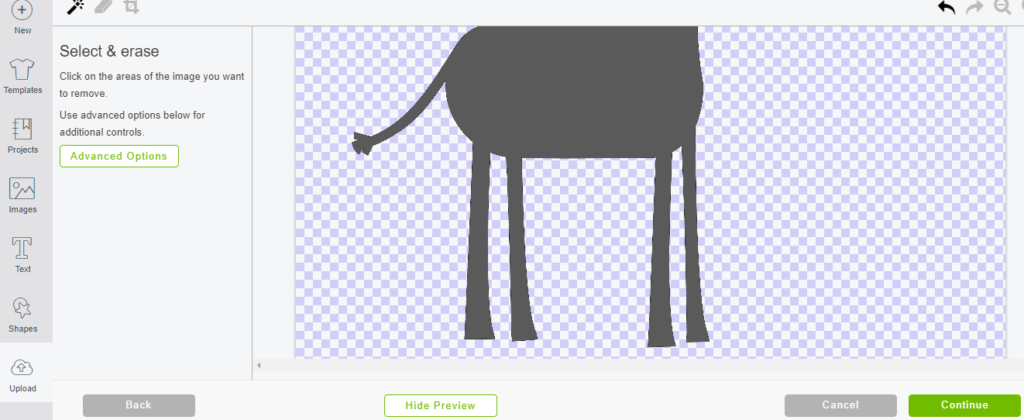
Sometimes there can be random cut lines around an image, so it’s best to preview it before continuing on to the next step. If there are any random lines that aren’t part of your image, use the eraser tool and remove them. Here I am previewing my cut image and it all looks good! Now click ‘continue’.
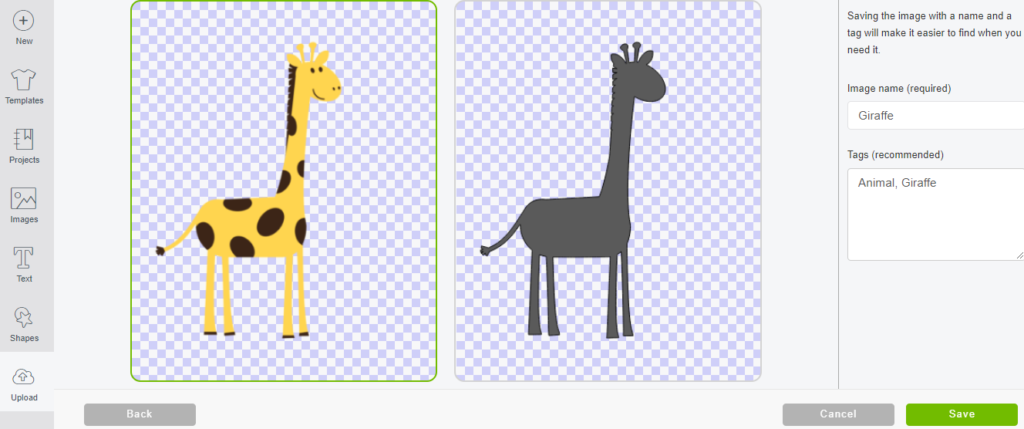
6. Select to save as a ‘print then cut image’ (I’ll show you why soon). Write an image name and add some tags so that you will easily be able to search through your uploaded images at a later date.
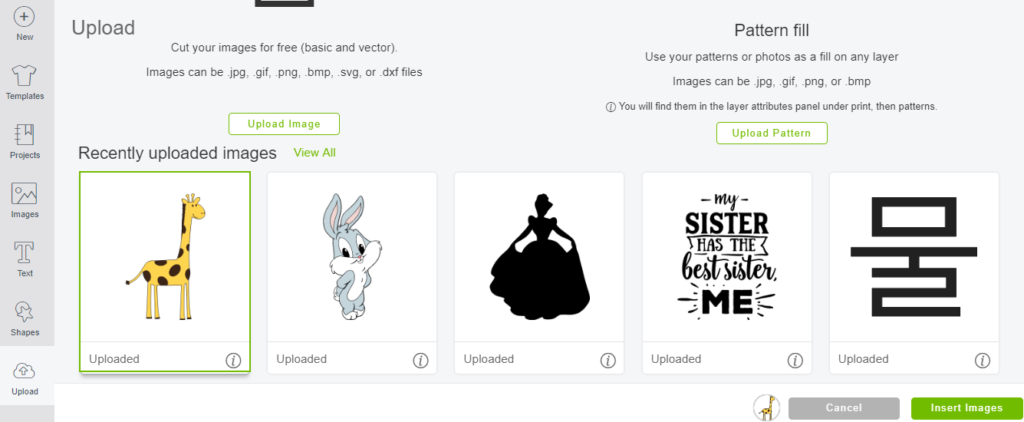
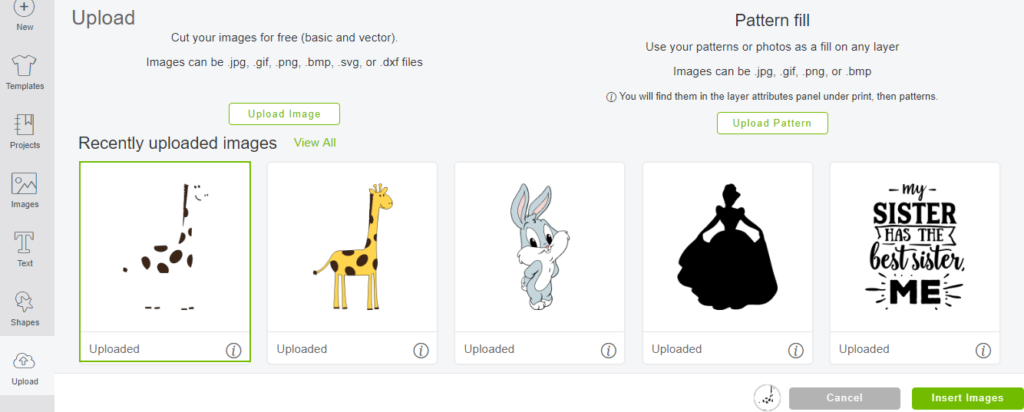
7. Your image is now uploaded! Let’s insert it into the canvas so that I can explain about single layer and multi-layer cut files. Click the image to select it and then click ‘insert images’.
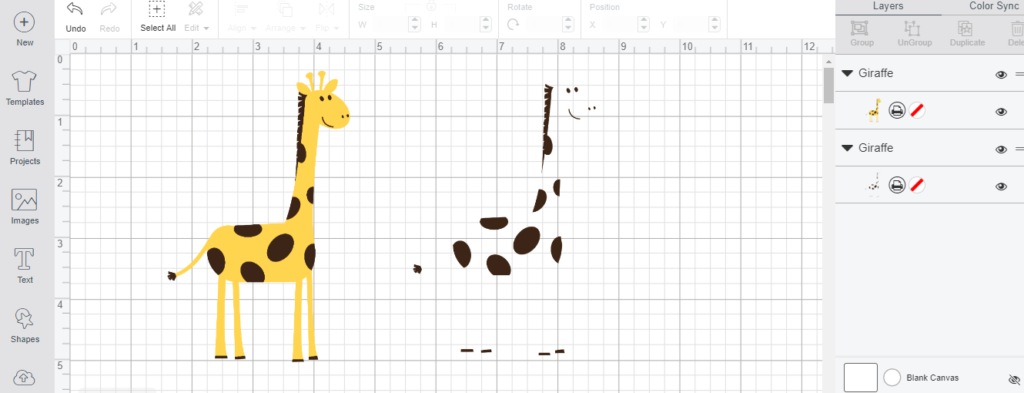
8. Now we’ve got our print then cut image on our canvas. You can see on the right hand side (below) that there is a little printer symbol. This shows that it is a single layer image and can only be printed and then cut as ONE layer. There are no separate layers available to work with here. So, we’re going to make more layers!
To keep this tutorial from becoming unbearably long, I’ve only chosen to create a cut file that has two layers. But, once you know how to create one layer, the steps are the same, and you can continue to create multiple layers if necessary.
This print-then-cut image is actually going to serve as your base cut layer (the yellow/orange color of the giraffe). Here I just need to create one more layer (the brown colored parts of the giraffe).

9. Let’s upload the same image again. Click ‘upload’ and then ‘upload image’.
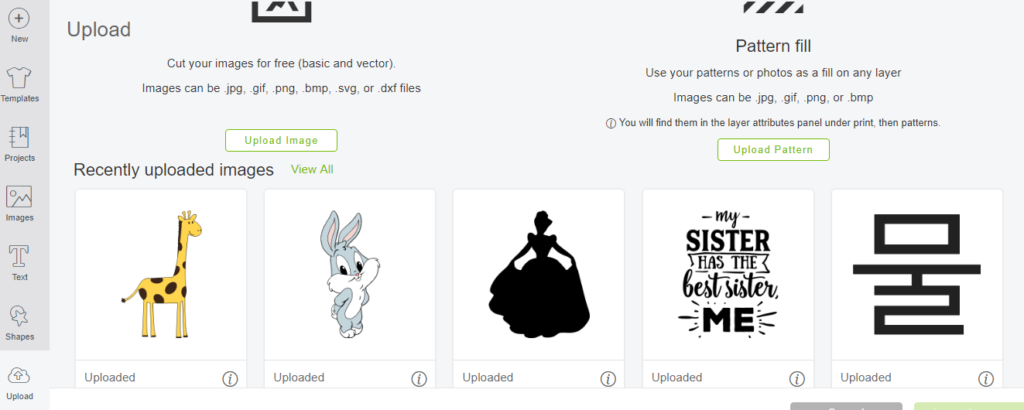
10. Click ‘browse’, and open your image again. Click ‘continue’.
11. Select your image type, same as before.
12. Erase the background again if you’ve got a JPG, or if you’ve got a PNG, you’re ready to go.
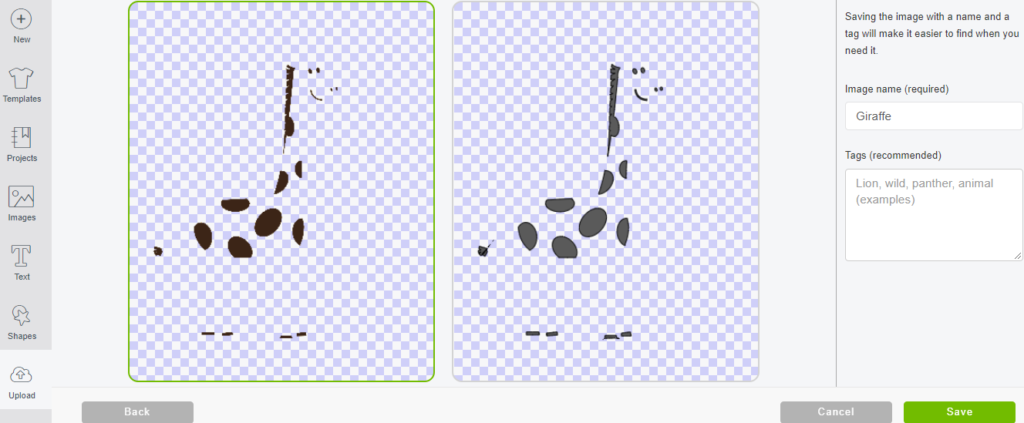
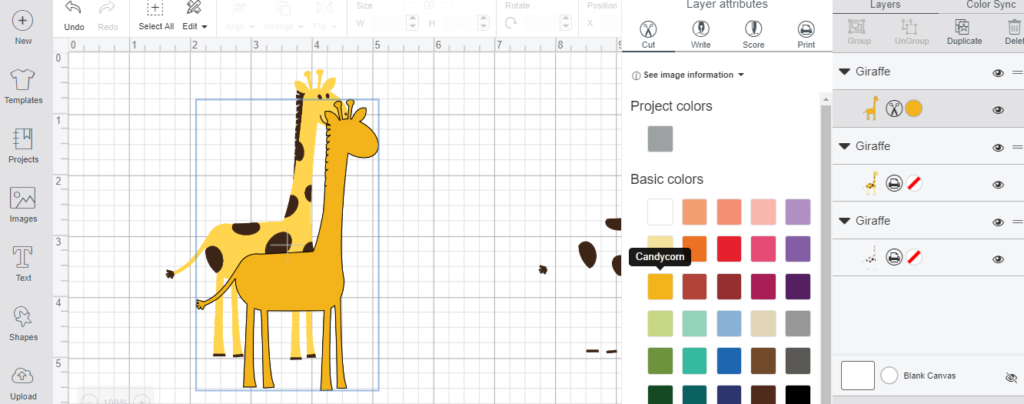
13. This time when uploading our image, we’re going to isolate only one color from our image, which will make up one layer of our cut file. As the orange makes up the base layer of the giraffe, I’m going to click with the wand to remove it, and I’m left with only the brown layer.
Click preview to make sure there are no stray lines, and if there are, remove them with the eraser. Then click ‘continue’.
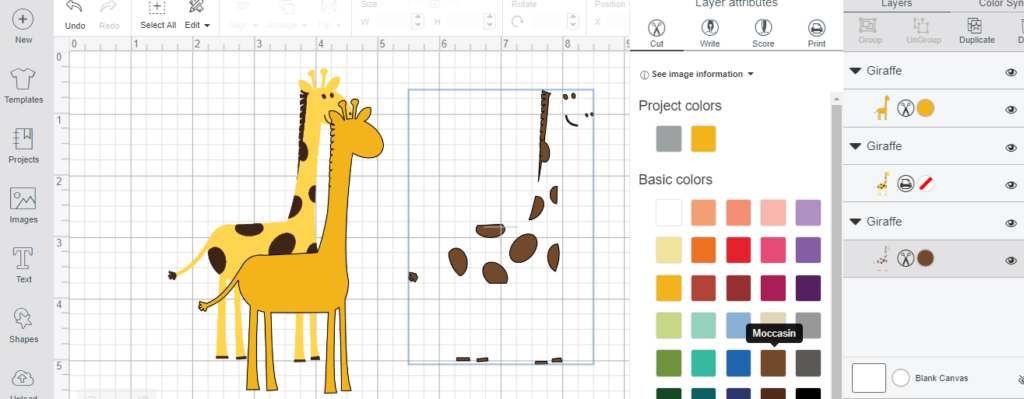
14. With the layers, you can either save them as a print-then-cut, or as a normal cut image. It’s great to save the first image upload (the base layer we’ve previously created) as a print then cut image, so that you can also use that original copy as a guide for putting your layers together later on. But for all subsequent layers, it’s really up to you.
Sometimes saving the image as a print then cut, and changing it to a cut file later on, gives a higher quality image. (Although I’ve also found the opposite to be true in some cases!) You can see below that I’ve got a few tiny random cut marks in the cut image preview (by the tail for example). If I save this layer as a print then cut, I don’t get the cut marks.
Add the image name and tags.
15. Repeat the above process with all the colors in your image. Isolate one color at a time by removing all the other colors in the image to make different cut layers. Once all your separate layers are uploaded, select them all and click to insert them into your canvas.
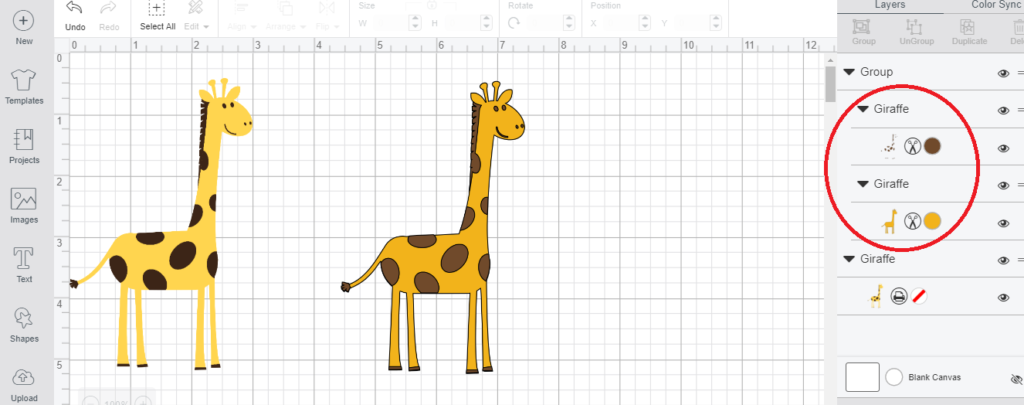
16. There we go, we’ve got the original print then cut image, and now our layers (I’ve just got one!) on the canvas.
17. You’ll want to keep an original copy of your main image, so duplicate it. Then click the printer symbol on the side, select ‘cut’ from the options that come up, and this will give you a base layer for your image. Change the color of this layer to resemble the color of the original image.
18. Now let’s do the same with the layers (unless you’ve saved them as a cut image, then you can simply change their colors to the same as your original image). Select your layer, click the printer symbol, change it to ‘cut’, and change the color of the layer.
19. Alright, almost done, stay with me! Now you’ve got all your layers, and your original (helpful if you’ve got 3+ layers). Position all your layers in the right place using the original image as a guide. You may need to click ‘arrange’ (in the top options panel) and bring some layers to the front.
Once finished, you can delete your print then cut image. Group all your layers together so that you can manipulate all layers at once (select all your layers and click ‘group’). Now’s also the time to decide what size you’d like your image to be.
This image would look so cute cut out of heat transfer vinyl and put onto a kids tee!
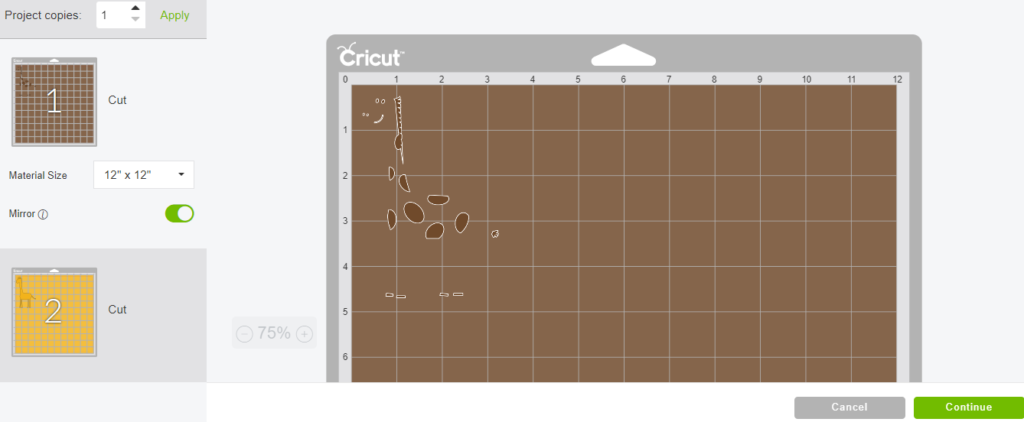
Here’s what my mats look like for this project – I’ve got two mats, one for each color of my image. Mirror your mats if using heat transfer vinyl (iron on) or leave as is for adhesive vinyl.
And that’s all you need to do to create layers in Cricut Design Space.
Let us know how you got on in the comments below!
(Please note: This post contains affiliate links. Read our full disclosure policy here.)


Thank you for these instructions. I have spent hours trying to make cut svg images that I scanned and failed miserably. I now know to use png or jpg images for scanning.
Thank you.
I just found this and am learning to use vinyl and making tee-shirts
would you be able to email the instructions for this!
Congrats on learning to make custom t shirts, Lynn! It’s so fun. I sent the instructions to your email : )
Just got a cricut explore air 2. Could you please email a printable version. Your instructions seem so much easier than any I’ve seen. Thank you so much!
Hey Jessica, I’ve just sent it over. Enjoy!
This is the best instruction video I’ve seen. I would appreciate a pdf if you’d be so kind. Thanks in advance.
So glad it’s helpful! I am sending the instructions to your email now.
Could you please email these directions. This is just what I have been looking for.
Thanks
Of course, Janet! I’ve just now sent the instructions to your email address.
Wow. That was so much easier to understand than most Ive watched and read. I would love a printable copy to refer to as well. This is the first set of instructions that didnt seem completely overwhelming for a newbie like me!
Yay! I’m so happy to hear it was helpful for you, Heather!
Please email me the instructions as well. This is what I needed. Thanks!
Sure, Denise, I’m so glad the instructions were what you were looking for!
This seams so much easier to follow, can you please email me a printable version?
Thank you for making an easy to follow directions.
Hey Crissy, glad they’re easy to follow, I’m emailing them to you right now.
This is great and so easy to understand, can you please email me the instructions also?
Thanks for the compliment, Amanda! I sent a copy to your email : )
Just got a cricut explore air 2. Could you please email a printable version. Your instructions seem so much easier than any I’ve seen. Thank you so much!
Congrats on the new cutting machine, Debbie! I sent the instructions to your email. Hope they help and that you enjoy creating with your new Cricut!
Could I possibly get a pdf of the how to create layers tutorial? I have been unable to find any printable directions online. thank you.
Sure, Mary! It’ll be in your inbox in just a second.
Hello,
Thank you very helpful.
Can I also get the pdf intructions too please
Thanks in advance
Glad you found it helpful! Hope you were able to make the design you’d hoped for. The instructions should be in your inbox!
This is great information! Could you please send the instructions to me as well? Thank you
I love it when our instructions help folks out! I sent them to your email, Lakisha. Take care!
If possible, will you send me the PDF of the instructions? Your information is so helpful.
You’ve got it, Becky! I sent the instructions to your inbox so you should be all set. Happy crafting!
Could you send me the instructions please? Thanks for the easy explanation
Happy to help, Kimberley. I’ve sent them over to your email now : ).
Thank you very much for this. Very easy to follow and straight to the point.
Glad to hear it, Althea! You’re welcome.
This was a great help. I just bought myself a Cricut and I am trying to learn & understand it all. Please e-mail me the pdf so I can see while I’m practicing.
I do have one quick question. One person mentioned this would be great as an iron on. Also I see it prints on 2 mats. How would you get both onto the iron on? Sorry for sounding stupid but as I said I am just learning.
There’s no such thing as a stupid question, Sherie! I’ve emailed the directions. As for the layers – Cricut divides the mats based on the color of the materials being cut. Assuming you do have different layers (ex. white body and pink nose and ears on a bunny) you’ll want to ‘tack’ the base layer for just a few seconds. So in the example of the bunny you’d apply the white body layer and just press for 1-3 seconds at the correct temp for the material you’re using. Then peel away the carrier sheet while it’s still warm. The adhesive won’t be set, but it’ll be on there enough to remove the carrier sheet and allow you to add another layer. The final layer gets the full pressing time. Hope that helps, please feel free to ask for more clarification!
I am so glad I found you!!! My husband had me on a sight that was not working and I was getting SO frustrated. Found your tutorial in a search and now I get it and am off and running again!! Would greatly appreciate an email with the instructions to print out better than my hen scratch notes 😉
That warms my heart, Martina! I’m so glad it helped you out. I’ll send it to your email now 🙂
Glad you’ve got it figured out, Martina! Sounds like you’ve got a well meaning husband : ).
Please! I would also appreciate the instructions. Thanks so much!!
So sorry I missed your request, Jan! I’ve sent them over now. Take care!
I’ve been searching everywhere for how to do this! Your instructions are by far the simplest. I just got my Cricut for Christmas and am trying to learn it all. Thank you so much! Do u mind emailing me a pdf copy?
That makes us so happy to hear, Mandy! The learning curve can be pretty steep but luckily there’s a lot out there on the internet to help make it as smooth as can be. The instructions have been sent – good luck!
This was an awesome tutorial. I would love for you to also send me the instructions via email. It would be helpful to have this on hand as I am always needing something to refer to until I get it down.
I’m sorry it took a bit to get back to you but you’ll find the instructions in your inbox. Hope they continue to support your crafting!
Love the step by step. could you email the instructions to me?
Of course! Happy to help. I’ve sent it over now : )
Could you please email me these?
Your directions are awesome
Of course! They should have arrived in your inbox, Jody. Happy new year!
Great explanation!!! Thank you so much for the step by step, so helpful! Is this the same way you would do for a photo of someone?
Hey Jessica, it sounds like you’re looking to convert a photo to an SVG. You can do this in Design Space by uploading the image and then using the advanced features to essentially edit it down to a few key layers. We’ve been planning to do a blog on this topic but there are definitely some good ones out there like this. Good luck!
Love these instructions, they are so easy to follow. Could you please email me a copy that I could print.
Of course, Vickie! I just sent them so they should be in your inbox. Have a great day!
Hi! I am a Cricut newbie and these step-by-step directions are perfect for me. Could you please email them to me in PDF so I can print them to use as I learn? I appreciate it so much! This just made my day!
Yay! You’ll love the machine and just trying things out is truly the best way to learn. Every project will lead to learning something new! I emailed the instructions, please reach out if you have other questions! : )
I love this post! Can you please email thee instructions. Its hard to flip from this post to the cricut app! Thanks!
Happy to help, Vicki! You’ll find it in your inbox now. Cheers!
I need a pdf, please. Cannot quite get this. Thank you.
Hi Tammy, I’ve sent it over, hope that clears things up a bit! Let us know if you’d like any more support.
I would like a copy of the instructions also please.
Of course! They should have arrived, hope they’re helpful!
Could you email me the instructions as well? Thanks!!! I loved how you did your tutorial!! It was easy to follow, I don’t use my cricut often. There was one issue I ran into and was stuck. #17. I didn’t have a printer show up on the right. Did figure it out with the help of some design space friends that I had to change the option on left top of screen to fill instead of print. I think maybe that was because of an update?
Hi Liana, thanks for the email back, I’m glad you received them. Take care!
Thank you so much for sharing! You’re awesome! Could you please email the instructions. I appreciate you!
You’re sweet to say that, Stella! Thanks. I’ve sent it to your email : )
COULD YOU EMAIL PDF OF INSTRUCTIONS IT IS VERY HARD TO FLIP BACK AND FORTH TO FOLLOW
THANKS
It should be in your inbox, Danielle : )
I am trying to delete certain colors but it is not working any tips?
Hey Katie – is it possible that your layers are grouped? That might make it difficult to delete just one.
Could you email me the instructions please?
They should be in your inbox now, Becky! : )
Could you possibly send me the how to as well? Thank you so much!!
They should be in your inbox, Nadia!
I would really appreciate it if you could email the directions to me too. Ive tried printing them and it cuts part of them off.
No problem, Lori! I just sent them. Have a good one!
Could you please email these directions. This is just what I have been looking for.
Hi Brenda, I just sent them your way! Cheers!
Would you please email the instructions to me, too? I’m struggling with a few projects and I think your instructions was just what I needed!
No problem, Amanda. I just emailed them. Have a good one!
Okay this is great. I would love love love it if you could email me the instructions as well. Thank you so very much!
Just sent it, Courtney! Have a great day!
The best instructions I’ve seen. Thankyou May I also get the instructions emailed to me I’d love to print them out. Thanks in advance.
No problem, I just send them Deborah. : )
Is there a pdf file on these instructions I tried printing them but had a problem they are easier to follow than on a u tube tutorial.
Hi Jane, I just sent you an email with the instructions. Hope that helps!
is there a PDF or printable version of these instructions? (tried printing it off here but it was all wonky) They are BY FAR explained in the best way.
Hi Brenda – I just sent them via email. Hope that helps!
Would you be able to email the instructions to me as well. Printing cut off about half of the needed info. Thanks so much.
Just sent it, Cassandra! Hope it helps : )
I would like a copy as well. Brenda is right on printing from here . Thank you in advance
I got you, Robin! Happy to send you an email but it looks like the address you used when writing your comment came back undeliverable. Do you mind checking it and commenting again? Thanks!
Hi! I’ m another newbie to Cricut. Could you send me the PDF so I can follow along. Creating layers is exactly what I wanted to learn. Thanks!
Happy to help, Linda! It should be in your inbox shortly.
I follow your directions but I am not able to get the layers to split to different mats. I get the three layers in one mat. I even printed this off so that I did not have to switch back and forth.
Hi Karen, that sounds frustrating. Can you put two different pieces of vinyl or whatever you’re cutting on the same mat? Here’s an example of what I’m talking about. https://www.howtoheatpress.com/how-to-cut-everything-on-one-mat-cricut/
Did you make sure each layer was set as a different color. The mats go by color.
Great suggestion, Teresa! Thanks!
I am brand new and every thing was so confusing. this makes every thing crystal clear and easy to understand. thank you so much.
Awesome, Monica. The start can be intimidating but you’ll get the hang of it. Glad the article was helpful!
Brilliant Thankyou I have actually been able to do it after many attempts with lots of frustration your step by step got me there in no time. 🙂
Thank you so much for these instructions. They are so easy to follow. I was about to lose my mind trying to figure out how to do this. lol.
Great instructions I have been trying to figure out how to do this. I think I can do it now. Thank you for explaining it so we can understand.
Thanks Carrie
Thank you so much, I would never have been able to do what I did without your help. Easy instructions, very user friendly . I will refer to this when need be and I will also pass it on to some of my friends that need the help. Thank you again,
Awesome thanks Deb 🙂
Loved this much better than a video. I can refer back to certain areas if I need to without watching a whole video. I’m going to try it this afternoon. Thank you!
Thanks Sandra.
I really appreciate how you told the conversion in layman terms. Thank you so much!
Awesome, glad you found it helpful!
so incredibly helpful!!! Thank you so so so much!
Great to hear, thanks Dawn 🙂
I have not tried your post on converting JPG and PNG to a cut and layered file yet but i love how you explained each step so i can understand it. I will be trying it real soon not just today i have to many other things to get done. Thanks again.
Hope you can figure it out 🙂
Thank you! Very helpful!
Thanks Maddy 🙂
One of the best tutorials I’ve seen so far for multiple color designs. Thank you so much
Thanks Anne, appreciate it 🙂
I love how helpful this is. So far it is the best I’ve seen. I was wondering if you could email the instructions? Thank you
I’ve got you, Tonya! They should be in your inbox by now. Good luck!