You Should Use HTV on Wood! How to Apply HTV on Wood

What’s the best vinyl for wood? Surprisingly, it’s not permanent adhesive vinyl, you should use HTV on wood! Heat transfer vinyl is perfect for projects on wood. Follow just a few tips below and you will make your HTV on wood project flawless. I’ll also share a step-by-step tutorial including all of the designs and supplies I used for this cute little DIY “Let it Snow” sign.
Why use HTV on Wood Instead of a Stencil or Adhesive Vinyl?
Craft projects done on wood have such a nice, warm feel to them. They can fit in with any home decor scheme with coordinating colors and font styles. Wood is great for stenciling onto but using HTV will get you great results with much less time than creating a stencil and painting it. Plus, no bleeding under the edge of the stencil or smudging to worry about!
Also, you can use a variety of HTV (heat transfer vinyl or sometimes called iron-on vinyl). My favorites include holographic HTV, puff HTV, glitter HTV, or even patterned HTV to add depth and creativity to your work. You can never go wrong with matte HTV or just regular vinyl if you want to give your project more of a painted look.

Will permanent vinyl stick to wood? Yes, for a bit. It’s much more likely to fall off, especially if the piece of wood will be subject to any elements. Adhesive craft vinyl is basically a sticker. Because wood is porous and textured it can be difficult to get it to adhere well.
Below you can actually see a project that was done with permanent vinyl on wood. The trick to make that stick is to add just a bit of heat but it’s tricky because the adhesive can melt out! If both are available you’ll typically get better results with HTV on wood than adhesive vinyl and heat.

Your best bet is to go with wood blanks from your local craft store or Amazon. Some of my favorite blanks can be found below. Also – anyone out there handy with a chainsaw or table saw? You can absolutely make your own little tree cookies. Just make sure you’re using logs that have been able to dry for about a year. Otherwise, the water in raw wood will cause the vinyl’s appearance to change over time. If you’re buying a wood blank the water won’t be an issue.
If your wood is rough or has raised grain it’s going to be worth your effort to smooth it with some fine-grained sandpaper. Make sure to blow off your wood so there isn’t any dust on it before applying the HTV.
Supplies for Adding HTV to Wood
Obviously, if you’re wanting to do an HTV on wood project you’ll need a nice wood blank to start with! These can usually be found for pretty cheap and come in lots of different shapes and sizes.
Here are some of the best blanks we’ve found for doing HTV on wood projects:
 |
14" Round Blank |
|
View on Amazon |
 |
3" Tree Cookies |
|
View On Amazon |
 |
Linking Wooden Discs |
|
View On Amazon |
 |
Wood Blank Multi-Pack |
|
View On Amazon |
 |
3" Squares - 50 pack |
|
View On Amazon |
 |
2" Wooden Hearts |
|
View On Amazon |
There’s really no right or wrong type of HTV to use on wood. Any HTV that you like will adhere nicely to wood. For this project, I used Cricut’s Everyday Iron-On in red and white puff HTV similar to WALAKut Puff. I’d been wanting to try out the puff HTV on wood because I love the texture! In the project above I used acrylic paint and white HTV to create a cheery wood sign for new grandparents. In case you’re wondering, you can apply HTV on top of painted wood too!

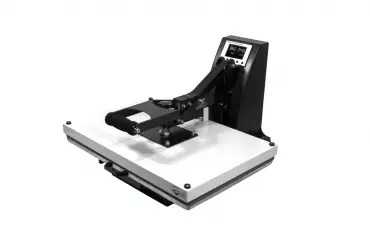
In my opinion, the EasyPress is the perfect press for applying HTV to wood. Yes, you can use an iron. Yes, you can use a larger format heat press. The reason I think the Cricut EasyPress is the way to go is because you are applying pressure to a thick item that might have an odd shape. You don’t need the pressure a full-size heat press provides and an iron is likely just not big enough for the job plus they don’t heat consistently.
Preparing HTV for Wood Application

You prep HTV on wood projects just as you would if you were applying heat transfer vinyl to a shirt. Follow the cutting instructions on the HTV to make sure you get a perfect cut from your cutting machine that’s not too shallow or too deep. Make sure you mirror your image before cutting and weed away accordingly.
Any cutting machine will do the trick for an HTV on wood project. I’m using the Cricut Maker but the Silhouette Cameo or another machine like the Cricut Joy or Explore would be great too!
If this is your first time doing an HTV project we’ve got a lot more in our HTV tips and tricks post.

It’s a bit tricky to see in the photo above but I used my light pad for weeding this design. If you’re in the market for Cricut’s BrightPad or an alternative tracing pad like the one seen here it’s worth looking into it. It depends on the vinyl you’re using but it does make weeding a bit easier on the eyes and less stressful for detailed projects. A sharp weeding tool always helps too!

Below you can see the cute “Let it Snow” design I used for this project. It’s from Font Bundles (sooooo many adorable SVG files on their site!) and was just too sweet to pass up! As soon as I saw the design I knew I needed to make it with puff HTV for the snow. Sometimes a project just speaks to you like that!
You could use this same technique with any cute saying and you can probably even find a free SVG to use.

Applying HTV on Wood

While HTV on wood might not seem obvious it’s included as an application option on Cricut’s heat guide. You can follow the same application temperature for whichever HTV you’re using. In this case, Cricut Everyday Iron-On needs 300°F, a 5-second warm-up, and 40 seconds with firm pressure on the wood.
In this project, I was also layering HTV. Whenever you layer HTV you just want to do a short press, like 3 seconds, for each layer until you get to the final one. It’ll be enough heat and time to get the HTV onto the wood and the final press should really do the job of getting maximum adherence.

I wasn’t sure how wildly puffy my puff HTV would get when I applied heat. If you’ve never used puff HTV it looks and cuts just like normal HTV, but then puffs up when heat is applied. In this case, the snow in the design is actually supposed to look like it’s billowing over the letters so I figured it was fine no matter how puffy it got!

The temp on the puff HTV was set to 325°F – a bit warmer than the red HTV I was using. Don’t stress too much if your temperatures aren’t exactly the same, most HTV (especially simple colors) is pretty forgiving. With puff HTV you want to be sure to give it the temp, time, and pressure it asks for to get maximum puffy goodness!
As you can see in the photo above, the carrier sheet for my snow layer didn’t entirely cover the red letters below. In the picture below you can see I used parchment paper to protect my heat press from the HTV and vice versa. Even if the carrier sheet had covered it all it’s always a good idea to use a Teflon sheet or parchment paper!

Ready for the puff?! It turned out great! The puff was just enough to give it some added texture. If I were doing this again I would honestly go with WALAKut Puff Plus to get even more of that 3D feel.

Now the big question – to add glitter to the snow or not? I’m on the fence, so I’ll leave it be for now. This would be a really easy addition though with a little ModPodge, a paintbrush, and some sparkly glitter just on the white snow.

We’ve had an old sled I like to put out by our front door in the winter months. It’s cute on its own, but this little sign really spruced it up! To save time I just used a hot glue gun to apply the butcher’s twine to the back of the wooden disk. That way I didn’t have to drill holes or mount any other hardware.