Monstera Leaf Throw Pillow With Cricut!
Here’s how you can make your own custom designs in Design Space!
The Hungry JPEG has given us access to one of their current graphic design bundles to do a project. We decided to decorate a throw pillow with Mostera leaf images using inkjet transfer paper!
How To Use PNG Files In Cricut

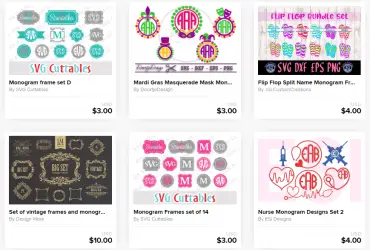
The Hungry JPEG always has a great selection of graphic design bundles on offer. These bundles contain a large number of design files, in a range of file formats, which are totally compatible with Design Space.
We went for the Sensational Summer Bundle for this project. It has a fantastic selection of font and graphics packs, with over 1000 tropical design elements! You can use these illustrations for all kinds of creative projects.
Get 15% OFF Site wide at The Hungry JPEG with code ‘heatpress15’ until Dec 2020!
Here’s what you need for making this throw pillow:
- Avery Transfer Paper for Light Fabrics
- Cricut Maker or Explore Air 2
- Inkjet Printer
- Blank throw pillow cover
Cricut PNG Design
There are so many amazing graphics in this Summer bundle that it was hard to choose which one to make a project with… I knew I wanted to decorate a throw pillow, I just couldn’t decide which of the stunning graphics to use!
However, I ended up choosing the Monstera leaves. These tropical leaves are some of my favorite in the bundle!
The colors in these graphics are gorgeous! I’m going to use inkjet transfer paper for the transfer, but they would also look great if you used a sublimation printer with an appropriate blank.

Here’s how I used these PNGs in Design Space:
- upload the palm leaf PNG to Cricut Design Space and insert it into a new project
- use the shape tool to make a square, and resize the square so that it is the exact size of pillow cover
- duplicate the Monstera leaf a few times, make each leaf different sizes
- flip some horizontally and vertically to make them all a bit different
- arrange leaves over top of the square, with some parts of the leaves sticking outside of the square
- slice all of the leaves with the square (but since you can only slice two items at a time, I had to slice one leaf with the square, then the next leaf with the square, and repeated this until all the leaves had been sliced)
- delete all of the excess sliced pieces and the square
- group everything together to hold the exact placement of everything
When uploading a PNG file to Design Space, you’ll need to save the graphic as a print-then-cut file, instead of just a cut file. This means you’ll be able to use the Print & Cut feature in Design Space. You can print the design with Design Space and your inkjet printer, place the printed design onto your cutting mat, load it into your Cricut and your Cricut will cut it out!
If you’d like to know more about print and cut, or how to upload PNG files to Cricut Design Space, see this Cricut Printable Vinyl project.

I like to see exactly how my finished project is going to look like, so I design it as close as possible to how it is going to look in real life! I want to make sure I like how it’s going to look!
Here is my finished design. Next I clicked Make It to continue to the mat preview.

I will be transferring this design onto a white linen pillow cover, so I’m using Avery Transfer Paper for light fabrics.
The design will need to be pressed face down onto the cover, so the design needs to be reversed. I mirrored each of my mats and then clicked continue. You don’t need to mirror if you’re using Dark Fabric Transfer Paper!

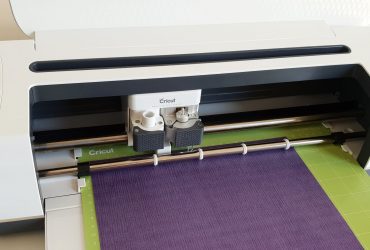
How To Use Cricut With Printer
Next I printed the design using my office Epson inkjet printer. There are 6 pages to print.
I clicked ‘send to printer’ and selected my printer. Since I am going to cut the design out with my Cricut later on, I am going to turn the bleed on. This helps the cutting machine get a more precise cut. I loaded up my printer with some Avery Transfer Paper and clicked print!
I recommend doing a print-head clean before printing a project like this, it ensures the best result!

Here they are all printed. They came out very well!

How To Cut Images With Cricut
Now it’s time to cut out the design with the Cricut Maker. There’s no custom cut setting for Avery Transfer Paper in Design Space, so I had to do a few test cuts to see which setting would cut the paper the best.
After a few test cuts I found that setting the material to Light Cardstock cut the paper perfectly! Depending on how new your blade is and how well that setting works out for you, you can always change the default pressure to more or less.

I used a StandardGrip mat, but a LightGrip mat would be fine too. The design is placed facing up onto the mat, then loaded into the machine, and ready to go.
Your Cricut will read the black line around the image first, so that it knows exactly where to cut. Then, it will start to cut around the design. Make sure there is plenty of room behind your Cricut for the cutting mat to go through!

After each leaf had been cut out, I removed the excess transfer paper from the mat. Then I turned the entire mat over and bent it slightly, so that the leaf would easily come off the mat without getting damaged.

Here’s all the leaves cut out. I used my original design in Cricut Design Space as a guide for heat pressing them all in the correct positions on the throw pillow cover!

How To Heat Press Throw Pillow
Because I’m just doing a single project, I’m just going to use the Cricut EasyPress. It heats up quickly and there’s no fuss!
I used my silicon pad as a sturdy surface to press on. I turned on the EasyPress and set it to 340°F and let it heat up. Then I pre-pressed the pillow cover to remove moisture and wrinkles.
There are no official settings for using Avery transfer paper with the EasyPress (that I know about!). But, I have used 340°F for Avery Transfer Paper several times in the past and it has always worked out to be a great temperature for me.
To press Avery Transfer Paper for Light Fabrics with an Iron:
- 1/4 sheet – 45 seconds
- 1/2 sheet – 90 seconds
- Full sheet – 3 minutes
Set your iron to high or to the cotton setting. Then iron your transfer by applying firm pressure, slowly, from left to right.
I mirrored all of the leaves before printing them out. Now, the design is placed face down, so that each leaf will be heat transferred the right way around.
I used Avery’s recommended ironing times as a guide for how long I should press each transfer with my EasyPress 2.

Wait for the transfer to cool completely before peeling away the transfer paper. Peel it away slowly, just in case part of the transfer has not adhered properly.

Since some parts of the leaves are coming from the edges of the pillow cover, I wanted to make sure the transfer went right up to the edge of the cover, or even over it. Any excess that went over the edge I just cut off with scissors, and that meant I was able to get a perfect edge!

Cricut Maker Throw Pillow
Love the colors in this palm leaf clipart!

The completed pillow cover!

And finally…how the cover looks with the pillow insert back inside! Looks great!
DIY PNG Stickers
I also made some stickers with this watercolor beach themed clipart from the same Summer bundle!

I printed them with my Inkjet printer onto Cricut Sticker paper, and then cut them out using the print and cut feature in Cricut Design Space!

Graphic Design Bundles
So if you are looking for graphics to use in your Cricut projects, then make sure you visit The Hungry Jpeg.
The bundles not only have PNG files that can be used in projects like these ones we’ve done, but also fonts for quote designs, SVGs for use with vinyl and HTV, and files for mock-ups. There are also other file formats that can be used with Silhouette Cameo machines, and other cutting machines.
Besides the bundles, also take a look at the Crafters range here – there’s so much good stuff!