Cricut Cutting Mat Guide – Cricut Mats Tips & Tricks For Success
Cricut mats are essential to getting started and working with your Cricut Machine. They come in 2 different sizes and 4 different tack levels, each color coded so we don’t get confused!
All of the Cricut cutting machines come with a cutting mat included, whether they are part of a bundle or not. However, you will need to replace mats from time to time, and you might want to use the different varieties of mat for different projects.
Cricut Mats

Cricut mats come in four different tack levels :
- Standard grip mat
- Light grip mat
- Strong grip mat
- Fabric grip mat
There are two sizes of Cricut mat:
- The Cricut 12 x 12 mat
- The Cricut 12 x 24 mat
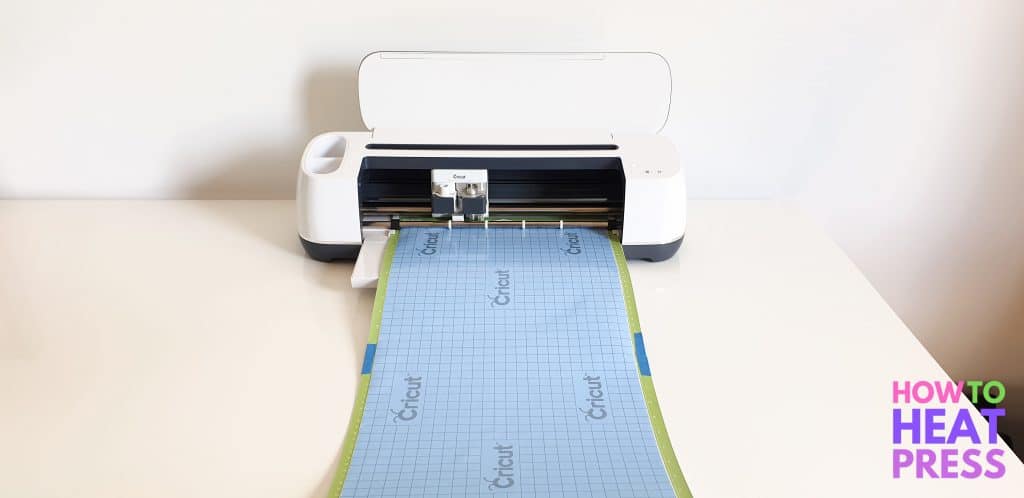
They also come in different pack sizes. You can get either a 1, 2 or 3 pack of each tack mat, or you can buy the four pack pictured to the right with one of each kind of mat.
Let’s take a look at the four different tacks of mat, and check prices on Amazon and Cricut to get the best deal!
1. The Cricut Standard Grip Mat
The green Standard Grip Mat is included with the Cricut Explore Air 2, while the blue Light Grip Mat is included with the Cricut Maker.
The green mat is not too sticky, and not too under-sticky, it’s just standard! Though, to be honest, it can be a little overly sticky when brand new!
This is the mat I use more than any other, probably because I mainly make heat transfers for t-shirts. If you’ve been wondering which Cricut mat for vinyl? This is the one, for both HTV and adhesive vinyl.
What can you cut with the Standard Grip Mat?
This mat is great for cutting the following items:
- Light cardstock (I reckon you can get away with heavy cardstock too)
- Heat transfer vinyl (HTV) or Iron-on vinyl
- Adhesive vinyl
- Patterned and embossed cardstock
2. The Cricut Light Grip Mat
The Cricut Light Grip Mat is light blue and has a low tack surface. This can be used for lighter and thinner materials. Ideally, you don’t want to put thin light materials onto a standard grip because it’s so hard to remove them once the cut is completed. Items also rip easily if they are too stuck down.
What can you cut with the Cricut Light Grip Mat?
The following materials are ideal with this mat:
- Paper – printed or otherwise
- Thin cardstock
- Thin construction paper
- Vinyl
- Any other thin and light material (non-fabric)
3. The Cricut Strong Grip Mat
The Cricut Strong Grip Mat is the purple mat. You do not want to be using this for cutting paper! This is a high tack mat made for holding thicker and harder materials down while cutting. For most of these materials you will also want to be using the Deep Cut Blade and Housing.
What can you cut with the Strong Grip Mat?
- Thicker, heavier cardstock (such as glitter cardstock)
- Cricut magnet sheets
- Chipboard and poster board
- Fabric with stiffener
4. The Cricut Fabric Grip Mat
The last Cricut cutting mat is the Fabric Grip Mat. This is a stronger mat, made especially for use with the Rotary blade (only the Cricut Maker uses this blade). However, this mat can also be used with the bonded-fabric blade (used with the Cricut Explore or Maker).
What can you cut with the Fabric Grip Mat?
The name gives it away but in case you missed it, the Fabric Grip Mat is used for cutting…fabric! It can be used to cut silk, cotton, canvas, burlap and a wide variety of other fabrics. When you select your material in Cricut Design Space, the software will prompt you with the blade you need to use to cut it.
Cricut Mat Sizes
Cricut cutting mats come in two sizes: 12 x 12 inches or 12 x 24 inches. If you are using the larger mat then you need to change the setting in Cricut Design Space.
The 12 x 12 mat will be sufficient for most projects, but every now and again you might want to go large.
The Cricut 12 x 24 mat
What do people use the large 12×24 mat for? That was my first question when I first heard about these long cutting mats. Here are some examples of projects people need the 12 x 24 inch mat for:
- Making vinyl on wood signs
- Large wall decals
- Window/glass graphics using sign vinyl
- XXXXXXL size t-shirts!
These mats are also good if you are creating bulk amounts of a single item. For example, card makers may go through a lot of red hearts and so they just cut 12 x 24 inches of them to have in stock.
7 Cricut Cutting Mat Tips & Tricks
These 7 tips and tricks are drawn from our larger article, 25 Cricut Tips & Tricks.
1. Cricut mat too sticky?
When the mat is brand new, it is really sticky, and might be a little too sticky for your project. After you peel the protective cover away, you can place a clean dry t-shirt over the mat to de-tack it a little bit. It can be difficult to get cardstock off, even if you have all the right tools, when it’s new and fully sticky. It is very easy to damage the material when you remove it from the mat.
2. Cleaning your Cricut cutting mat
You are able to clean Cricut cutting mats with baby wipes. The water wipes without fragrance (and non-alcoholic) are best. This will remove cardstock and vinyl residue, as well as household dust and lint. Cutting mats are a lot like belly buttons in that way.
3. Keep the mat covers
Cricut cutting mats come with a plastic protective cover over them. Keep this cover and replace it after each use to keep the mat cleaner and stickier for longer.
4. Test cut
Test cut on new projects. If the blade is set too low it will chomp up your cutting mat. If set too high, it may only cut slightly through your vinyl, cardstock, etc. and ruin the material. A test cut involves asking your machine to cut a small circle at the top of your material. Make adjustments as necessary.
5. Pull mat away from project
As well as using the right tools to remove your cut projects from the cutting mat, here is another tip to getting it off. Rather than peeling your project away from the mat, peel the mat away from the project. Bend the mat away instead of lifting or pulling the item off the mat.
6. Use a medium tack tape for extra grip
If you are needing a stronger grip, you can use a medium tack painters tape to stick your square of material to the cutting mat. Your problem might be a mat that has lost all its tack, or that you need to firmly apply a thicker or heavier material to the mat. Just make sure your machine isn’t set to cut over the tape.
7. Set the dial to the correct material
Make sure your dial is set to the right material. This may save your mat getting cut up! I have to remember this especially when I am switching between materials in the same session. Thankfully I haven’t ruined anything too badly yet!
That’s all we’ve got time for in this post, but let us know in the comments section below if you have any more tips. Tell us about your experiences with Cricut cutting mats, and what you use the large 12 x 24 mats to cut.
Compare mat prices between Amazon and Cricut and get yourself the best deal!
(Please note: This post contains affiliate links. Read our full disclosure policy here.)


Will it harm the mat to cut the size down? I ordered a size to large and was hoping to cut it rather than return
I’m not sure sorry, it depends on the size/brand! The machine reads marks on the mat so messing with it might effect that.
My cricut mats have always lasted ages. I get a lot of use out of each one. My only problem has been getting cardstock off the green mat.
Yes, they do last well. Mine eventually crack, but that’s after a long time. Some of those tips for using Cricut mats above should help you remove cardstock without damaging it, but otherwise you might want to grab a lightgrip mat. That would be best for lighter cardstock.
My green mat has started losing all of its green colour! Is this normal?
I haven’t heard off this happening, so I’m not totally sure! I haven’t had it happen with my mats – they tend to crack and break after about 6 months use. Have you used the mat very often?