Cricut Patterns: How To Upload & Use Them!
Everything you need to know about Cricut Patterns!
Patterns can be used for all sorts of paper, vinyl, and card crafts. In this post I’ll go over how to upload, locate, use, edit and filter patterns in Design Space. I’ll also give you some tips on how to use patterns with text, single layer images, and multi-layer SVG cut files.
Cricut Patterns
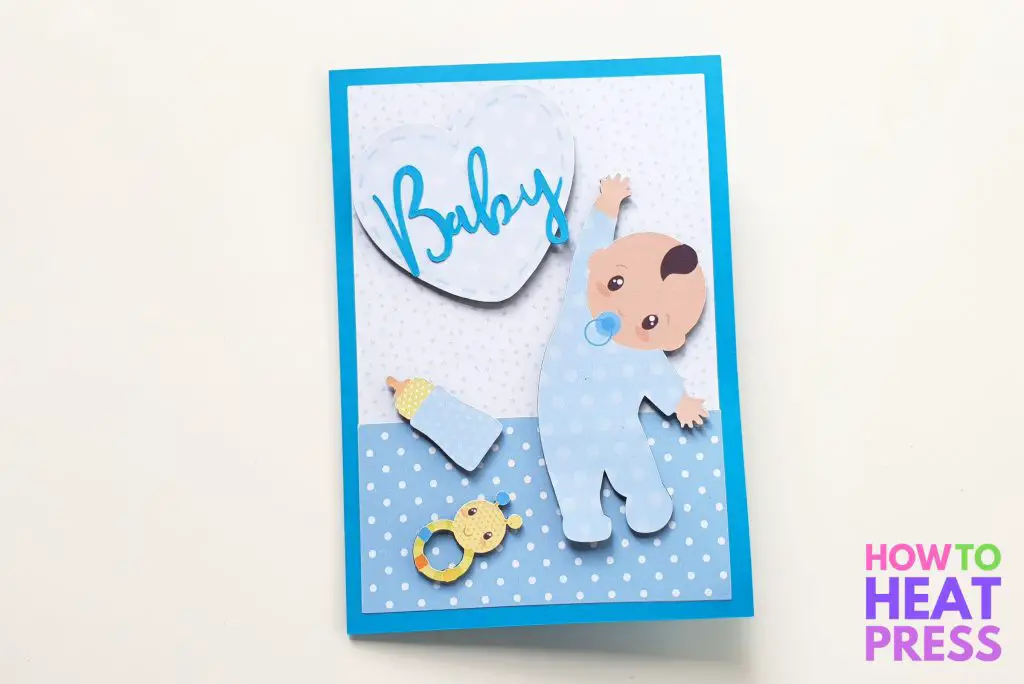
Here are the downloads from Creative Fabrica I used to make this baby boy card:
- Baby Boy Digital Paper in Blues and Browns
- Some cute PNG’s from this baby boy clipart set
I printed the patterns and images onto Cricut Printable Vinyl and used the Cricut Explore Air 2 to cut them out.
Now let’s get on to the tutorial.
How To Upload A Pattern To Cricut Design Space
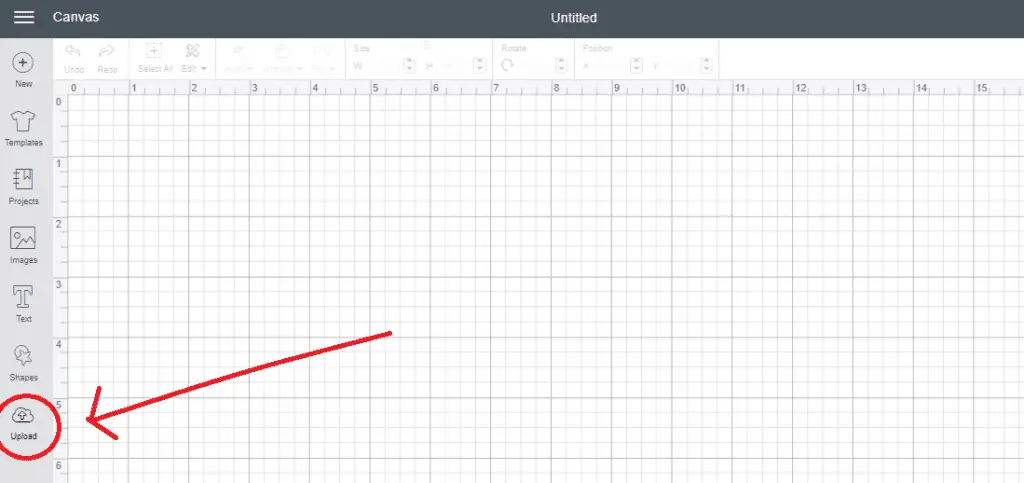
In Cricut Design Space, open a new project and then click ‘upload’.
What is pattern fill on Cricut?
It’s when you use a pattern to fill your chosen shape. We’ve got a few examples.
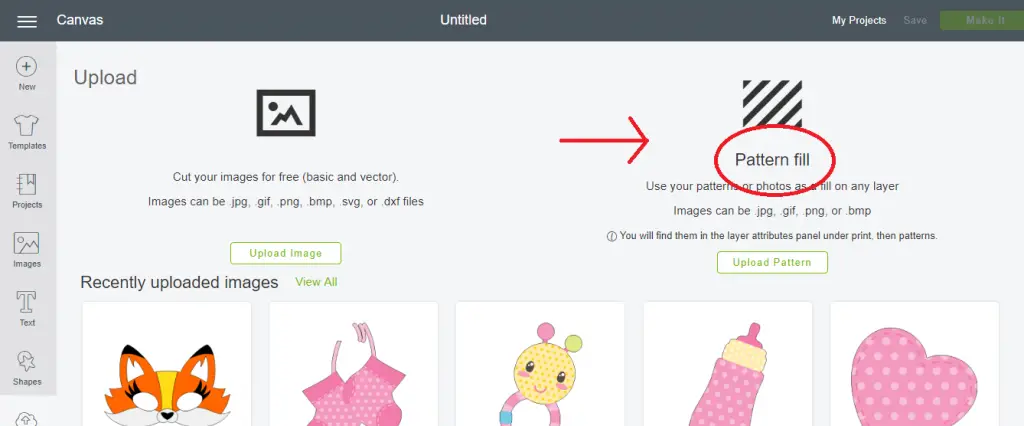
Usually you’d select basic and vector upload, but for patterns you’ll want to go for the ‘pattern fill’ option. Click ‘upload pattern’.
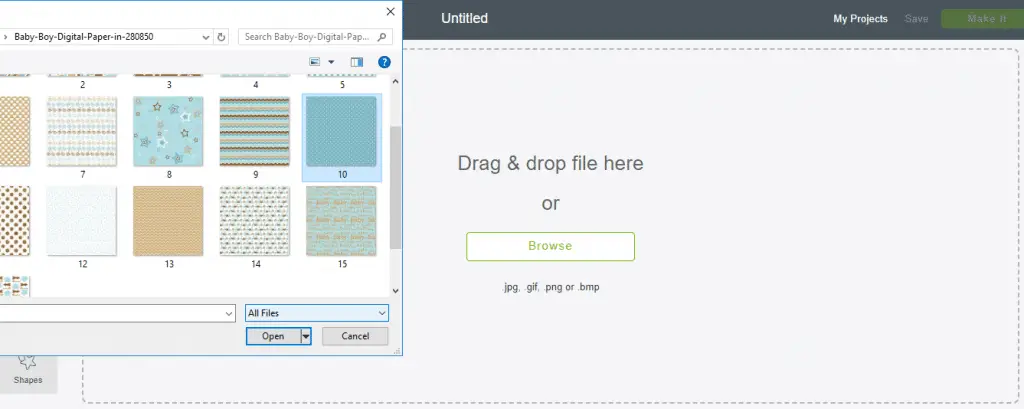
Click ‘browse’ and select the pattern you would like to upload. Click ‘open’.
Now you’ll want to name your pattern, and select the themes, styles and colors that apply to your pattern. This will help you to filter and search through your patterns later on. Click ‘save’.
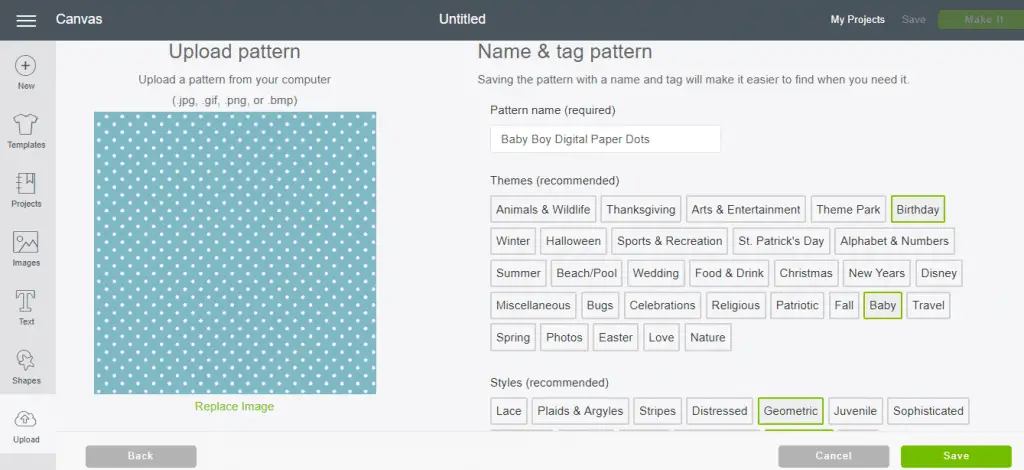
After you’ve saved your pattern, you’ll be brought back to the upload page. You should get a notice come up that your pattern has uploaded successfully.
You won’t be able to see your pattern on the upload page because only basic and vector uploads appear there. Once you go back to your canvas, you can look through your patterns and use them from there.
Click ‘cancel’ to go back to the canvas.
How To Use Patterns In Cricut Design Space
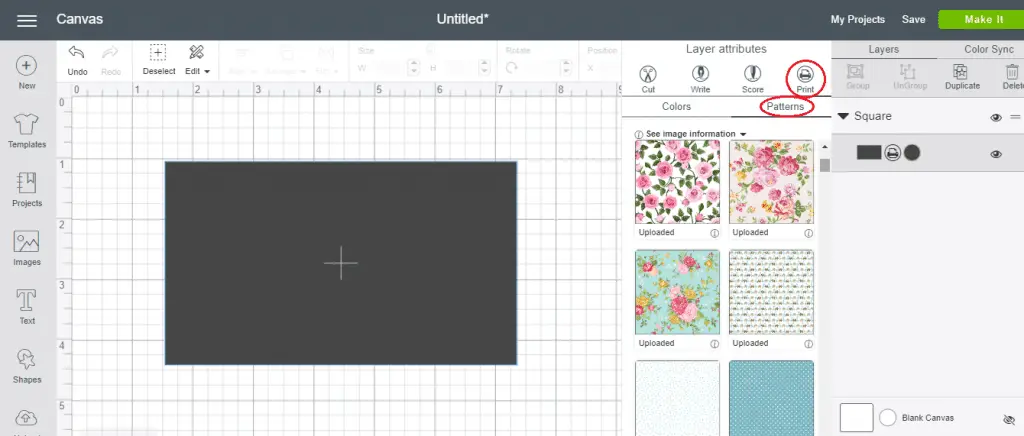
To use a pattern, you’ll first need an image or shape on your canvas. Here I’ve created a rectangle with the shape tool. Before I can use a pattern in this shape, I’ll need to change it to a print then cut image.
To change a cut image to a print and cut, click the scissors symbol in the layers panel, and then select ‘print’. Now a printer symbol will appear instead. Click ‘patterns’ to view patterns you have uploaded, and also ones that are available for purchase.
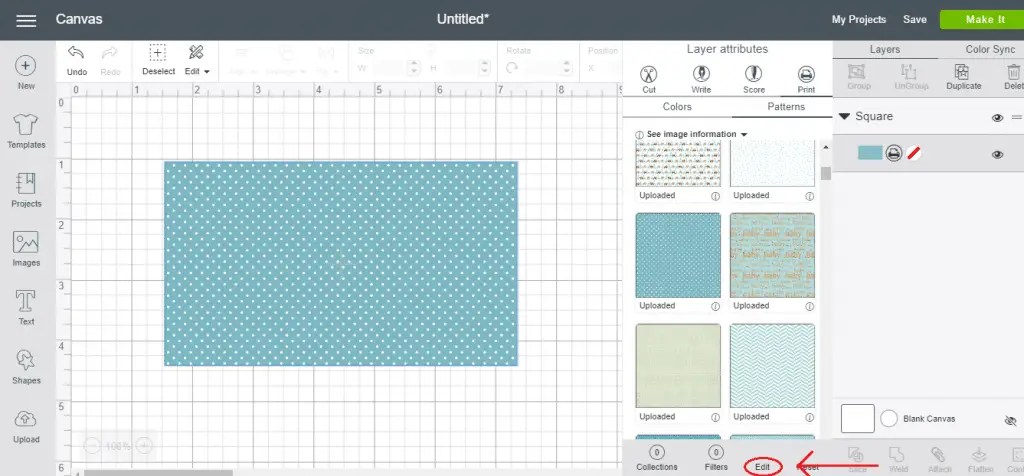
Click the pattern you’d like to use and it will fill your shape. It should be easy to find the pattern you’ve just uploaded, as it will appear right at the top.
How to Edit A Pattern In Cricut Design Space
Now click ‘edit’ which will bring up some options to customize your pattern.
You can adjust the scale of a pattern so it is bigger or smaller in your shape. You can also move the pattern horizontally or vertically. And lastly, you can rotate it around, or flip it horizontally or vertically.
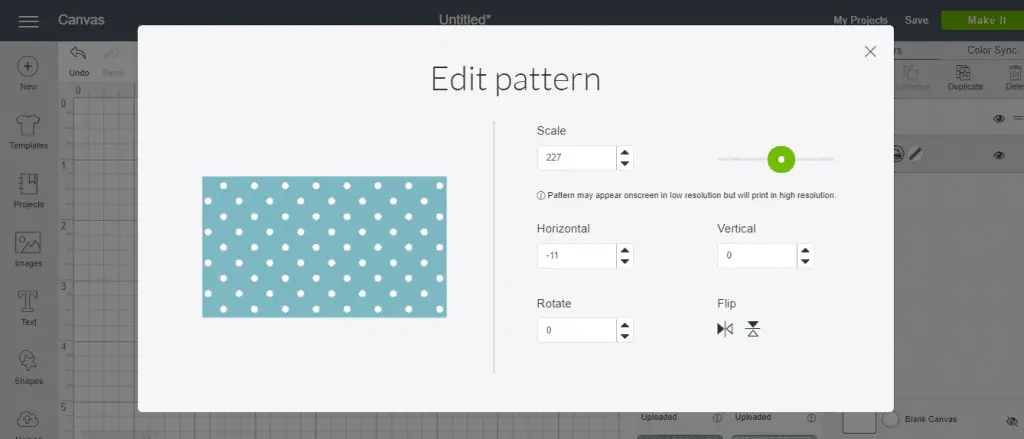
It’s best to decide the size of your shape before you edit it. If you change the size of your shape after you have scaled your pattern, the pattern may distort.
How To Filter Patterns In Cricut Design Space
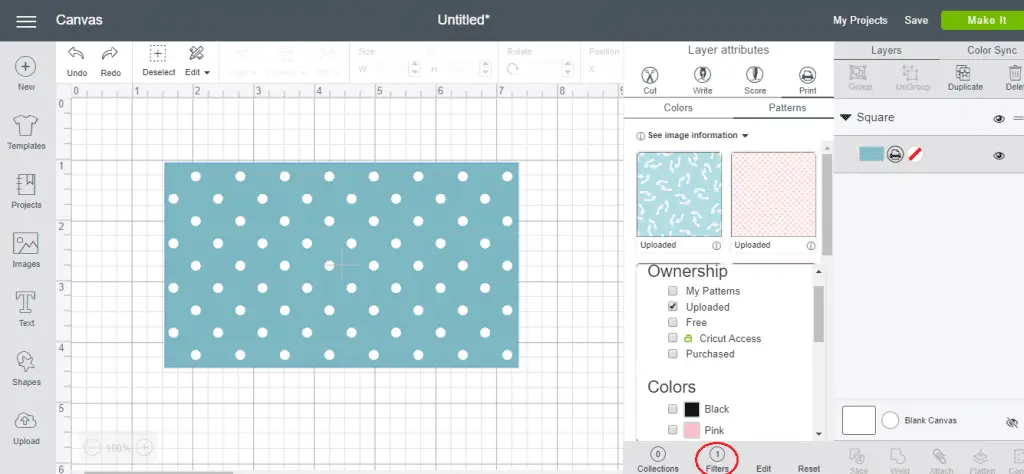
You can also filter through your patterns, which will make it easier to locate the one you’re looking for. Click ‘filters’ and you’ll be able to filter your patterns by uploaded, free, purchased, etc. You can also filter your patterns by color.
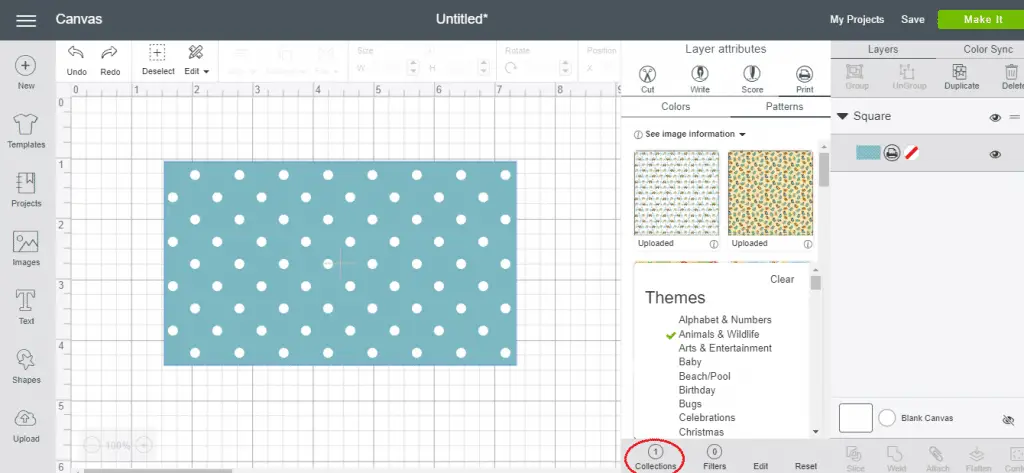
To filter patterns by topic, click ‘collections’ and then browse through all the options and select the one you’d like.
Patterns With Text In Cricut Design Space
To use pattern fill with text in Design Space, first write your text and choose your font. Then, just change your text from a cut image to a print and cut image. Select ‘print’ and choose your pattern. Edit the scale if you wish.
In the screenshot below I’ve made a shadow for my text. To do this I simply duplicated my text and changed the fill to a solid color. I positioned the text with the solid color behind the text with the pattern fill. Then I selected both and clicked ‘flatten’ so that they would become one image. Isn’t it pretty?!
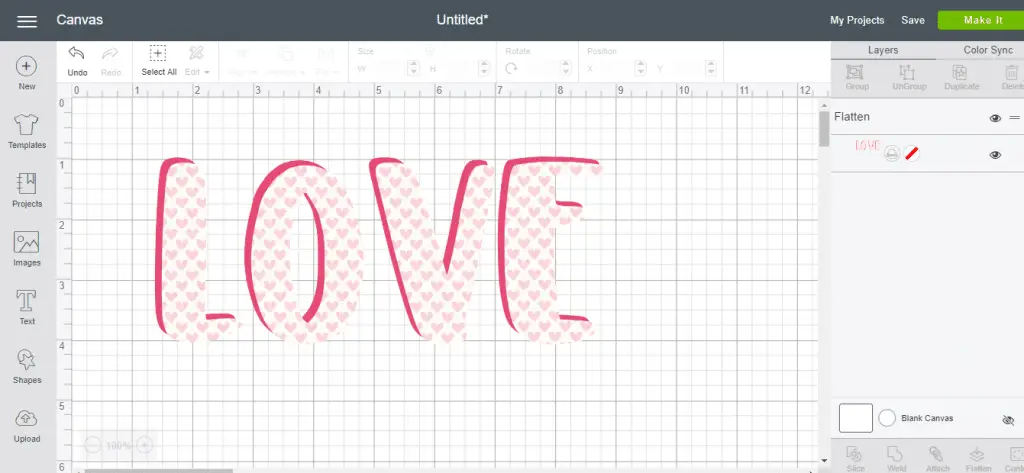
You cannot edit text once it has been flattened, nor can you edit the pattern. You can only adjust the size of the image. However, if you’d like to change something, you can always just ‘unflatten’!
Patterns On Single Layer Images
You can use patterns with any single layer image or SVG that you have downloaded, and uploaded to Cricut Design Space. You’ll just need to change it to a print and cut image first, if it isn’t already. Then you can select your pattern.
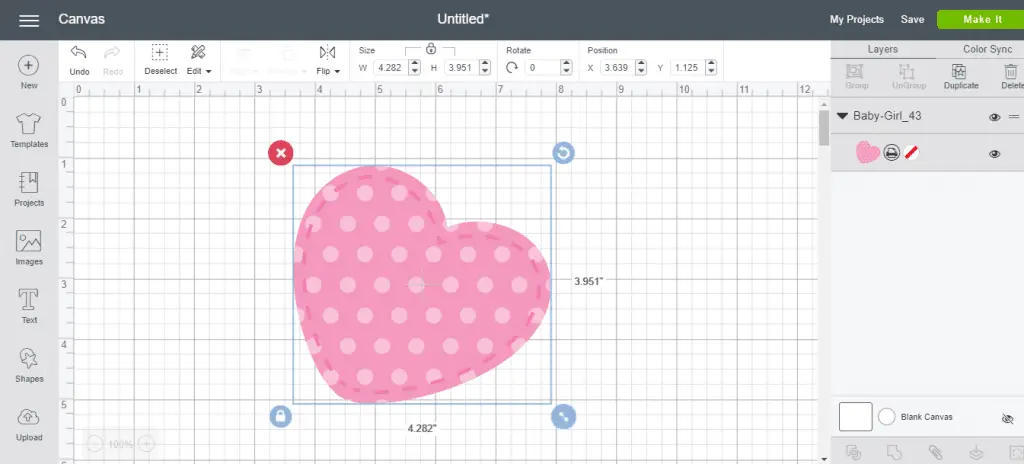
I LOVE this floral digital paper from Creative Fabrica!!
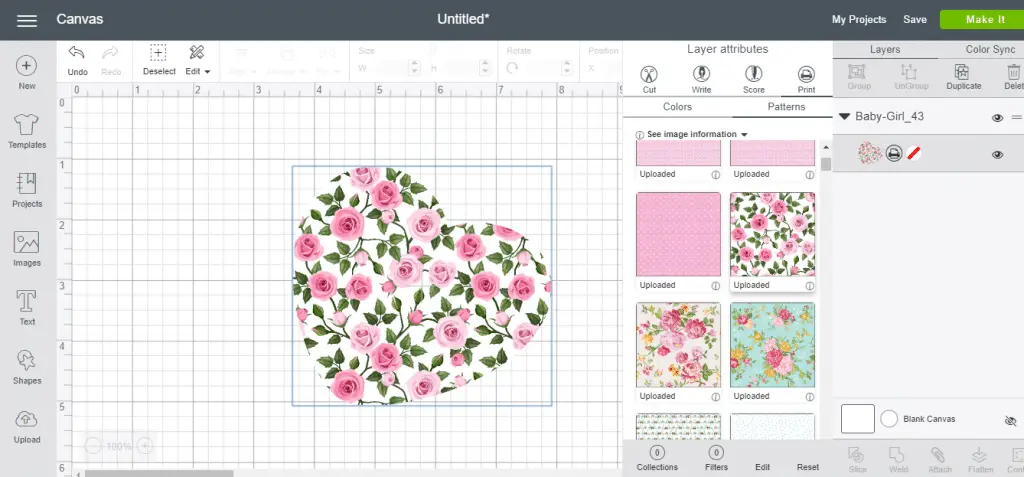
You can also upload your own personal photos as patterns in Cricut Design Space. Then, you can use your photos to fill shapes, text, and images, for print and cut.
Patterns On Multi-Layered Cut Files
If you’d like to use a pattern on a multi-layered cut file, you’ll need to change each layer of the SVG to print, and then you can select the pattern for each layer.
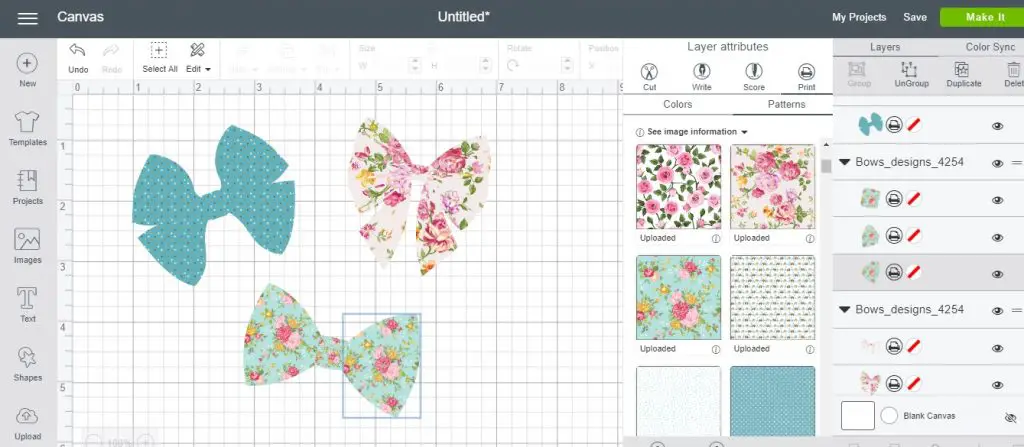
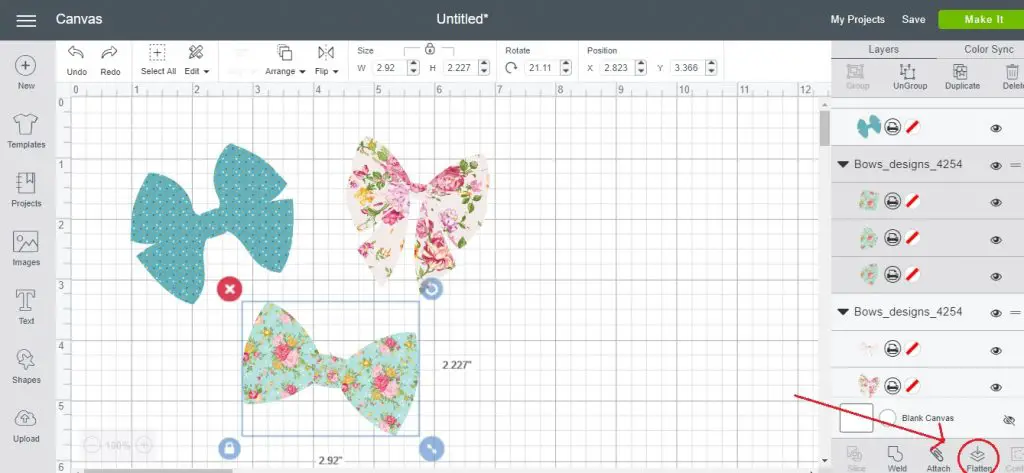
Once you have changed all the layers of your SVG to your desired pattern, you’ll need to flatten your image. The layers are still separate pieces, so using the flatten tool will print and cut them as one image. You cannot use patterns on an image that has already been flattened.
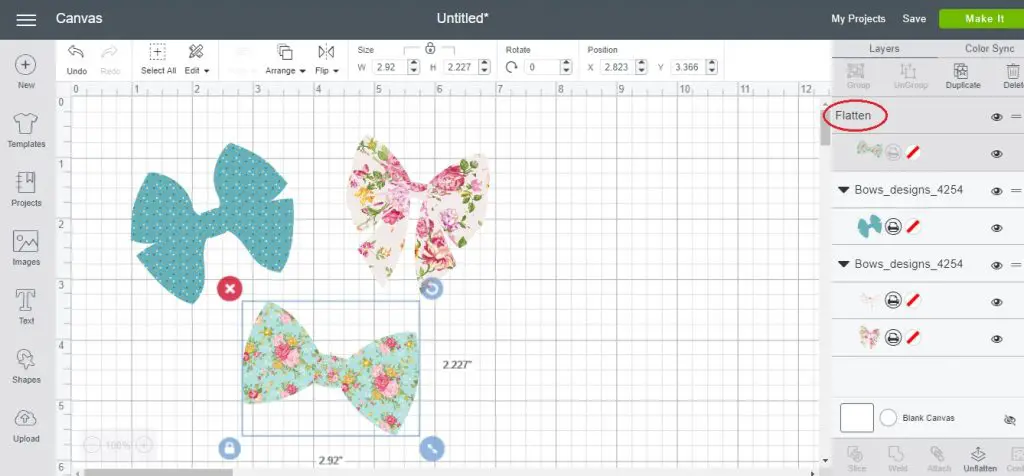
Once your image has been flattened, it is the same as if your print and cut image has been welded together. It will now print and cut exactly how you see it on the canvas, in one piece.
Patterns In Cricut
And so that is how you work with patterns in Cricut Design Space. It can seem a little complicated at first, but it is easy to learn and implement. It’s another great skill to have while working with your Cricut cutting machine.
Pin this post! 🙂
(Please note: This post contains affiliate links. Read our full disclosure policy here.)

Great Post. I’ve been trying to use the print and cut feature to make a photo tee- shirt
but once I get to edit my pattern/photo the edit button is unavailable it wont let me use this feature.
No i did not ungroup my letters and mess with any of the font. It also only
lets me use cricut fonts I cant use my own. Do you know why this is? Thank you so very much.
Hi Leslie, sorry I’m not going to be much help because I’m not sure. Best to give Cricut a call and see if they can help.