How To Make Stickers With Cricut – A DIY Christmas Cookie Jar
Ever wondered how to make stickers with Cricut?
Whether you have the Cricut Maker or Explore Air 2, both are great for making DIY stickers! Let me show you how I made Cricut vinyl stickers and put them on a Christmas cookie jar!
Cricut Stickers

There are a number of important things you need in order to make stickers with Cricut:
- Cricut Explore or Maker Machine
- Inkjet Printer ( I like the Epson WF-2630)
- Cricut Printable Vinyl or Sticker Paper
- Clipart/graphics

And ideally you’ve got something to put the stickers on, whether a cookie jar like I’m doing, a Starbucks Tumbler, or something totally different!
Cricut Sticker Paper
There are two different Cricut products that are great for making custom stickers:
- Cricut Printable Vinyl (which is what I’m using)
- Cricut Sticker Paper
Cricut Printable Vinyl is better for making stickers that you want to last. It’s a stronger product that will, for example, last for ages on a cookie jar!
Cricut Sticker Paper is great for scrapbooking, sealing envelopes, putting in a kids sticker album, and that sort of thing. It’s fine for low wear & tear applications.
Let’s get into the project!
1. How To Upload Clipart To Design Space
You will need to choose some clipart to print onto the sticker paper.
I’m using this Christmas Cookie Clipart from Creative Fabrica, but you should take a look at their full range of graphics here.
Once you’ve selected and downloaded the graphics to your computer, right click on the folder and select ‘Extract All’.
Then, in Design Space, click ‘upload image’.

Click ‘browse’ and search for the folder in your computer files. The download will often be in multiple formats (SVG, DXF, EPS, PNG or JPG), and I use PNG for Cricut print & cut as the background of the image is already removed.
Select the image and click ‘open’.

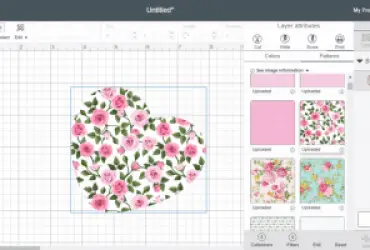
Now select the image type. This will entirely depend on the image you are uploading and how much detail is in the image.
You can play around with the options to see how much detail you want to leave or remove. For my image I don’t want any color variation removed, so I’m going to go with Complex.

If you have a PNG file, the background will already be removed and you won’t need to do anything here.
If you have a JPG file, you will need to remove the background. At this point you can also remove any other details you don’t like.
Click ‘continue’.

Add a name for your image and some tags so that you can search for it and find it later on. Save as a print then cut image.

2. Size Your Images
Repeat the above process with all your images…it takes a while!
Now I’ve got all my images. I clicked ‘select all’ and made them all 2 inches wide.
Next click ‘Make It’.

My images fit nicely on two pages, and you can check you aren’t going to waste a lot of printable vinyl. If it turns out you are, then you can go back and resize your images.
You won’t need to do anything else at this stage, so click ‘continue’.

3. How To Print Stickers With Cricut
On the next screen click ‘send to printer’. I’m using the Epson Workforce-2630.
The print setup will show up. Select the name of your printer and make sure the bleed option is ON.

Place some Cricut Printable Vinyl or sticker paper in your printer and click ‘print’.

4. How To Cut Stickers With Cricut
After both sheets have printed, it’s time to cut them out with your Cricut machine. Set your material. Click ‘browse all materials’ and search for Printable Vinyl.

Select ‘Printable Vinyl’.

Place the printable vinyl with the images facing up onto your StandardGrip or LightGrip cutting mat. Load the mat into your machine and click the go button to start cutting.

DIY Stickers
Now the images are all cut out, and ready to apply to the cookie jar.

Here is the finished cookie jar!
You can customize this project in so many ways, and use the idea not only for Christmas but for any other holiday as well.
Find some thanksgiving clipart, for example, or for your occasion you’ve got coming up, and make the stickers you like!
Thanks for checking out this Cricut sticker project!
Here are some other related projects we’ve made:
(Please note: This post contains affiliate links. Read our full disclosure policy here.)