How to Use Cricut Print And Cut With Avery Transfer Sheets
Thanks to Heather for submitting this Cricut Print and Cut tutorial – visit her Etsy Store here for more great Cricut creations.
By using the Print and Cut feature in Cricut Design Space, you can make easy heat transfers out of complex images. Heat transfer vinyl has its limits, but by using t shirt transfer paper, designs that are impossible with iron-on, are made simple.
In this post I’ll show you how to use Cricut Print and Cut while making an adorable custom onesie with Avery Light Fabric Transfer Paper!
Cricut Print Then Cut
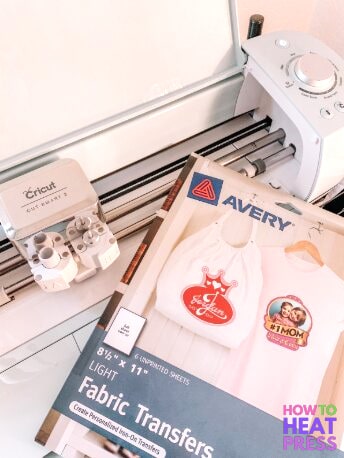
Here is an overview of how to use Print and Cut with Cricut (full step by step below):
-
- Upload the image that you want to use into Design Space.
- When you’re done editing the image (it needs to have a transparent background), it will ask you if you want to save the image as a ‘Print then Cut’ file or a ‘Cut’ File. You want to choose ‘Print then Cut’. If you’re lazy like me and don’t like to edit images because it’s tedious, you can use this website to remove your background for you.
- After you save the image as a ‘Print then Cut’ file, you want to upload it into your Design Space and resize it based on the size you want it to be on your project.
- Click “make it”.
After you click “make it”, you will need to print your image using your Fabric Transfer Sheets! You need to put the sheets into your regular household inkjet printer (make sure it’s not a laser printer), and click print from Cricut Design Space OR you can print using the System Dialogue. - After the image prints out, you need to bring it to your Cricut, place the paper design facing up onto your Lightgrip Cricut mat, insert into the Cricut and proceed to “cut” the printed image using the custom settings to cut it out properly.
- Your Cricut will take a few seconds to “find” the lines of your image so that it can cut it out perfectly. Follow the prompt on your Cricut until it’s done and you can remove the mat.
- After you remove the mat, you now have your cut out image that is ready to be ironed on. Place the design face down (you do not want to be able to see the design) where you want it on your product. You will want to use your Cricut Easy Press to heat for 30 seconds at 315 degrees. Make sure you apply a good amount of pressure so that your design adheres well to the fabric. You can find all Easy Press settings in this handy guide.
- After the 30 seconds is up, let your design cool for two minutes. When these two minutes are up, very carefully peel away the thin layer of the Fabric Transfer Sheet, which will reveal your beautiful image that you created using a Fabric Transfer Sheet!
- If you want to add words to your product, you can still use something like Cricut Iron On to spruce things up.
How To Print And Cut On Cricut
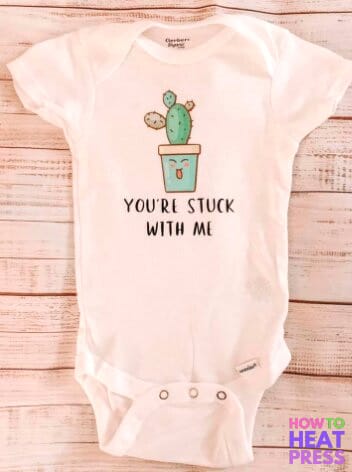
Materials Needed (for this project):
- Black Heat Transfer Vinyl
- Light Fabric Transfer Sheets
- 100% Cotton Baby Onesie/Bodysuit in white
- Color Inkjet Printer (a laser printer will NOT work)
- Cricut Cutting Machine (check out these Cricut Bundles)
Download The Free Font For This Project
If you want to reproduce this project, you’re going to need to download the font ‘Wellington’ from FFonts. You can check out many more free fonts for Cricut here.
- Download the font by following that link
- It will give you a zip file
- Open the file and open the document that ends in .ttf

4. After you open this, you will need to click “install”.

5. After it installs, exit all webpages. If you don’t exit everything, you will not be able to find the font until you do. You should now be able to re-open Design Space and find that font. We will be using this font today. You can find the font by scrolling until you get to ‘Wellington’, or you can search for it like I did in this image:

How To Print And Cut With Fabric Transfer Paper
- The first thing you need to do is find an image that you want to use. For this project we’re going to use this image. There are 6 images in this file, but we’re going to use the cactus one. Regardless, click download and then upload this set of plants into Design Space.
- After you uploaded the image, you need to click “complex” and click “continue”. Now we’re going to click on the eraser and erase everything except for the cactus because that’s the only image we’re using today.

3. Notice how I erased everything, including the words that were at the bottom, except for the cactus. After you’ve done this, click continue.

4. After you erased everything and clicked “continue”, the following screen will pop up:

You need to press “Save as a Print Then Cut image” and then click “save”.
5. After you have saved your image, you can now upload it to your canvas in Design Space. Select the cactus image and click “insert image”.

Now that you’re image has been inserted, let’s add some text and resize the image so that it will fit on a onesie. You want to make sure that your image, including the text, doesn’t exceed the size of your product. As a rule of thumb for onesies, I try not to go over 5” x 5”.
We are going to write the phrase “YOU’RE STUCK WITH ME” and use the Wellington font that we downloaded earlier for this.

6. After you have the cactus, and the phrase, and it’s the proper size for your product, now we need to make it! Click on “make it” in the upper right hand corner of Design Space. You will be brought to this window:

Time to get our your Avery Fabric Transfer paper and put one piece into your printer! After you have put one piece in your printer, click “continue” and click “Send to Printer”.

Let your printer print this image out just as it would normally print out anything else. When it is done printing DO NOT CUT AROUND THE BLACK LINE. That is for your Cricut to use to find the image.
Take your 8.5”X11” piece of Heat Fabric Transfer Paper that now has a printed cactus on it and place it on the light blue Cricut mat with the design facing up.
Insert the mat into your Cricut machine and click the flashing Cricut to begin cutting out the Cactus.
How To Apply The Print & Cut Transfer
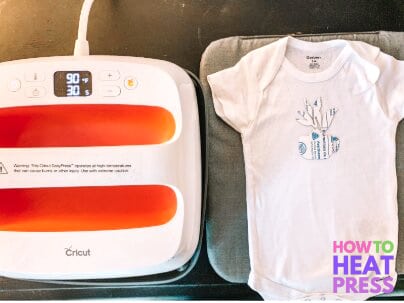
Lay your cut out cactus face down on your Cricut Easy Press Mat or a Towel and position it how you want it. You will want to use your Cricut Easy Press to heat for 30 seconds at 315 degrees.
Make sure you apply a good amount of pressure so that your design adheres well to the fabric. Let cool for two minutes before very carefully peeling off.
7. Now that we have our image using Heat Fabric Transfer Paper successfully adhered to the onesie, we can add text, if you want to! You need to cut out a piece of heat transfer vinyl that is the size of the phrase according to Design Space and place it SHINY SIDE DOWN to your blue or green Cricut mat.
Make sure the materials are set to Everyday Iron-On AND that you have mirrored the image (this will cut it out backwards, like it’s supposed to).

After you set the setting properly, as stated above, you can follow the instructions on the image above to load your tools and your mat to cut out the phrase “You’re Stuck With Me”.
8. You now need to weed the negative space away from the vinyl that you just cut out. Use your Cricut mat and your Cricut Bright Pad (if you have one) to do this. When you are done weeding, place the design on your product with the shiny side facing up. The design should no longer appear backwards and you are ready to use your Easy Press to adhere the words!
You will want to use your Cricut Easy Press to heat for 30 seconds at 315 degrees. Make sure you apply a good amount of pressure so that your design adheres well to the fabric. Let cool for two minutes before very carefully peeling off.
Ta da! You’re done and you’ve now made a really adorable onesie using Heat Fabric Transfer Paper!

Print And Cut Cricut
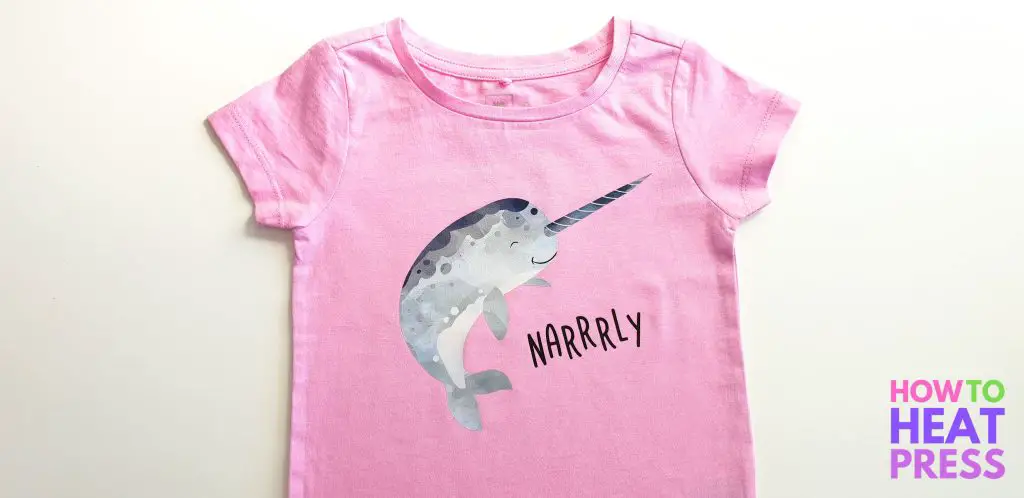
Use inkjet transfer paper to make easy designs
And so that’s all there is to it! Thanks again to Heather for sharing that tutorial, and don’t forget to check out her Etsy store here.
Also this post on Cricut Printable Vinyl also using the Print & Cut feature in Design Space, along with this custom clipart tutorial (making the narwhal t shirt pictured above)!
Pin this post! 🙂
(Please note: This post contains affiliate links. Read our full disclosure policy here.)


Can I just cut my image of my cat out by myself and not use a cricut to cut it out for me? I have the cricut easy press 2. Also can I use transfer paper from mickles to use with the cricut Easy Press 2? Thank you for your help!🙂
Hey Liz, absolutely. You can totally cut images out of Avery Transfer sheets by hand. The Cricut Easy Press 2 works with all transfer paper out there – just follow the specific instructions for time, temperature, and pressure. I bet your cat project is going to be purrrrrrfect!
Can I use these on craft wood?
Hi Amber – I think it’s worth giving a try! I’d just use a little less time to start with to make sure it’s not scorching or doing anything else strange when you apply it. As always, it’s best if you can try out just a tiny design maybe on the back of your craft wood to make sure it’s going to give you the result you’re looking for. Good luck!
This looks brilliant! Do you know if this method will work to transfer onto mugs or do I need to use something else?
Hi Katy! Sorry for the delayed reply, we’ve been vacationing and are just getting back into the groove now. These Avery transfer sheets will not work on mugs. You’ll need printable permanent adhesive vinyl which is totally a thing. You can use the same print then cut steps to make designs for mugs. I’d recommend you use Oracal Inkjet Printable Permanent Adhesive Vinyl Packs for printing designs for mugs. Oracal UV Laminating Film for Printable Vinyl Sheets is a must to protect your designs from water and lots of touching : ).
what is the setting? what setting do you use for the air 2 to cut the sheets because i havent had ANY luck cutting them!??
Hi Candace – The Iron-On setting should do the trick. I’d put the dial between Iron-On and Cricut and if you can tell it’s not cutting through make sure to re-cut BEFORE you unload the mat from the machine. Hope that helps!
I have an image of a truck with words already chosen I mirrored the image for the transfer now I’m wondering if my cricut with cut the image and words so I am able to have a nice T-shirt without the backing of the paper.
Sounds like a nice design, Jackie Ann! Yes – you should be able to have your Cricut cut the truck and the words.