What Is Screen Printing? How Does Screen Printing Work?
What is Screen Printing, and how does it work?
Most people have wondered what it takes to make the t shirts that they wear. How are the designs applied? And what are they made of?
There are multiple ways to make t shirts, but in this article we’ll focus in on the screen printing method. We’ll take a look at what’s involved, how to do it, the pros and cons, and a whole bunch of other stuff.
Silk Screen Printing
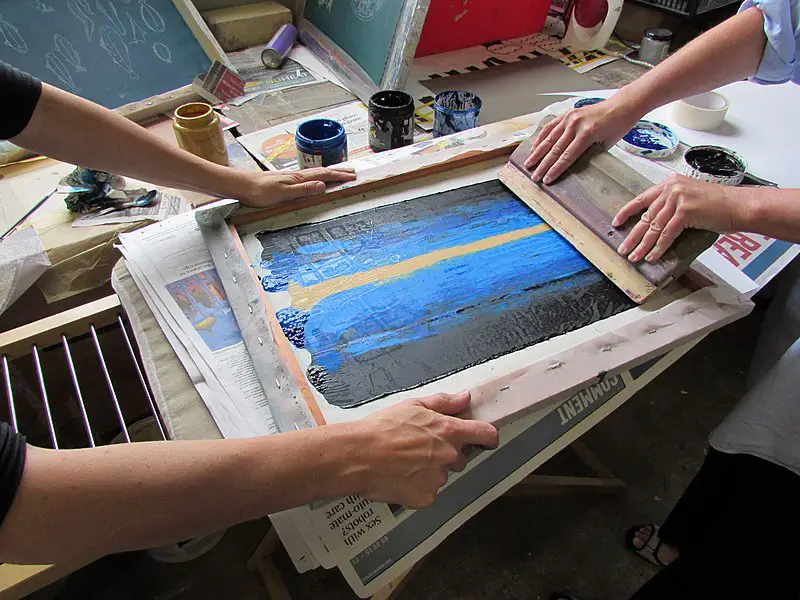
What’s the difference between silk screen printing and screen printing?
Nothing! These are two different terms that are used to refer to the same process.
Silk screen printing is an older term used for this method of t shirt printing. Back in the day, silk was used to make the screens. Nowadays, they are more often made from synthetic materials, such as polyester.
How Does Screen Printing Work?
The screen printing process is a technique whereby a design is transferred through a mesh screen, onto a substrate, with fabric ink.
The screen needs to be prepared so that ink will only go through certain areas, forming your design. There are different methods of preparing screen printing designs which we’ll get into in a minute.
Check out this clip on the easiest way to start screen printing: the cut paper stencil method (using a Speedball Screen Printing Kit).
You can see how screenprinting is done on the most basic level.
Screen printing can be rather complicated, messy, and frustrating at times. It’s not the easiest way to make t shirts at home, but of course, there are plenty of pros & a few cons.
The Different Methods Of Screen Printing
The hardest part of screen printing is preparing the screens. Because this is quite the process, it means the screen printing method is best for when you are making many prints of a single design.
Do you have 50 t shirts that need the same design on them? Screen printing is best for that sort of job. If you are doing 10 t shirts or less, I would try using heat transfer vinyl instead.
Preparing screens for screen printing can be done in at least 3 different ways.
1. Cut Paper Stencil Method
This is the method demonstrated in the video above. It basically involves cutting a stencil out of paper and taping it to a screen. The ink is then pressed through the stencil, applying the design to your t shirt or other substrate.
The downsides of this method are:
- you may not get nice straight & clear lines
- the paper will not last that long before it needs replaced
- you cannot have detailed designs
- you cannot have features inside the design
This method is great for home craft screen printing, especially for teens or those just wanting to make cool simple tees at home. The Speedball Basics & Intro Kit both allow for this method, and provide everything you need to get started.
2. Screen Printing Filler Method
The filler method is also best for screen printing beginners, and can be easily accomplished at home.
To sum up the process:
- You paint (or draw) a special fluid onto your screen
- Then cover the screen with the filler
- The drawing fluid is then washed out
It’s easiest to understand it when you see, so check out this clip showing how to screen print using the drawing fluid and filler method (the rest of the video series is here if you want to know more about it).
As with the previous screen printing process, Speedball kits make it really easy to get started using this method. The Intro, Intermediate, and Intermediate+ kits can all be used.
3. Screen Printing Emulsion Method
The final method, using photo emulsion, is the most complex, but it is the best way to screen print. This way gives you the cleanest designs, and your screens will last for a long time. They can be re-used again and again.
In a nut shell, this method works like this:
- Apply sensitized photo emulsion on screen (while keeping it out of the light)
- Dry screen in a dark location
- Apply design (printed transparency) to the screen
- Expose the screen under light
- Wash out photo emulsion that has not cured (the area under the design transparency)
For the sake of continuity, here is Speedball’s photo emulsion tutorial (rest of the series here).
Screen Printing Multiple Colors
If you want to screen print different colors, things can get a bit trickier.
You have to make different screens for each part of the design that is a different color. Only one ink color can be printed at a time, and you have to wait until the previous color has dried before applying the next.
However, there are ways to speed up the process. You can use what’s called a flash dryer (pictured right). These are usually set up at the back of a screen printing machine and will flash dry the t shirt for a few seconds as it comes through with each new color.
Ideally, your screen printed designs will be 1 or 2 colors, but a maximum of 3 or 4. Any more than that becomes too costly and time consuming.
If you are going to a screen printing professional, multi colored screen print tees will definitely cost more than those with a single color.
Craft Screen Printing VS Professional Screen Printing
Because of the labor intensive process of the photo emulsion method, and the best use case being for multiple copies of a single design, screen printing with emulsion is best for pro and/or business use.
The screen printing set up costs can also be reasonably significant, though there are alternatives to having all the “right” gear. For example, exposing your screens in the sun rather than with a special photo emulsion light.
Speedball’s Advanced Kit does make it more accessible to home crafters, however, you’re still going to want a good reason:
- making t shirts for your sports team or church group
- creating YouTube merch
- t shirts with the family name on it for a reunion
There is something attractive about screen printing and screen printed t shirts. So if it’s something you want to have a go at, even just as a “craft”, I wouldn’t hold back. But if screenprinting is just the means to an end for you, you might want to look into a professional screen printer, or other ways you can get custom printed tees online.
How To Screen Print

Source: Screen Printing T Shirt Design
By now you should have a good idea on how to screen print, but it can take a while for the process to cure in our minds!
Here are a couple more screen printing videos to help familiarize you with what’s going on! Remember that everybody has their own little tricks and tips, which may not be best for everyone.
For example, once you have screen printed onto fabric, you need to heat set the ink. Some people use a home iron, some people use a heat gun, others use a heat press, while others chuck their tee in the dryer! Depending on where you’re at you can try different methods. I would recommend trying an iron to start off with.
In this first video, Bob makes a screen printed t shirt using Speedball Inks.
In this next video, Dave shows us how to screen print posters. This is a slightly more professional look at how to screen print.
What Is A Screen Printing Machine
What are screen printing machines (or screen printing stations)?
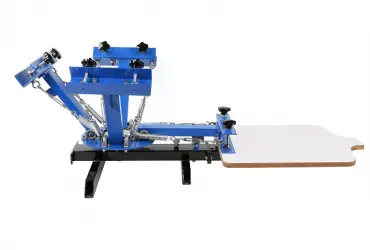
At a most basic level, a screen printing press is something that holds the t-shirt and screen in place while you do the print. It allows you to raise and lower the screen over the tee.
At the higher level, a screen printing machine can hold multiple t shirts and screens and allows you to spin each level around.
Here is one of the best videos showing how to use a screen printing machine.
Notice:
- this is a 6 station t shirt screen printing machine
- the screen layer section is holding 4 different ink colors, but has capacity for 2 more
- the lower pallet is holding 6 different t shirts
- their is a flash dryer at the back of the unit drying between colors
Screen Printing Screens
Screen print screens are usually made with a wooden or aluminium frame. The mesh screen is held in place with tension by the frame. The mesh is usually made of mono-filament polyester mesh, nylon, or similar substance.
The mesh screens are sold in different grades, rated by how many threads cross the screen per square inch (eg. 160, 110, etc). They make certain mesh counts for glitter and shimmering inks (eg. 40 count screens).
For bold blocky designs and base coats, which require heavy ink deposits, you would use lower mesh counts. The 110 to 160 count is the one most commonly used.
The higher end screen mesh count is for detailed images which do not require as much ink. When wanting a more detailed image, you need to use 180 to 200 count mesh. For a soft feeling t shirt print that is detailed, you need a mesh count of 230 to 280.
What type of mesh count should you choose? To sum up, it depends on your ink, your substrate, and your level of design detail.
Check out the following video for a few more tips on how to choose the right screen printing screen.
When you know what screen (or screens) you need, you can:
- buy screen printing screens already made up in a range of sizes (commonly 10 x 14″, 18 x 20″, 20 x 24″, etc)
- get them as part of a kit (such as the Speedball kits)
- or make your own
You can easily buy the mesh you need, build you own frames, and save a bit of money if your money is more precious than your time.
Screen Print Ink
As with the screens, there are also different types of screen printing ink:
- use water based acrylic screen printing inks for posters & printing on paper
- use fabric inks for printing on fabrics
- try out the screen printing process with plastisol inks
What are platisol inks, and how can you use them in screen print transfers?
Check this out:
Plastisol inks allow for more vibrant and brighter screen prints, especially on dark garments. It’s a much thicker ink which can be trickier to apply, but the results are amazing. The transfer itself, when cured correctly, is flexible and stretchy.
The downsides are that this is a petroleum based product so it can’t be cleaned up with water – you need to use solvents. However, you don’t have to clean the screen every time. It can be stored with ink on it for a time.
Water based ink soaks into the fabrics of the shirts instead of sitting on top of the shirts like plastisol does.
Screen Printing Pros & Cons
As with all things, there are pros and cons for and against screen printing.
Screen Printing Pros
- print on many fabrics & substrates
- good for simple designs
- best for high print volume
- long lasting, durable heat transfers
- less prone to flaking, peeling, or fading
- can do multiple colors which blend well
Screen Printing Cons
- no good for low print volume
- somewhat limited in number of colors
- longer learning curve
- preparation of screens is labor intensive
- clean up can be a pain
Screen Printing Vs Heat Transfer Vinyl
Heat transfer vinyl is something we’re personally a lot more comfortable with, and which we use a lot.
HTV is good for smaller orders, but not so much for larger jobs. And of course vinyl sits on top of the garment, rather than being absorbed into the fabric.
HTV iron on is definitely better for home crafts and is an easy, non-messy, way to make t shirts at home. All you need is a cutting machine, a heat press machine, and the HTV… that’s it really, and you’re away.
HTV also has some limitations with using multiple colors (it takes time to cut, weed, and press each color separately), so screen printing isn’t alone there.
What You Need To Start Screen Printing
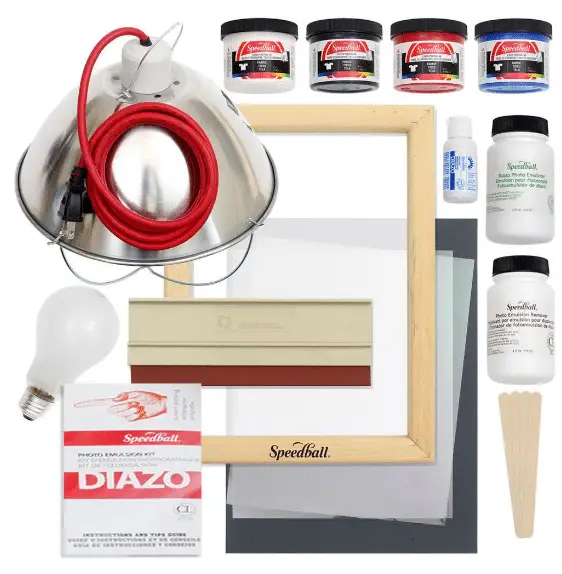
A screen printing bundle from Swing Design
There are a few things that you need to start doing screen prints, and a few more to start a screen printing business!
Here is a basic list of what you need to start screen printing at home:
- screens
- screen printing ink
- photo emulsion (& sensitizer, unless it’s ready to use emulsion)
- photo emulsion remover
- squeegee
- transparencies
- blank t shirt
And if you are thinking of starting screen printing for business, you might need:
- a screen printing machine
- a flash drier
- exposure light
- emulsion scoops
- printer for printing transparencies
You also need to think about work space. Having a good amount of room is a big bonus when screen printing.
The Screen Printing Process
So that is the screenprinting process!
Hopefully you’re a lot more familiar with what it’s all about. It’s like anything, when you first begin learning about it, it can seem quite complicated. And when you try screen printing for the first time, it’s unlikely to go perfectly.
But, if you stick at it, keep learning and practicing, you’ll be making crisp, clear, screen printed tees in no time.
Let us know if you have any questions or comments down below, and we’ll get back to you asap. And if we’ve left anything out that you’d like to know more about, again, let us know and we’ll update the article.
Thanks for visiting!
Pin this post!
(Please note: This post contains affiliate links. Read our full disclosure policy here.)


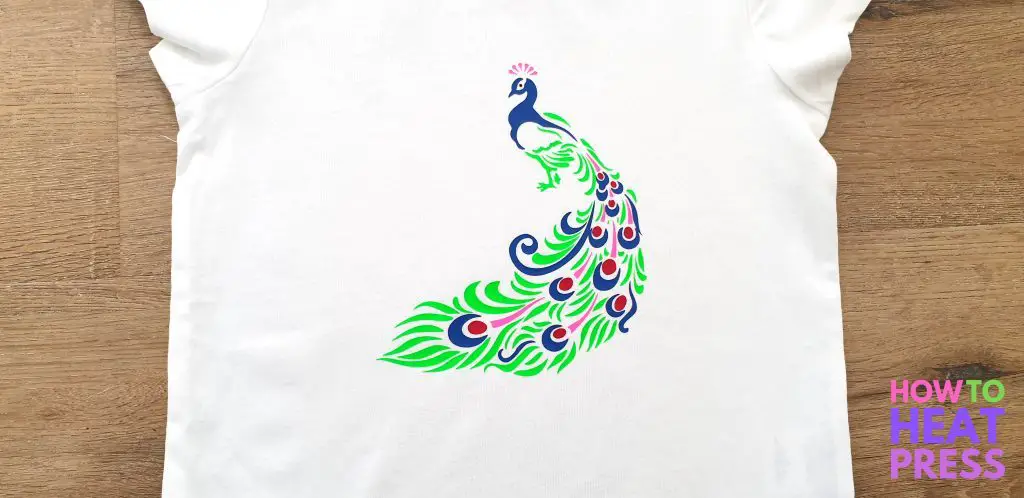

It’s great to know that screen printing can be used on a good number of different fabric. The neighborhood association that I belong to would like to produce shirts for each member. Maybe something simple like screen printing a certain design on a cotton shirt would suffice.
That sounds like a great way to go! It seems you live in an awesome neighborhood. Good luck!