
How To Slice In Cricut Design Space – Cricut Slice Tutorial
The Cricut Slice tool is yet another great feature of Design Space.
When you’re bored of doing the same plain old types of design again and again, it’s time to master the slice tool. It opens up a whole new world of Cricut craft projects and gives wonderful results.
You’ll see this below in this simple beginner’s guide on how to use the Design Space slice tool.
How To Slice On Cricut

We recently had a new baby, and we named her Meadow. For this project I’m going to make a design with her name which will be pressed with heat transfer vinyl onto a blank baby onesie.
The slice tool cuts one design element out of another. It can either cut one shape from another shape, cut overlapping shapes from one another, or it can cut text from a shape. In the project below, I’m going to cut text out of a heart shape.
Let’s get started!
1. Choose A Font
The font I am using for this project is Watermelon Script from dafont.com.
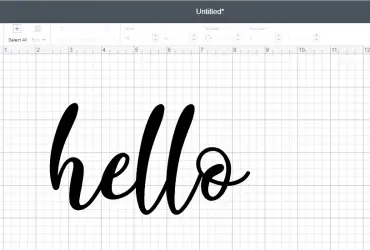
I typed my desired text and decreased my letter spacing from 1.2 to -0.9 so that each letter linked together nicely.

2. Weld The Text
Once I was happy with the letter spacing I welded the letters together to make my word into one image. Welding in Cricut permanently connects all the design elements into a single image.
In my design, the text is all linked together into one piece after clicking weld. Make sure you are completely happy when you weld something, as you cannot un-weld it again later!

3. Choose An SVG
I found a free heart SVG here on Lovesvg.com, but you could also use this one available for free use, or check out these other free Cricut SVG sites.
You’ll see in the screenshot below that the LoveSVG SVG was together with a group of different images. I simply ungrouped everything and deleted all the elements I didn’t want.
There are also basic shapes you can choose from in the left sidebar of Cricut Design Space.

4. Size The Design
Next, I resized the heart image. I wanted the heart to be exactly 5 and a half inches big, so I typed 5.5 in the width box. I chose 5.5 inches as this is going to suit the size of the blank onesie that I am using.

6. Arrange Design
Next I worked out exactly where I wanted my text to go on top of the heart. To do this I had to click ‘Arrange’ and send the heart to the rear, so that my text would appear in front.

8. How To Slice In Cricut
Once I had everything perfectly positioned, I selected my text, held down the ‘ctrl’ key on my keyboard, selected the heart, and clicked ‘Slice’ (You can also click ‘Select All’).
I removed the text away from the heart and deleted it. That’s how easy using the slice tool in Design Space is!
This is also a great method for layering two different colors of glitter.
You can’t actually layer glitter HTV, so if you slice out the text, you can position your second layer of glitter in the space. So it looks like the glitter has been layered, but it’s actually not!
This is called ‘The Knockout Method’. Find out more about it in this post from Expressions Vinyl.

8. Sliced Text
Here’s my final design, the text has been sliced out of the heart image.
I love this font and I’m looking forward to seeing the cut vinyl!

9. Mirror HTV
I clicked ‘Make It’ to view my mat and selected the ‘mirror’ option as I’m using heat transfer vinyl. Always cut HTV in reverse as it is applied to your garment backwards.

10. Cutting The Sliced Design
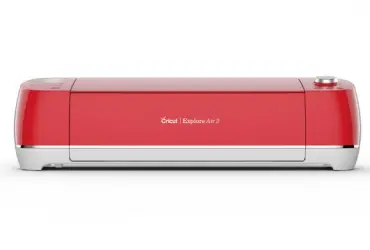
I cut Siser heat transfer vinyl with the Cricut Explore Air 2 cutting machine.
This is such a great machine – there’s no end to what it can do!
For this project I’ve used Gold HTV from this Siser HTV bundle. I forgot to get a photo of my vinyl being cut, so the following is just a photo of my machine that I took afterwards!
Don’t forget to set the dial on your machine to ‘Iron-On’ and place your HTV shiny side down on the mat!

11. Weed The Design
Next I weeded my design with my Cricut weeding tool. It was a bit weird for me to weed out the text this time, rather than weeding out the vinyl around it!
If you are pressing your project with a heat press, you can heat up your lower heat press platen for a couple seconds and weed your vinyl on the warmed platen. This will make weeding easier and faster.

12. Press The Design
The design is all ready to be pressed onto a baby onesie!
I pre-pressed my garment for 2-3 seconds first to remove any wrinkles and moisture. To perfectly line up my transfer, I folded the baby onesie in half and pressed a line right down the middle. Then I just lined up the middle of the heart with the pressed line.
The Iron-On that I’m using needs 10-15 seconds at medium pressure with a heat press. But, you’ll have to refer to your vinyl manufacturer’s specific instructions for time, pressure, and heat.
If you are using an iron, you will need to press it down firmly for ten seconds over each section of the design. It doesn’t matter if some areas get hit twice. You can then gently peel away the carrier sheet.
If using the Cricut EasyPress (or an iron), you can turn your garment over and press the back as well to make sure the design is well adhered to the garment.

How To Slice In Cricut
And here is the finished Cricut Slice project.
I absolutely love it, it’s so pretty!
So there you have it: how to use slice Cricut Design Space! It produces a really stunning result, but is very easy to create.
I hope this has helped you to know what you’re doing, or inspired you to give it a go. Let us know the kind of slice tool projects you’ve been working on in the comments below, and check out these other Cricut Design Space Tutorials to learn more!
(Please note: This post contains affiliate links. Read our full disclosure policy here.)
This is the best instruction ever. I’m a beginner using cricut machine. I’m happy to cross on your site. I am looking forward to learn more. Thank you so much !
Aww, that’s great to hear! So glad you found the Cricut slice tutorial helpful – please circle back if you have other questions as you get into your Cricut life!
i must be the dumb one in the group because i could not get SLICE to work, i tried and thought i followed your directions to a T but when i held down the control key, the slice key was not available to use , it was grayed out? can you help?
Hi Debi – it can be a bit frustrating so don’t get down on yourself! How many layers are you trying to slice? Something that can often be a problem (for me too!) is making sure that you only have two layers selected to slice. If there are more than two layers the slice button will be grayed out and not work. I’d be happy to try to troubleshoot if that’s not the issue, please reach out with more details about the project.
Simply the best explanation I have had about getting letters cut out of a design. I had tried everything and read so many tutorials and your expiation made it so simple . Thank You so much!!!!
So glad it did the trick, Debbie! The slice tool gives you so may new design options, once you’ve mastered it you’ll use it all the time!
Your directions are very clear! Super helpful to me. Thank you
Thanks Nicole!
Oh thank you so much for this info. I to am a newbie and wanted to know exactly how such a piece was made! Wonderful, easy to understand.
Good to hear, thank you Sandee 🙂
Thanks for this tutorial! I’m a total newbie (as in fresh out the box) and because of these directions I completed my first project ever with success! It was a tank top shirt done as a birthday gift for my size 18 month old little cousin. Thanks again!
Great, glad you found it helpful. Sounds like a cool project as well! I’m sure your cousin will love it 🙂
Thank you for the way you explaned it and the pictures were great, I know that I can do it now.
Thanks Theresa, glad it was helpful.
Oh my goodness! How DARLING! ? thanks so incredibly much for the detailed tutorial – can’t wait to try as a baby shower gift! I’m only a newbie but excited lol
Haha thanks Kathy. Yes I’m really happy with how this one turns out – it’s a shame she only wore it once or twice before she grew out of it! And it’s cool to hear you’re so excited about starting some new Cricut projects. Be patient as you learn and I’m sure you’ll be a Cricut Pro in no time.
I would add that the slice tool is at the bottom where the weld and attach tools are. Only because I’m such a ditz, I couldn’t find it! Thanks for the great info.
Yes, thanks for that Lynn! 🙂