How To Edit Text In Cricut Design Space: All The Options!
Learning how to edit text in Cricut Design Space is really easy!
There are all sorts of text options available in Cricut Design Space. Once you know what’s there, I’m sure a whole new range of project ideas will flood into your head.
How To Edit Text In Cricut Design Space
I’ll go through all the different ways you can edit text with Cricut but working through all the text related icons on the Design Space Canvas.
How To Add Text In Cricut Design Space
To create a new text box, click the text symbol on the left hand side. Once you have written some text you can edit it with the box around it. You can:
- Delete it
- Rotate it
- Unlock it to change the proportions of the text – when the text is locked the height and width will always stay in proportion. Unlock it to alter the height or width of the text.
- Increase or decrease the size of the text by dragging it in or out
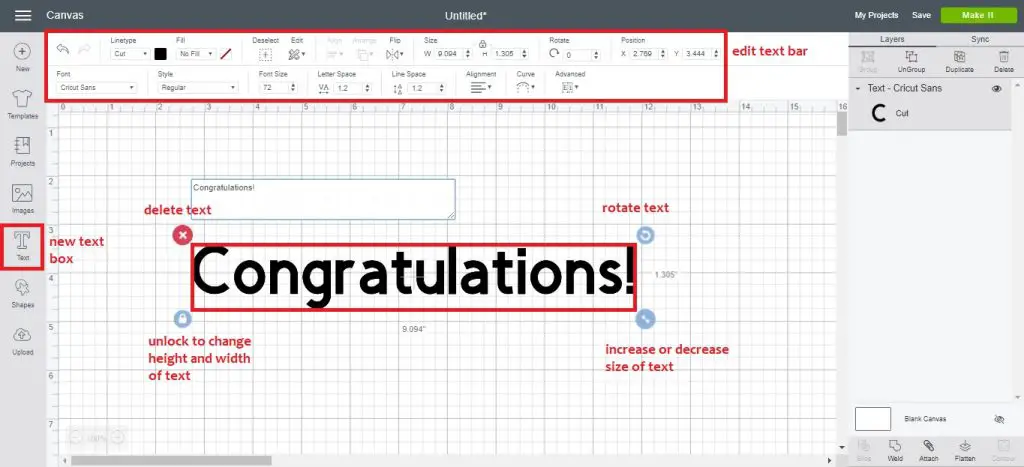
The text edit bar is at the top.
With the icons along the bottom row, from left to right, you can:
- Change the font
- Change the style – regular, bold, italic, bold italic, or writing style
- Change the font size
- Change the letter spacing
- Change the line spacing
- Change the alignment of the text – left, center or right
- Curve text upwards or downwards
- Advanced features – ungroup to letters, lines or layers
With the icons along the top row, from left to right, you can:
- Undo or redo an action
- Linetype – cut, draw or score
- Change pen type and color for drawing
- Change the fill to color or pattern
- Deselect text
- Copy and paste text
- Align and center multiple lines of text together
- Distribute text horizontally or vertically
- Change the order of your layers – send a text layer to the back or bring it to the front
- Flip text horizontally or vertically
- Change width and height of text – if text is locked, height and width will automatically change to stay in proportion, if it is unlocked they will not
- Rotate the angle of the text
- Change the position of the text on the canvas
Choose Font On Cricut
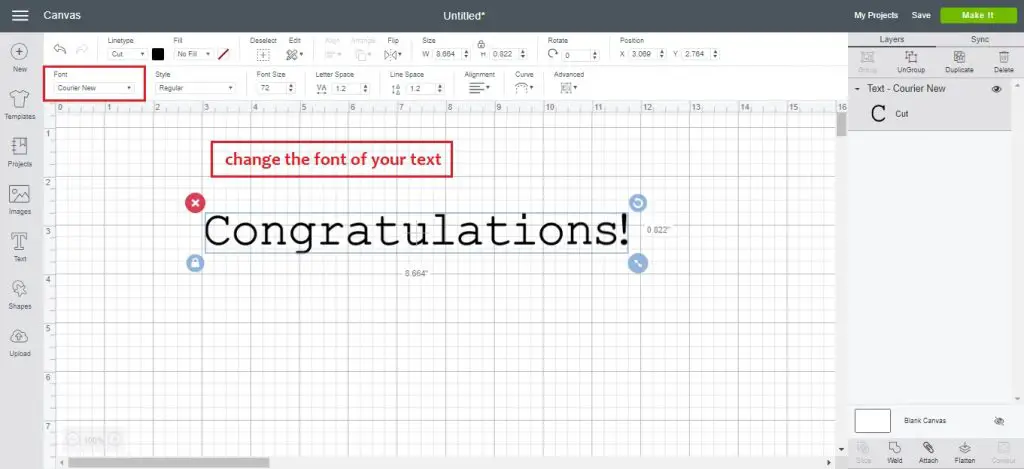
You can change the font of your text by choosing the Cricut fonts available for purchase, or your system fonts, which are the ones you have previously downloaded to your computer.
Filter fonts by multi-layer, single-layer or writing. Learn how to download and install free fonts to your computer for use in Design Space.
Changing The Font Style
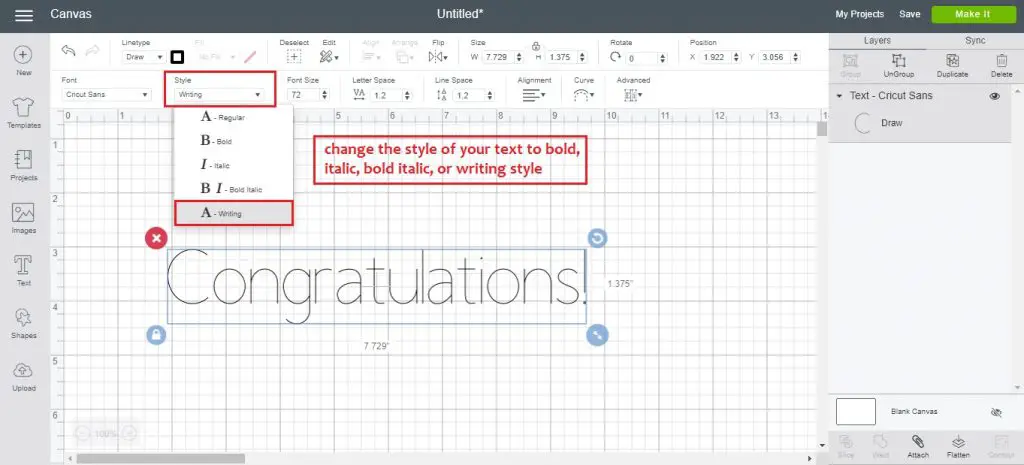
You can change the style of your text to regular, bold, italic, bold italic, or writing style.
Changing The Font Size
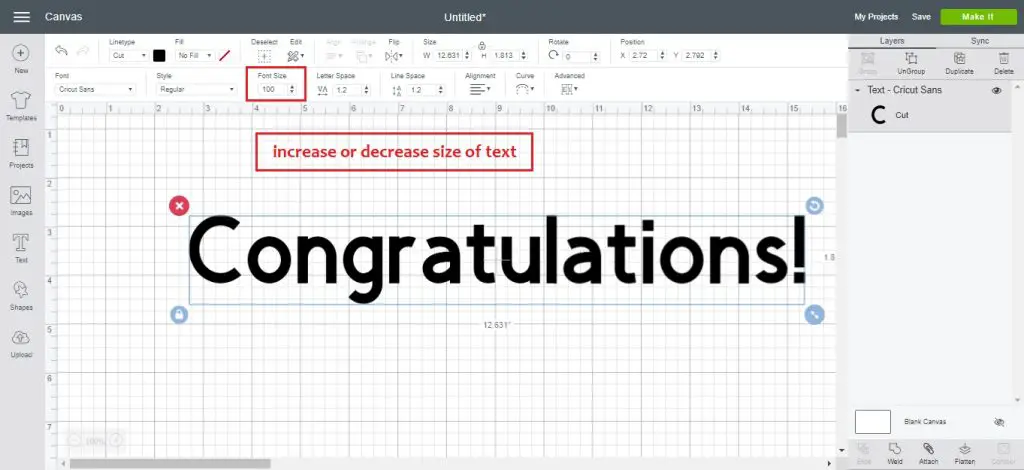
You can change the font size. Type in a number, or click the arrows up or down, to increase or decrease the size of your text.
Changing The Letter Spacing
You can change the letter spacing of your text. Click the arrows up or down to increase or decreasing the space between the letters.

Changing The Line Spacing
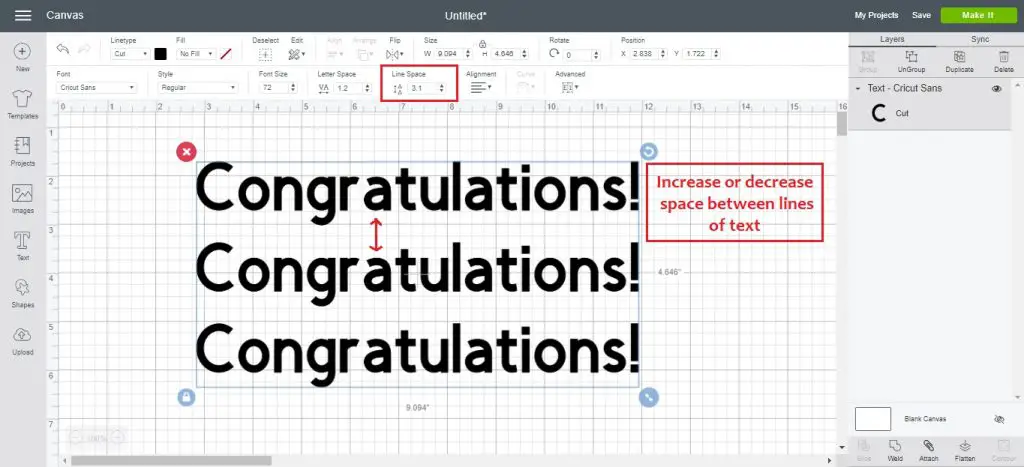
You can change the line spacing. Click the arrows up or down to increase or decrease the spacing between lines of text.
Changing The Text Alignment
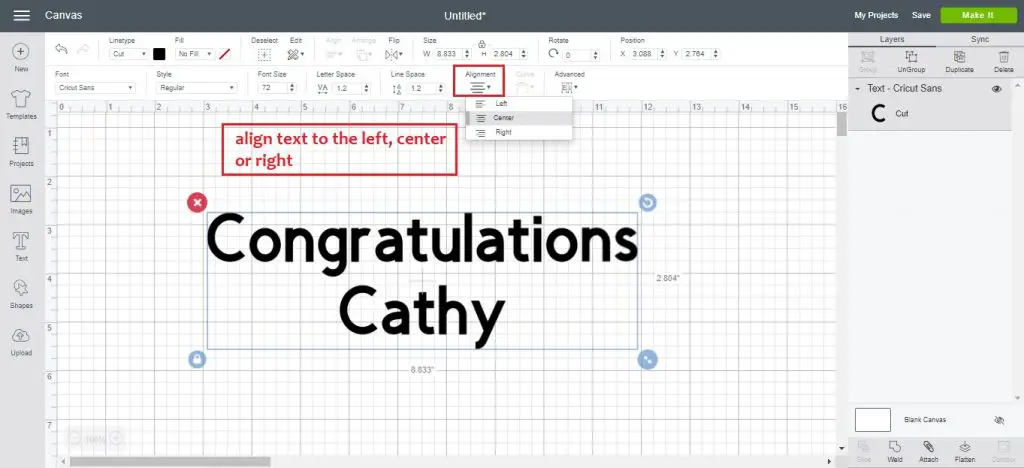
You can change the alignment of your text. You can align left, center it, or align right.
Curving Text
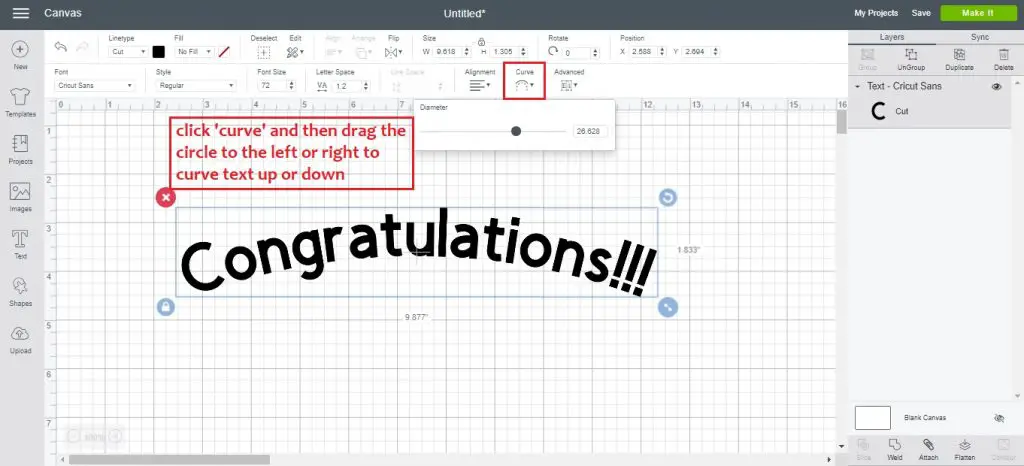
You can curve your text. Drag the button to the right or left to curve your text upwards or downwards. The further left or right you go, the more dramatic the curve. See our full tutorial on how to curve text in Cricut Design Space.
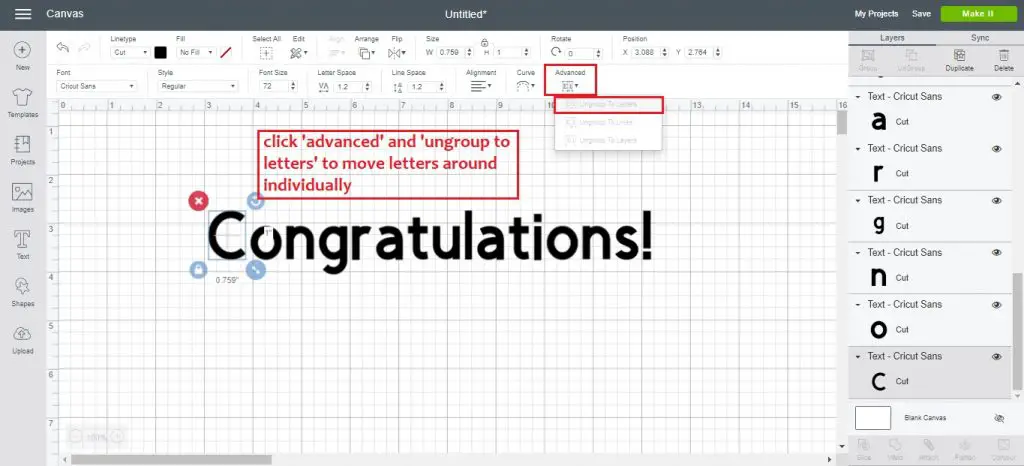
Ungrouping Text To Letters
Click ‘advanced’ and ‘ungroup to letters’ to separate the letters in the text. Now you can move each letter around individually and further customize your text.
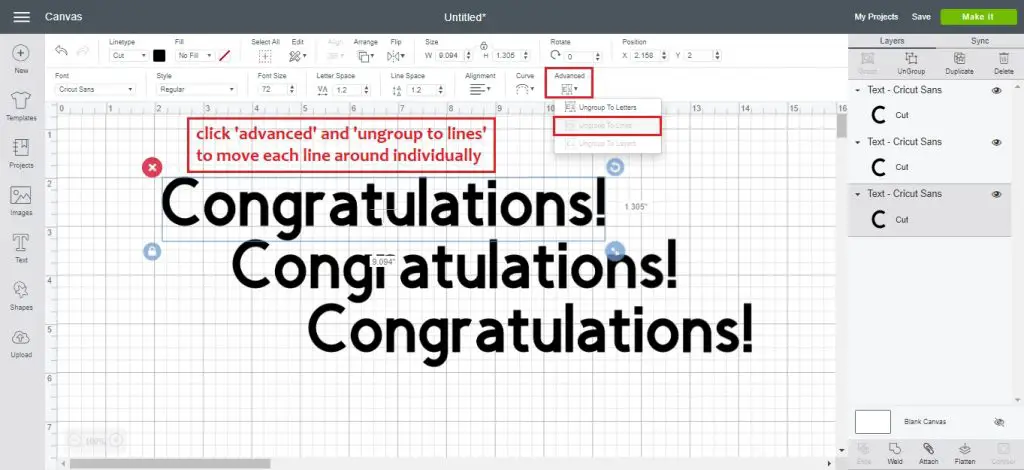
Ungrouping Text To Lines
Click ‘advanced’ and ‘ungroup to lines’ to be able to manipulate a single line of text. Now you can arrange multiple lines of text exactly how you’d like.
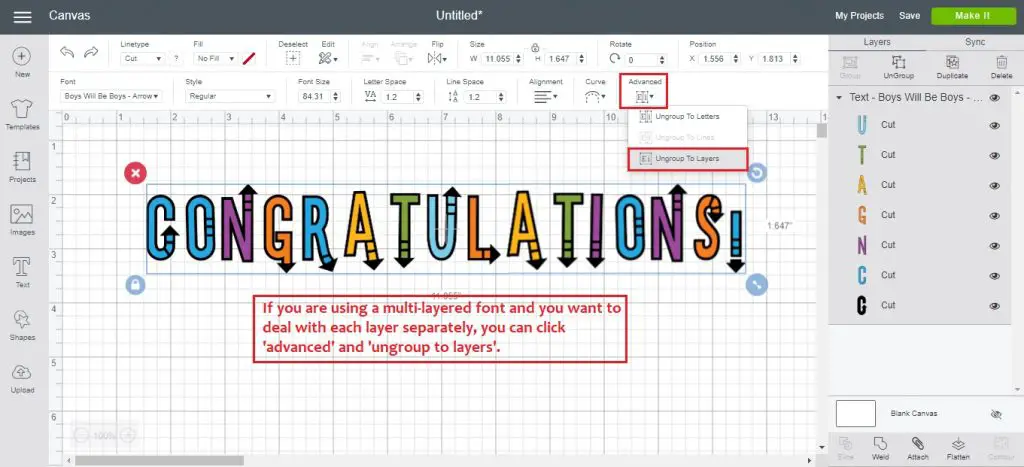
Ungrouping Text To Layers
If you are using a multi-layered font, you can click ‘advanced’ and ‘ungroup to layers’ to deal with the layers separately. After ungrouping to layers you can also further ungroup to letters.
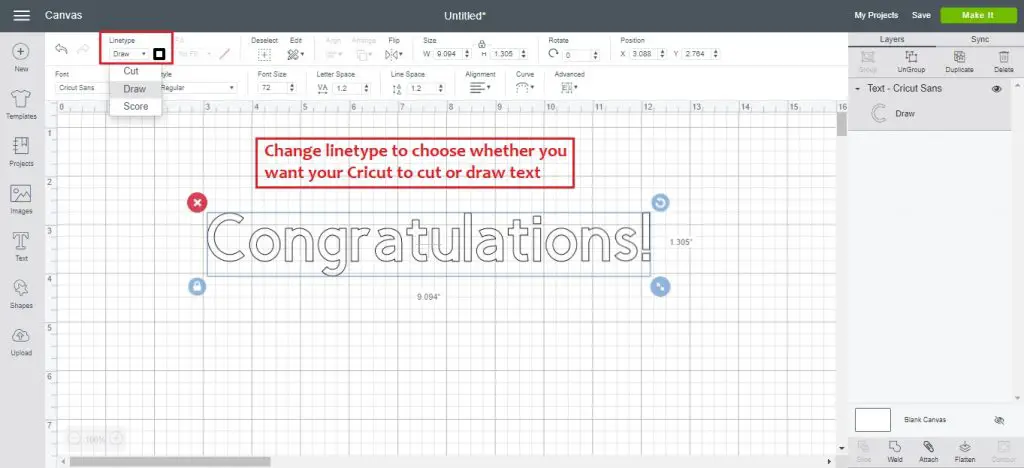
Changing The Linetype
Change the linetype to select whether you want your Cricut to cut or draw your text.
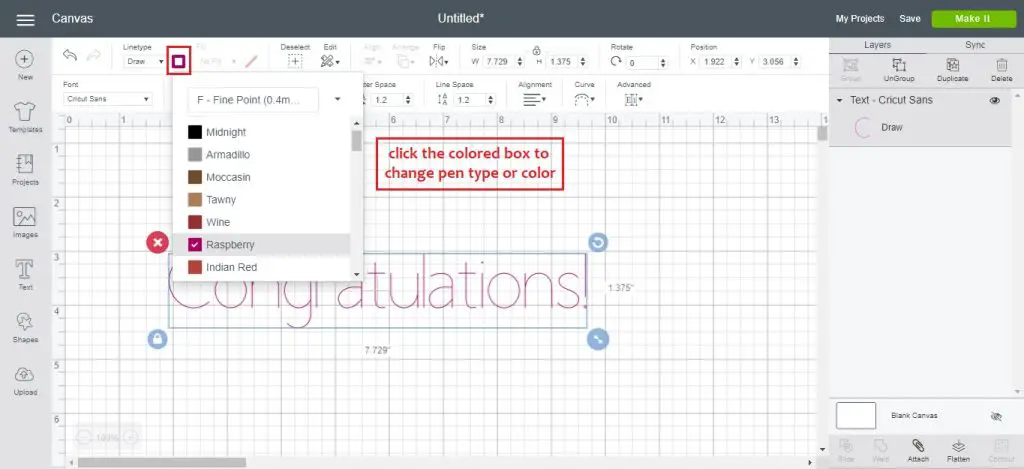
Changing Pen Type & Color
After selecting ‘draw’ as your linetype, you can click the box next to it and choose your pen type and color. If you select ‘cut’ as your linetype, you can choose your material color.
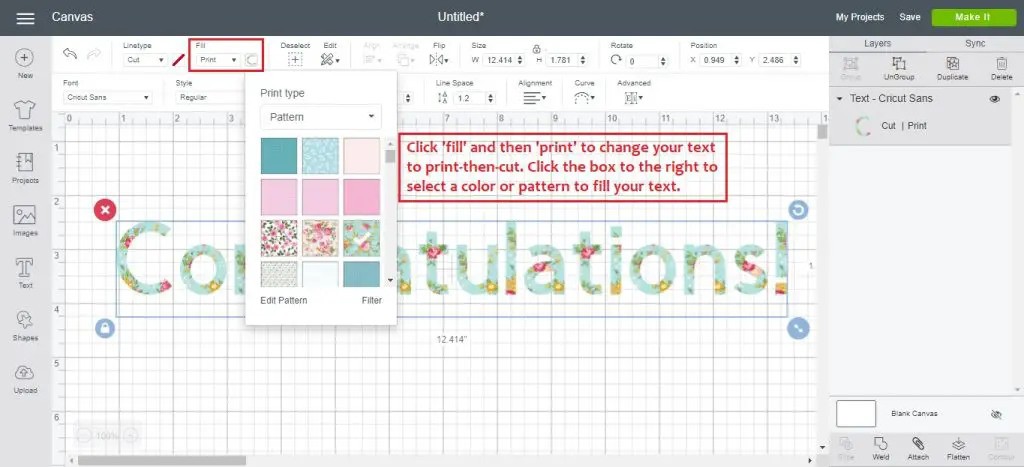
Color & Pattern Fill
If you would like to print and cut your text, choose ‘cut’ for linetype, and ‘print’ for fill. Click the box next to it to choose a color or pattern to fill in your text.
You will print this out with your printer, and then put that printed page into your Cricut for it to cut out around the text.
Learn more about how to use patterns in Cricut Design Space.
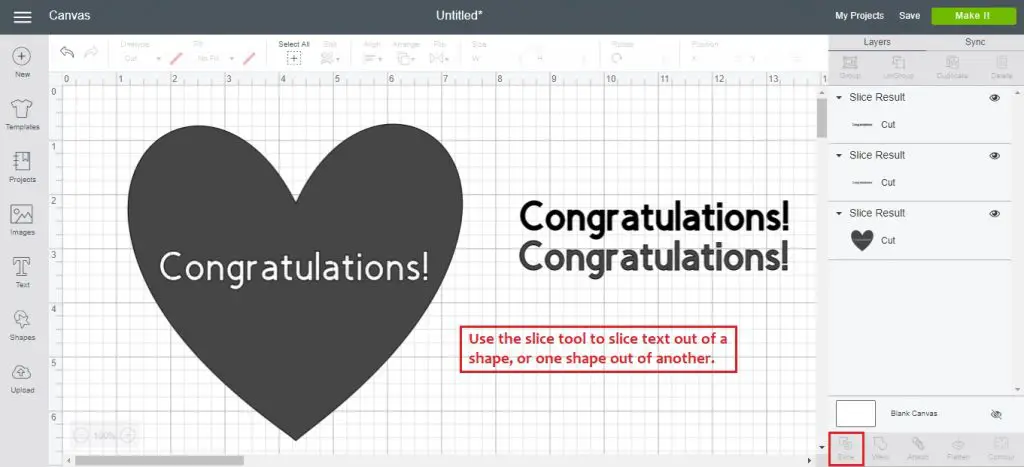
Slicing Text With Cricut
You can use the slice tool to slice text out of a shape, or to slice one shape out of another shape.
Position the text where you would like it be be sliced out, then select both layers and click slice in the bottom right corner. Move the layers to the side to see your new design.
Check out this full tutorial on how to use the slice tool in Design Space for more info.
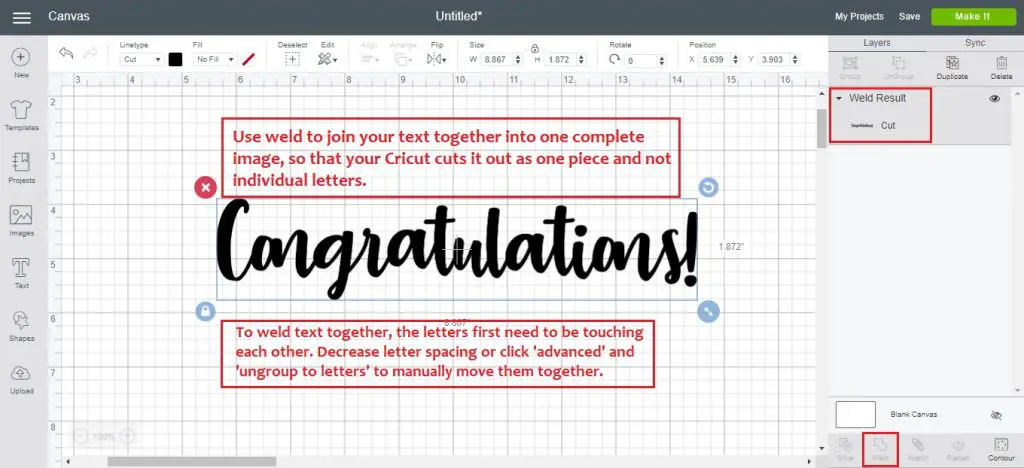
Welding Text
Use the weld feature in Design Space to join text together into one continuous image. Instead of cutting out separate, individual letters, your Cricut will cut out around the text as one word.
To use this feature successfully, the letters must all be touching each other, as you are sort of gluing them together in a way!
Decrease the letter spacing, or click ‘advanced’ and ‘ungroup to letters’ and manually move all the letters together so that there is no break between them. Then select all and click weld.
Learn more about how to use weld in Cricut Design Space.
Using Attach With Text
Use the attach feature in Design Space to attach text and shapes together. With this feature you can draw text onto another shape, or you can cut text out of another shape.
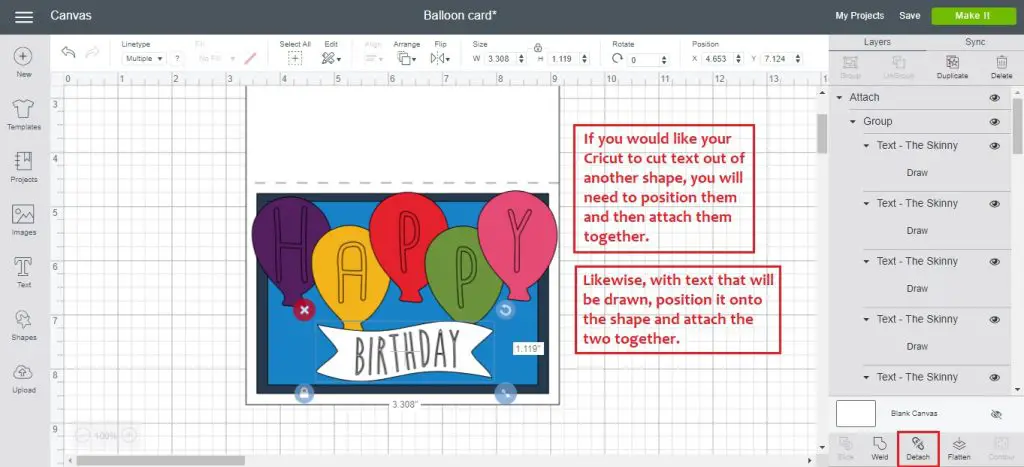
In the screenshot below I have made a birthday card.
I want the word ‘birthday’ to be drawn onto the banner with a pen, so I have attached those two elements together. I also want the letters to be cut out of the balloons, so I have attached each letter to a balloon. Now my Cricut knows exactly what I want it to do!
Using Flatten With Text
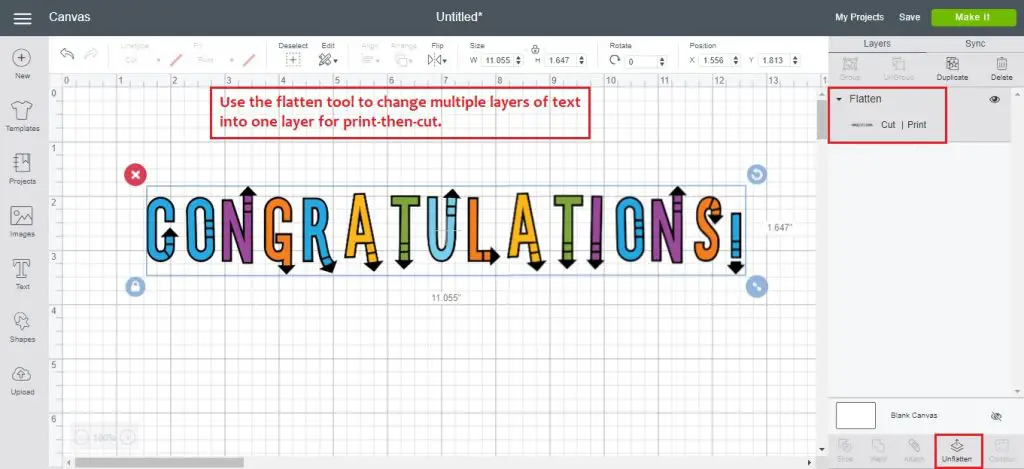
You can change multi-layered text fonts into a single-layered image with the flatten tool.
Select all and click ‘flatten’. Now you can use your text for print-and-cut. Print out the image with your printer, and then place the printed page into your Cricut cutting machine, and it will cut out the letters.

Editing Text In Cricut
So that’s how to edit text in Cricut Design Space – you’re a master now!
Thanks for reading. Leave any questions or comments you have down below.
(Please note: This post contains affiliate links. Read our full disclosure policy here.)


Is there a way to edit text you imported from an already existing image? Not one you “typed” in the “Text Box” in design access space? I’m an IT person and find this whole Cricut experience horribly put together as far as the interface goes, not user friendly at all or intuitive. The instructions aren’t much better, and the auto bot reply is beyond maddening. It’s a great little machine but I can only bey a lot of people get rid of it out of sheer frustration. Thanks, and praise be to all the people that help each other. I have even bout Jennifer Maker’s 2 help sheets, still stuck. Sorry for the venting, 4 days and no forward success.
Hi Patricia, I’m sorry it’s a frustrating process – I agree that the learning curve feels pretty steep at the beginning with Cricut. You can’t edit the text in an image. Design Space treats it as a picture and not text to be edited if that makes sense. You could use the slice tool to cut out parts of the text and then add text boxes to replace them with what you want them to say. You should know that Cricut’s customer service is actually pretty great over the phone. They can even get in and try to help on your actual project if you’re up for that. Try calling during the day as nights and weekends have a lot of call volume. Let me know if you have other questions – I’m sorry for not getting back to you sooner as we took an extended holiday off from work.
I understand that you can change the font of a text you are working on, but how do you change the font of a word after you’ve written other texts and the text has not been welded?
Hi Janet – sounds like you’re clear that once you’ve welded something you can’t edit the text or change the font. If you want different font for different words you’ll need to make a new text box for each word. Hope that makes sense – you can only have one font for each text box. You should be able to double click on the text in order to edit the letters or change the font. Please reach out if you need more guidance!
Thank you
Of course, you’re so welcome!
So I have already edited and printed, now I need to add a name. How do I go back and edit? I highlight the text I need to edit but I have no options to change anything, I can not detach, I have no editing tool bar, I can group or in group.
Hey Jamie, that sounds frustrating, I’m sorry! If you’ve welded the design you might be stuck and need to start fresh. You can only unweld with the back button and sometimes projects have moved on a lot that undoing it all to get back to the weld is as much work as starting again. I hope you have found a way around it.
Your tutorial is excellent for a beginner like me! Thank you! You could teach Cricut a thing or two. Nothing this instructional came with the machine or can be found on the website. Seriously, you have reduced a lot of frustration!
Hey D, so glad you found it helpful! I know that sometimes the help from Cricut can leave something to be desired and I’m happy we were able to ease your frustration. Happy crafting!
HI…I am using a script type font and there are some missing connections. I am not sure how to get these letters to connect and still look good but I also don’t want to place each letter individually. Can I draw lines in between the letters to fill in the missing links?
Hey Patsy, it sounds like you need to move the letters together and weld them. Hope this article helps! Let me know if you need anything else. https://www.howtoheatpress.com/how-to-weld-unweld-cricut/
Doh! I just figured it out. Never mind. LOL Sorry.
Way to go Gale! Glad you got it : )
Ok so how did you do it??? I am hitting the rotate icon and nothing happens!
If I understood Gale’s question correctly you want to look for the circle shaped arrow in the top right corner of your word once it’s added to your canvas. From there you should be able to click it and spin it to any angle you want! Hope that helps.
Gale…how do you do it?? I can’t figure it out either
Hey Laurie – If I understand correctly what Gale and you are wondering you need to find the circle shaped arrow that shows up when you select your text. Usually on the upper right corner. You can spin the word any which direction using that. Hope that helps!
I am pulling my hair out! How do I turn my text design so it’s vertical. I don’t want the letters vertical one after the other. I want the whole word turned sideways. No matter how I ask the question on any platform, I’m unable to find the answer. Are you able to help me? Gosh, I sure hope so! TIA!!! Exampe: WORD <—turn the whole word sideways.
What am I doing wrong? Double clicking in the text box does absolutely nothing! Help!
Sorry you’re having trouble, Kelli! Can you tell me a bit more? What are you trying to do with the text?
Is there a way to edit a misspelling (editing the text itself)?
I created some text and found I need to change a letter after I had ungrouped the text to letters and moved it around to get the proper visual spacing. The designed was saved from a previous session, so no undo.
You can always edit text by double clicking on the text unless it’s been welded. You can either delete an individual letter after it’s been ungrouped and then create a new text box for a new letter if necessary.