Cricut Toddler Room Decor – Bunting Flags With Cork Sheets!
I’m using cork sheets & iron-on to make this cute toddler room decor!
Bunting is a great way to help decorate a girls room. As I have two toddler aged girls, I thought it would be cool to make name banners to go above each of their beds. Also, they just love it when I make things like this especially for them!
I’m going to share with you how to:
- set up a banner project in Design Space
- cut cork with the Cricut Maker using the rotary blade
- cut Cricut Patterned Iron On
- heat press onto cork
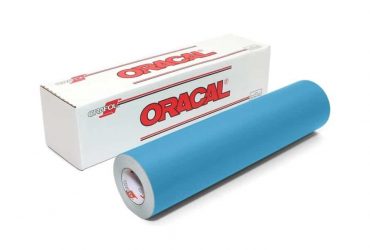
Cork Sheets & Rolls

This is the cork roll that I’m using. I picked it up from a local dollar store, but can’t find the exact roll online!

Cricut Toddler Room Decor
I’m also using this ‘In Bloom Pink’ Cricut Patterned Iron On Sampler. It has a lovely selection of floral patterned HTV.
We’ve also used this sampler in the past for making another patterned iron on project.

1. Cricut Swallowtail Banner
Here’s how to make the swallowtailed banner shape in Design Space:
- Click ‘templates’, look for ‘banners – swallowtailed’ and select it
- Once the template appears on your canvas select the size of your template (small, medium, large or custom – I did custom 3.6 inches wide so that I could fit 6 on a page of cork)
- Select ‘shapes’, select ‘square’ and unlock it to make a rectangle the same size as the banner template
- Click ‘shapes’, select ‘triangle’ and unlock it to make a triangle the same size as the bottom of the swallowtail shape
- Select ‘shapes’, select ‘circle’ and resize it over the template to make string holes the same size as the template
- Place the triangle over top of the rectangle and slice them together, then delete sliced out pieces
- Place one circle at a time over top of the rectangle and slice them together, then delete sliced out pieces (you can only slice two items at once)
- Once you have completed your first banner, just duplicate it to the amount of letters in the name you are making a banner for
After making the cork bunting I wished I hadn’t made the string holes so close to the edge. I had to do a bit of a fix up job on a few holes, so make sure you don’t make them so close to the edge as I did!
Then I chose the font ‘Corbel’ in bold style for the letters.
I just made sure each letter was going to fit nicely on the swallowtail shape. I divided the letters in the name ‘Meadow’ into 3 different colors, so that I could cut them out of 3 different sheets of patterned Iron On.

For more information on templates, see our post on how to use templates in Design Space.
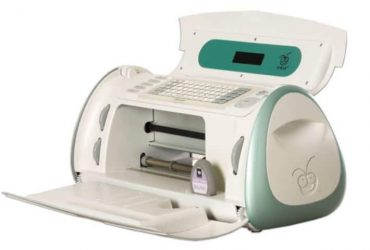
2. How To Cut Cork With The Cricut Maker
It was very difficult to figure out how to cut cork with the Maker.
One website I read said ‘choose the cork setting in Design Space’, but I could not find any cork setting for the life of me. I tried to look up the official Cricut info for cutting cork as well, but couldn’t find a thing!
Recently, I did a felt project with the Cricut Maker and rotary blade, and because the cork sheets seemed a similar thickness to the felt, I thought I’d give that a try!

Here’s how I cut the cork:
- Set the material in Cricut Design Space to ‘felt’
- Use the rotary blade with your Maker
- Use the fabric grip cutting mat
You may want to do a test cut and possibly set the default pressure to ‘more’ or ‘less’ depending on the thickness of your brand of felt.
Overall, the felt setting with the rotary blade cut the cork out perfectly!

Here’s what the rotary blade looks like. You must leave the protective cover on at the top.

You’ll have to make sure your fabric grip mat is clean so that it is sticky enough for the cork.
The rotary blade actually cut the holes way better than expected, despite them being too close to the edge. You could leave the holes out completely, and just make them with a needle afterwards.

3. How To Cut Patterned Iron On With The Maker
To cut the letters out of Iron On, you will need to mirror all of your Iron-On mats. If you’re using adhesive vinyl instead of HTV, you don’t need to mirror anything.
I cut the Iron-On with the green StandardGrip mat and standard Fine-Point blade.

Patterned Iron On is cut with the pattern facing down (carrier sheet side down) and the plain vinyl side facing up.

Once your letters are cut out, weed away the excess vinyl so that only the letter remains on the carrier sheet.
4. How To Heat Press On Cork
Once again I could not find much information about pressing Iron On onto cork, except for Cricut’s interactive heat guide.
I used this guide to find the settings for pressing patterned Iron On onto cork with the EasyPress. Thankfully, they had corkboard as an option this time!
Here were my settings:
- Heat press: Cricut EasyPress 1
- Heat transfer material: Patterned Iron On
- Base Material: Corkboard
- Mat or towel: Cricut EasyPress Mat (I used a silicon pad and the EasyPress mat is the closest option to this)

After clicking apply, I was given the following results:
- Set EasyPress to 315°F
- Pre-press material for 5 seconds
- Press design for 15 seconds with firm pressure
- Peel the carrier sheet away cold

The Heat Guide gives very detailed instructions!

These instructions worked great for me. I waited for my EasyPress to heat up. Then, I pre-pressed the cork for 5 seconds at 315°F.

I positioned the Iron On onto the cork and pressed it for 15 seconds with firm pressure. I peeled the carrier sheet away cold.
The cork texture shows up in the vinyl which means it has adhered well!

Now I just need to press all the remaining letters, add the string for hanging, and it’s done!
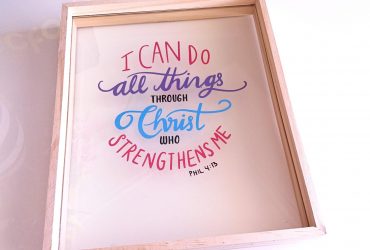
Toddler Bedroom Decor
And here it is – a new banner for above Meadow’s bed!
So cute!
This would look great with Iron On or adhesive vinyl. It could also be a great gift to make someone this holiday season! 😉
Another Cricut project idea for a toddler room is this DIY Peter Rabbit Cushion project, made with simple black HTV!

Thanks for stopping by – you can see all our Cricut projects here!
(Please note: This post contains affiliate links. Read our full disclosure policy here.)