How To Draw With Cricut Infusible Ink Pens And Coaster Blanks!
How to use Infusible Ink Pens to draw with Cricut!
You can use Infusible Ink Pens for all sorts of projects, but today we’re making some simple coasters.
Here’s what you need to know!
Cricut Infusible Ink Pen Project

We’re using the Cricut Maker drawing feature – the Explore Air 2 is also able to do this project.
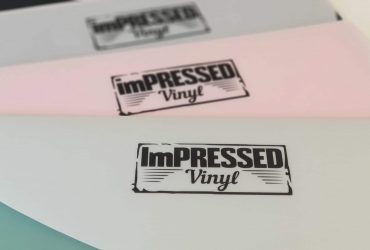
These are the Infusible Ink Markers we used for this project (though we’re only using the black marker). The difference between the Infusible Ink Pens & Markers is line thickness. Markers have a thicker line (1.0), while pens are thinner (0.4).

And these are the Infusible Ink Blanks we’re using – the round coasters. You can only use Infusible Ink with sublimation blanks (poly coated) and 100% polyester garments.

You must use laser copy paper with the Infusible Ink Pens. Only this type of paper will hold and release the ink correctly. Butcher paper is also required, and comes included with Infusible Ink Transfer Sheets (not the pens).
We’ll be pressing our designs with the 6 x 7 inch EasyPress.
How To Draw With Cricut
We are using a different SVG for each of the blank coasters: Mountain Camping Illustration 2, Illustration 6, Illustration 7 and Illustration 8. They are all camping themed, and done by the same artist, so we thought they would go perfectly together on coasters.
Upload the SVG to Design Space, and bring them into a new project.
Use the shape tool to create 4 circles (3.6 inches in diameter, as stated on the back of the pack of coasters).
Position each design over top of a circle. Set the designs to DRAW and the circles to CUT. Attach each design to each circle so that the placement is locked exactly as it is shown on the canvas. This all shouldn’t take long.
Now click ‘Make It’ to continue to the mat preview.

As these designs will be transferred onto the coasters in reverse, you need to mirror your mat.
It doesn’t really make a difference for my designs, but it especially does if you have any text in your design. You want it to transfer the right way!!
If you are drawing with Cricut onto paper or cardstock (not to be heat applied), you do not need to mirror the design.

Set your material to copy paper – 20 lb (75 gsm).
You’ll ideally want to use a LightGrip mat if you have one, but our StandardGrip mat is so non-sticky that I’m just going to use that.
Insert your Cricut Infusible Ink pen into clamp A. Make sure that you click it in completely, so that the arrow on the pen moves all the way down. Your blade is already in clamp B. The machine will first draw all of the design, and then cut out the circles at the end.
Place the laser copy paper onto the LightGrip mat (or non-sticky StandardGrip!), load it into the machine, and click go!

How To Heat Press Infusible Ink Pen Transfers
Once the transfers have been drawn and cut, remove the excess paper and you’re left with your designs!
Turn your mat over, bend it a little, and slowly pull your designs away from the mat. As you bend your mat, this should provide the least resistance and allow the paper to come off easily.
At this stage you can also color anything in by hand that you would like, with your other colored markers. I really like the monochromatic look, so I kept mine black and white.

Here’s an overview of how to press Infusible Ink Pen on ceramic coasters:
- Press with the EasyPress 2 set to 400°F for 240 seconds
- No pressure required
- Do not move the EasyPress while pressing
- Cold peel (you may need to leave it to cool for 5-10 minutes as the ceramic holds the heat for a while)
If you are using the square coasters, or are changing anything else in this project, please refer to Cricut’s heat guide for the correct pressing instructions.
To prepare your coasters for pressing you’ll firstly want to clean them with a rubbing alcohol, and wipe them with a lint free cloth. You don’t want any lint ruining your design! Allow them to fully dry before taping on your designs.
Lay down your EasyPress mat or silicon pad on a firm and sturdy surface. Tape your laser copy paper with your designs on them onto the coasters. Use heat tape to secure them in place. If you don’t use heat tape, the design may move and create a ghosting effect.

Turn on your Cricut EasyPress (or heat press machine). Set the temperature to 400°F, and set the time to 240 seconds. Allow it to fully heat up before you start to press.

Place white cardstock onto your mat. Place your coaster on top of the cardstock, with the design underneath, and the bottom (non glossy side) of the coaster facing upwards. The coaster will get so hot that the ink will transfer to the coaster, even though it is underneath.
Here is the order of items you will need to press your coasters (from bottom to top):
- EasyPress Mat
- White Cardstock
- Ceramic coaster facing down (with design taped to it underneath)
- Butcher Paper
- Cricut EasyPress 2
The white cardstock will protect your mat from the Infusible Ink.

Place butcher paper over top of the coaster. Your butcher paper needs to be larger than the size of your EasyPress.
Place your EasyPress on top and click go. You don’t need to use any pressure and DON’T move your EasyPress! You don’t even need to hold the press, you can just leave it there for the 4 minutes.
If you have one of the larger EasyPress machines, it’s also possible to press multiple coasters at once.
When the time is up, allow it to cool COMPLETELY. The ceramic gets VERY hot!! Please don’t burn yourself. Let it cool down, and then remove the tape to see your new finished coaster!

These designs that I got from Creative Fabrica weren’t necessarily designed to be made into coasters with Infusible Ink, but I think they turned out pretty good!
You can see they’re not perfect (like the tent detail was so fine that it ended up colored in totally!), but I really love them and look forward to using them in the house!
Not the cheapest project to make with the cost of the coasters, but definitely a cool way to make a custom gift for someone who loves camping!

Draw With Cricut
So that’s how to draw with Cricut using the Infusible Ink Pens or Markers. We haven’t used the drawing feature on the Air 2 or Maker a whole lot, but it’s nice to be able to combine it with heat pressing!
Check out our Infusible Ink Transfer Sheet Project using the Cricut Blank Tote Bag for more inspiration!
Pin this post! 🙂
(Please note: This post contains affiliate links. Read our full disclosure policy here.)