DIY Office Chair Makeover with HTV
How to do a DIY Office Chair Makeover
Is your office chair bringing you down? Time to spice it up with a little DIY office chair makeover! In this tutorial we’ll show you how to use HTV (heat transfer vinyl) to quickly elevate your tired office chair (and indeed your whole office space) from forgettable to charming! If you’re going to spend a lot of time sitting in it you might as well make it cute!
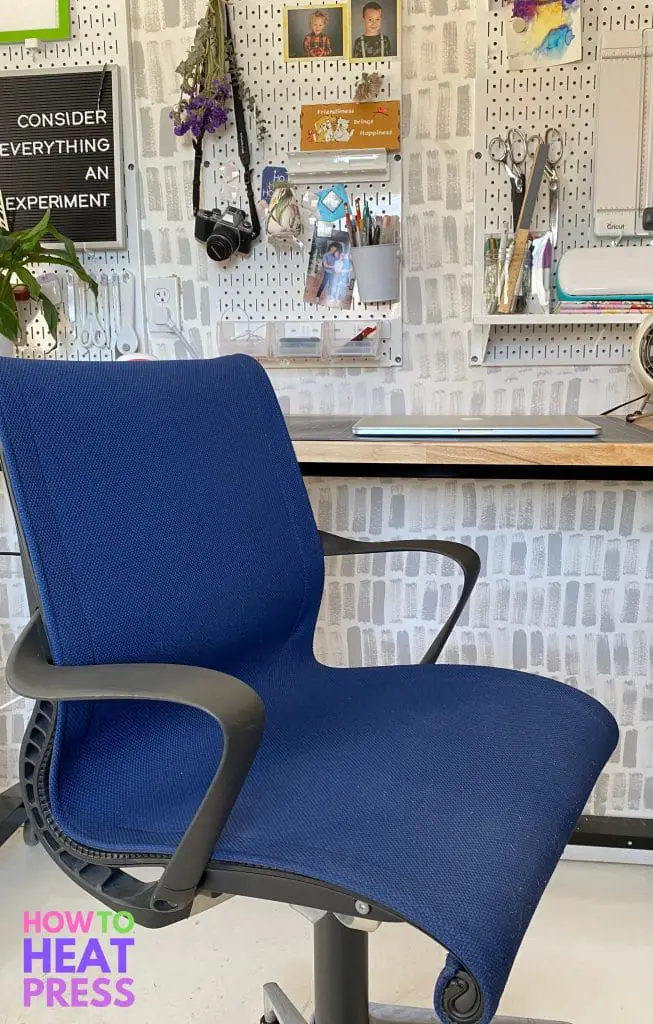
Here’s what my simple, good chair – my somewhat boring chair – looked like before the makeover. It gets a lot of use, but not a lot of love. Heat Transfer Warehouse is celebrating 11 years in business and supplied us with the Siser HTV for the project. HBD HTW, we’re thrilled to make this project part of the celebration!
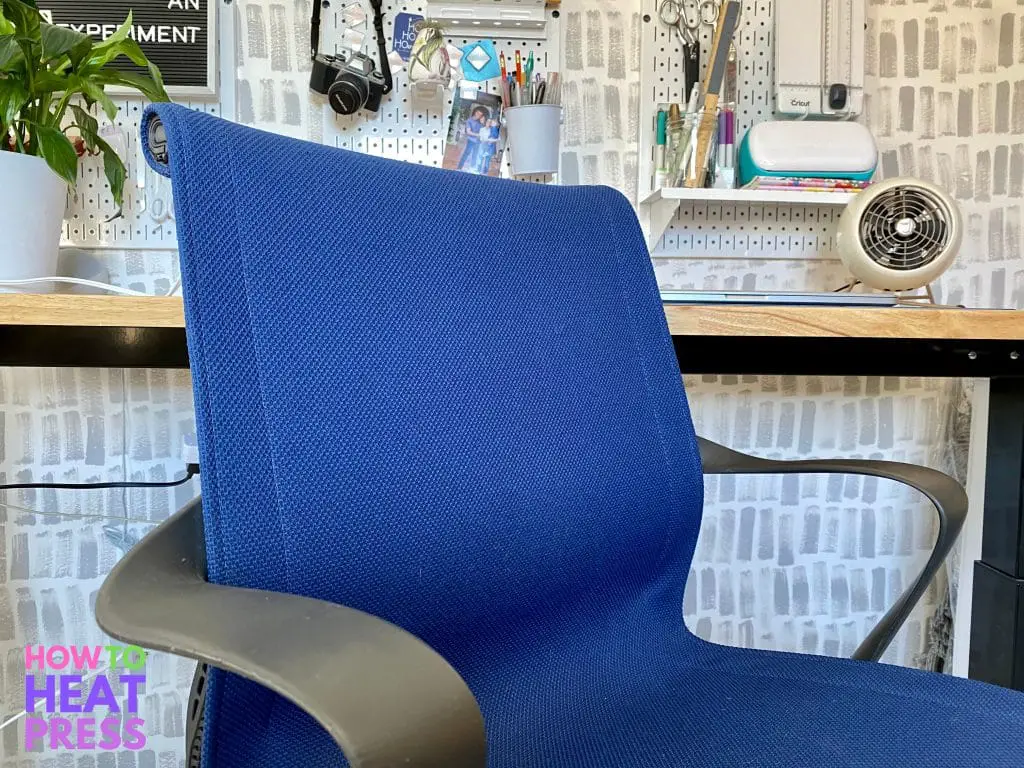
If you’re like me you might have an office or desk chair that you really love the feel of, but not so much the look. You don’t need to spend a bunch of money on a new office chair, you just need to give your current chair some flair! That being said, don’t be afraid to customize a new chair either : )
The real beauty of this makeover is that it packs a lot of bang for its buck in terms of both time and money. While reupholstering an old office chair is a great way to extend its life that might not be an option for your style of chair. It also takes more time than the method we’ll share here. No screwdriver or staple gun needed!
This easy DIY project can be done on any type of chair, it doesn’t have to be an office chair. Imagine your dining room chairs with a spunky design on the back, or customizing children’s furniture with their names or favorite animals. Using either HTV or adhesive vinyl is a great way to bring some personality to your furniture.
Office Chair Makeover
I scored a pair of these Setu stools from Herman Miller at my favorite industrial furniture shop about a year ago. They are so comfortable and work great in my workspace/home office. I love that I can adjust their height as I also have adjustable height tables. If I’m sewing everything gets lowered down, and if I’m working with my Cricut I like being able to shift from standing to sitting comfortably.
Other great spots to pick up a chair on the cheap that you can upgrade with some HTV include a thrift store like Goodwill, scoring something on Craigslist or Facebook Marketplace, even buying something new from Ikea.
Buying them used meant that I got a great price, but that they also came to me showing some wear. The fabric is in good shape but looks a bit dated compared to the newer versions of the same chair. While new fabric might have been an option to reupholster other chairs, the design of the chairs meant it wouldn’t be something I could swap out with pliers, a staple gun, and some elbow grease. Instead, I decided to upcycle my old office chair into a fancy stool that fits my personality and the style of my space using Siser Holographic HTV.
Using HTV on Upholstery
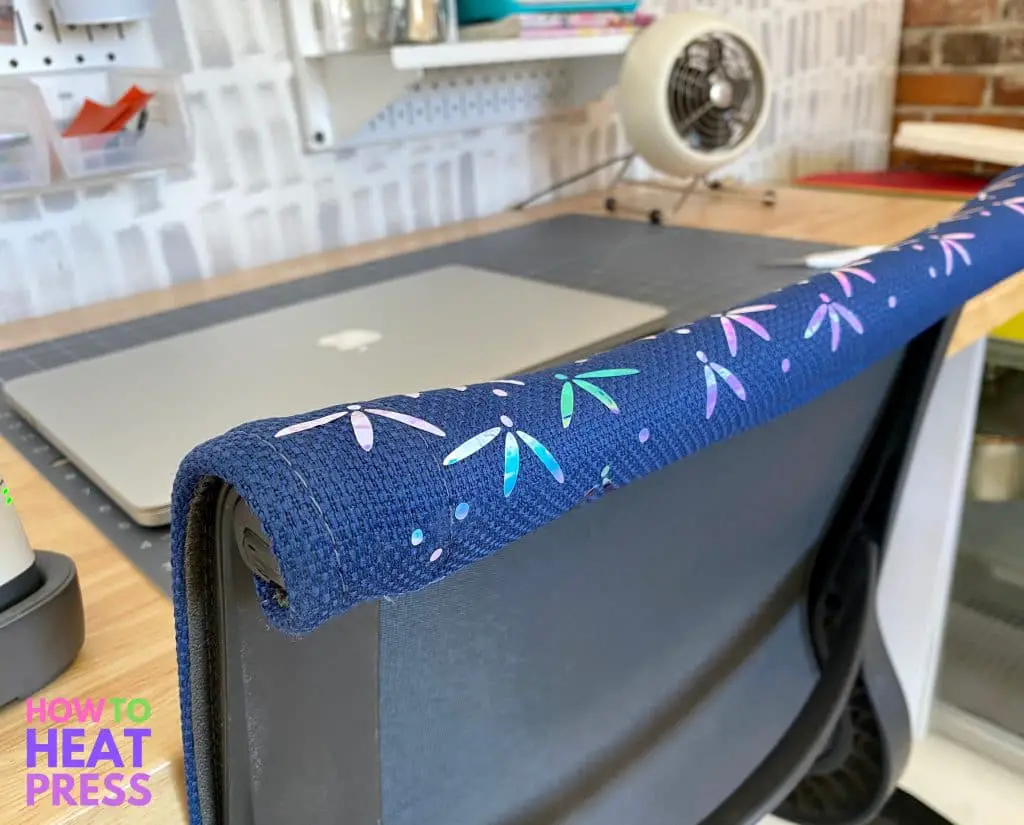
In all honesty, I knew I wanted to add HTV to these chairs as soon as I purchased them – but it still took me almost a year to do it! It seemed like a big commitment and I worried about the success of the project. Now that the project is done I only wish I’d done it sooner.
HTV can be applied to all different types of fabric. The most important thing is to make sure you use the correct temperature so as not to accidentally scorch the fabric. The Siser Holographic HTV I used is perfect for upholstery because it’s made to adhere to polyester, cotton, blends, and even leather. While I wasn’t sure exactly what type of fabric my old office chair was made of I assumed from the feel and durability that it’s polyester.
Make sure you follow the application instructions for whichever HTV you choose for your desk chair makeover. Reading up on some heat press tips and tricks before embarking on a project that feels high risk is always a good use of your time!
I took the additional step of applying a bit of HTV to the underside of my chair where it wouldn’t be visible to anyone except my toddler to make sure it would adhere well and the fabric could handle the heat.
Choosing a Design for your Chair Makeover
I suppose a big reason it took me so long to do this project was that I spent a lot of time laboring over the design I should choose. Here are a few questions for you to consider when thinking about giving your office or computer chair a facelift:
- How will the design fit with your existing home decor?
- Will this chair always live in your home office or craft room or does it move around?
- How large do you want the design to be?
- How will you feel about the design in different seasons?
- Do you want many colors in your design?
After considering those questions I decided to go with a pattern from this “Simple Blue Geometric Patterns” pack from Design Bundles. I chose the pattern on the far left, which I promptly nicknamed ‘bird tracks’.
I settled on the bird tracks design for a few reasons. First, I wanted something with small, individual pieces so that each piece would be less likely to stretch or crack over time. Next, it was important to me that the design would look good in every season. These little bird tracks could also look like flower petals or snowflakes, or just a simple dot and line doodle. I also wanted a design that would feel organic and forgiving. Because I’ll see and interact with my chair daily I wanted to make sure my design would be easy to apply. Straight lines that might come out imperfect because of the curved surface they were going to be applied to were not going to work for me.
While I first thought I’d go with a floral design I realized I might not love it so much in fall or winter – so hello bird tracks it was! I also decided I wanted to alter the pattern a bit to make it feel more random … more on that to come.
Choosing HTV/Adhesive Vinyl for your Chair Makeover
It’s likely that your design choice was heavily influenced by the color scheme you’re looking for in your project. But should you use adhesive vinyl or heat transfer vinyl? The answer is clear based on the material of the chair. If it’s fabric or leather you’ll want to go with HTV. Metal, wood, or plastic will do better with adhesive vinyl.
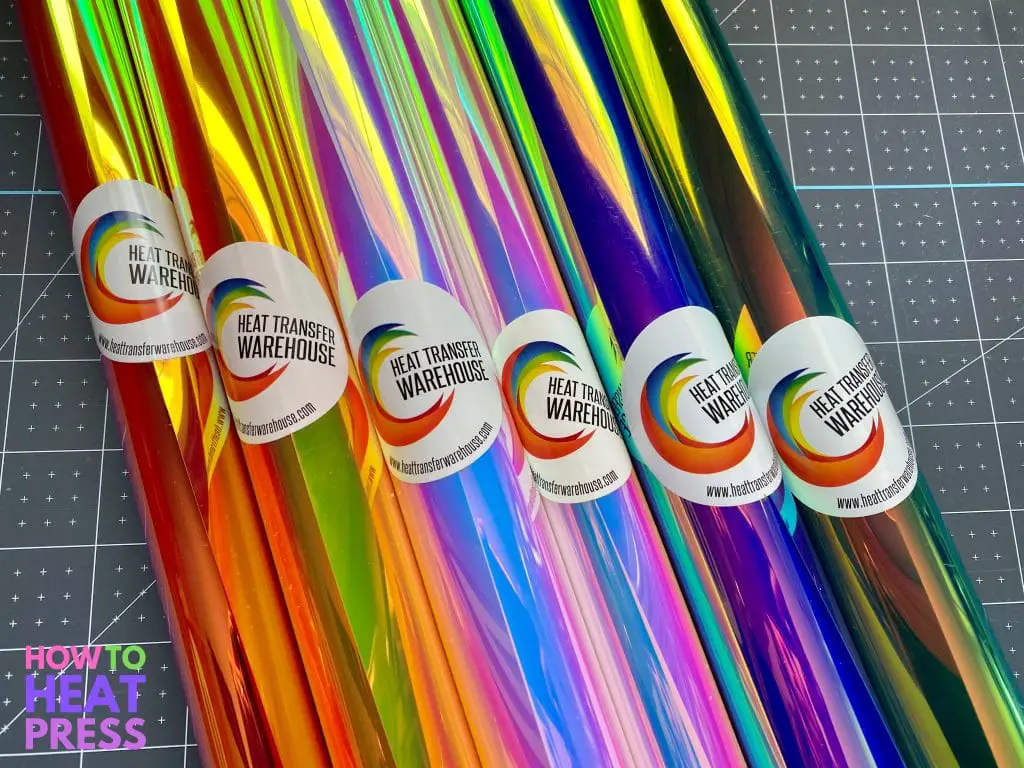
In my case, I wanted to add a bit of sparkle to my workspace so I chose Siser’s Holographic Pearl HTV from Heat Transfer Warehouse.
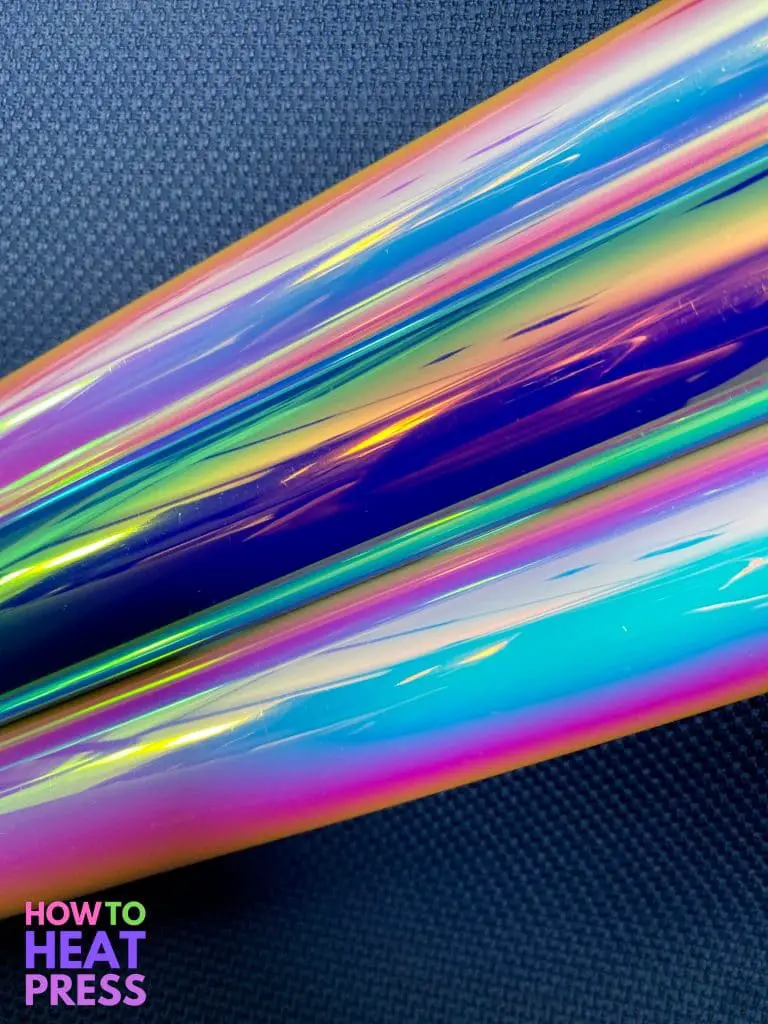
Holographic vinyl is full of surprises! Depending on the angle of the light hitting it you can see completely different colors which I love. The chair I’m freshening up lives in my workspace that has a southern exposure and therefore lots of sunlight! Add to it that the chair swivels it just seemed that holographic vinyl would add a beautiful pop of life to my creative work. I chose three shades of the Siser Holographic Pearl to include on my chair – Mystic, Moonlit, and Rainbow.
Convert JPEG to SVG
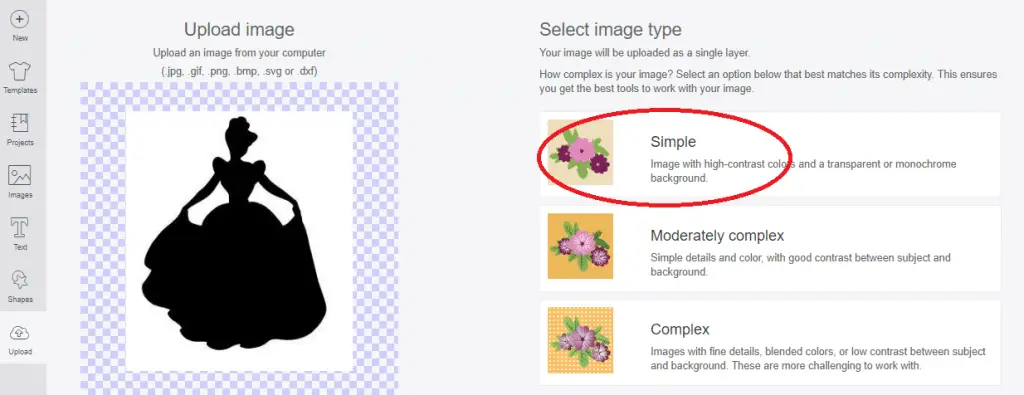
The file I chose to use for my design came as a JPEG. I needed to convert the JPEG to an SVG cut file. There are lots of different ways to this and your choice should depend on how complicated the image is.
If you’re using Cricut Design Space here’s how to convert from a JPEG to an SVG in DS. You can also use an online tool like Convertio.
Edit your Design for Your Chair Makeover
The pattern I used was just that – a pattern. I uploaded it to Cricut Design Space and got busy shaping it into what I wanted for my chair.
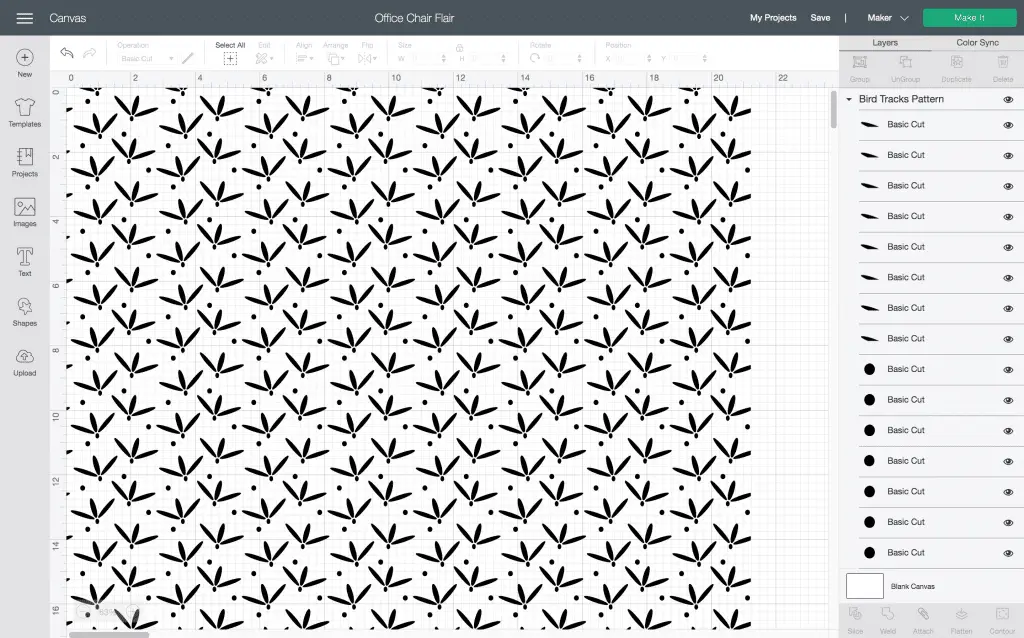
The first thing I did was measure how large of a space I wanted the design to cover on my chair. If you’re adding HTV to a chair you want to consider where to put it. Keep in mind you’re not making a piece of new fabric, and you shouldn’t try to cover the whole thing. I recommend avoiding places like the chair seat or armrests as they’ll be put through the most stress. I chose the backrest of my chair because it wouldn’t be stretched as much when sitting so the quality of the HTV will last longer. Depending on its design the back of the chair could be a nice candidate for sprucing up!
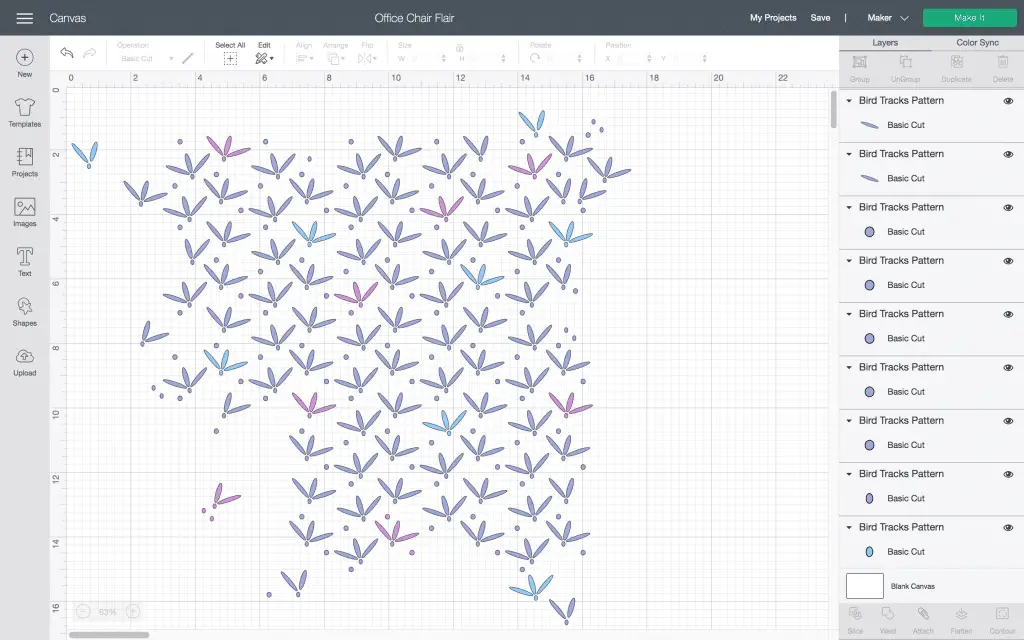
First, I scaled the pattern to the size of ‘bird track’ I thought would look nice. I wanted the shape to feel looser than the pattern looked so I then started to delete some of the ‘bird tracks’ to give it a more gentle edge. Because I wanted to use three different colors of HTV I changed the colors of the ‘bird tracks’ accordingly.
I made sure to attach all of the ‘bird tracks’ to the canvas one color at a time. That ensured they would cut just as shown on DS screen! If you’re in need of some explanations on using all of the tools in Cricut Design Space we’ve got you covered!
Cutting & Preparing HTV for Application
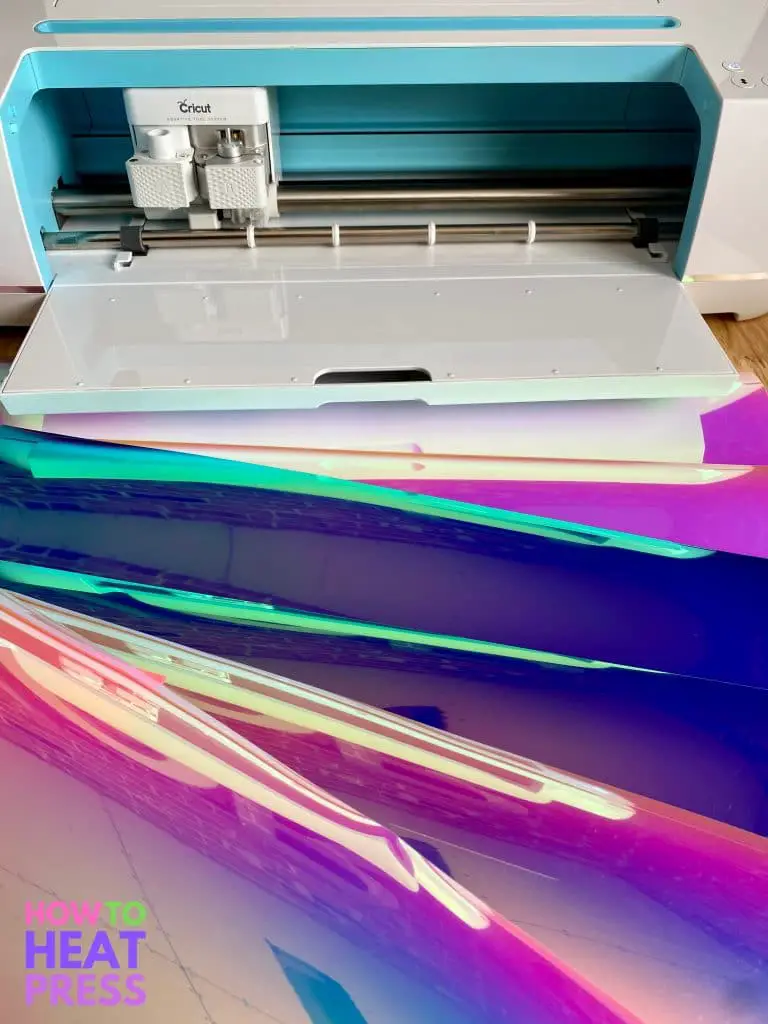
For this project, I used my Cricut Maker, but you can use any cutting machine. This is something you could even do with the Joy, you’d just need to cut many sheets of the little ‘bird tracks’.
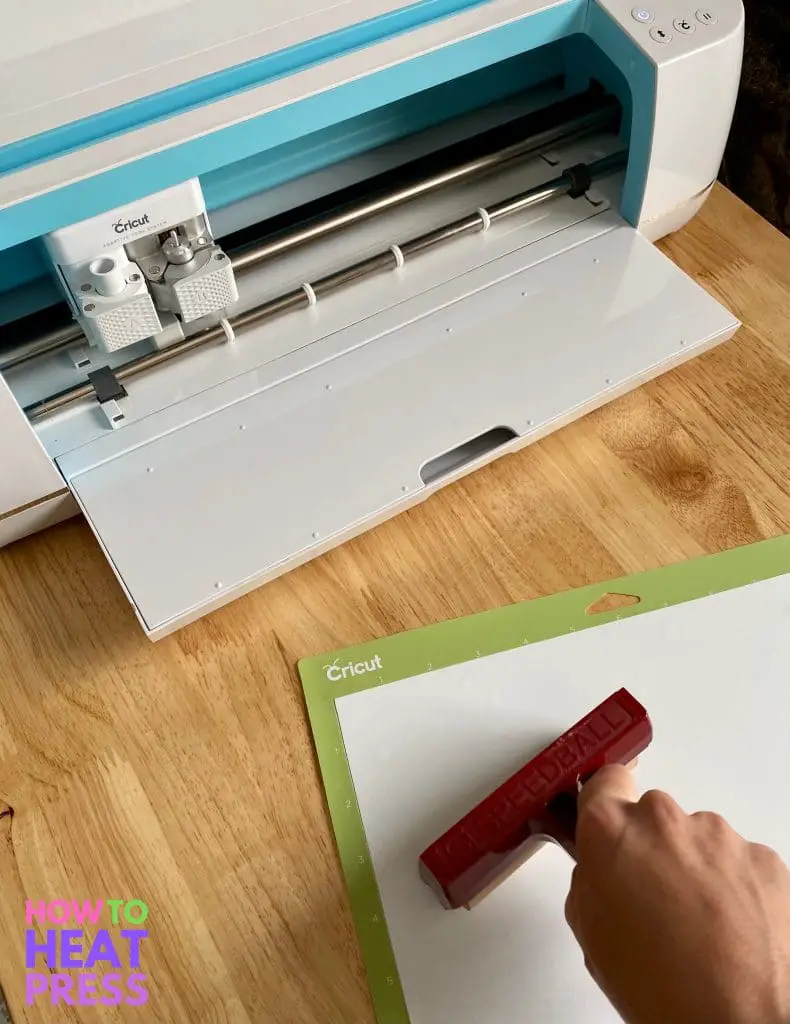
Based on the size of my design I needed large sheets of HTV. Whenever I’m using anything bigger than about 4 x 4 inches I always use a brayer to roll out any bubbles. I also find it helps the vinyl adhere to the mat better if I haven’t cleaned it recently.
Notice in the photo above that the shiny, holographic side of the HTV is facing the mat and the white, dull side is facing up. Because of this, you must always mirror HTV before cutting! If you forget, don’t give yourself a bad time, it happens to me at least once every couple of months.
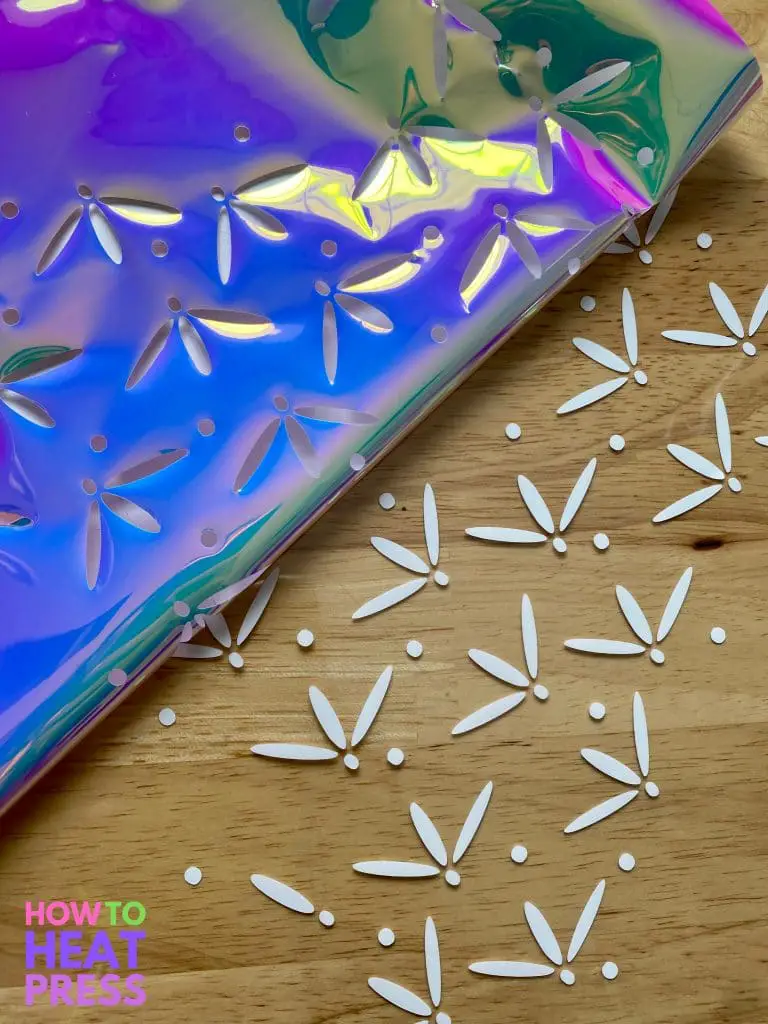
I’m one of those folks who loves to weed! Especially a project like this that is just one big peel of the negative image. If you look carefully above you can see where one of the ‘petals’ got pulled away. As I mentioned before the imperfections and looser, organic feel of the pattern were important to me so I didn’t worry too much about this. In fact, I even went further in removing parts of the pattern for a less structured feel after the initial weeding was done.
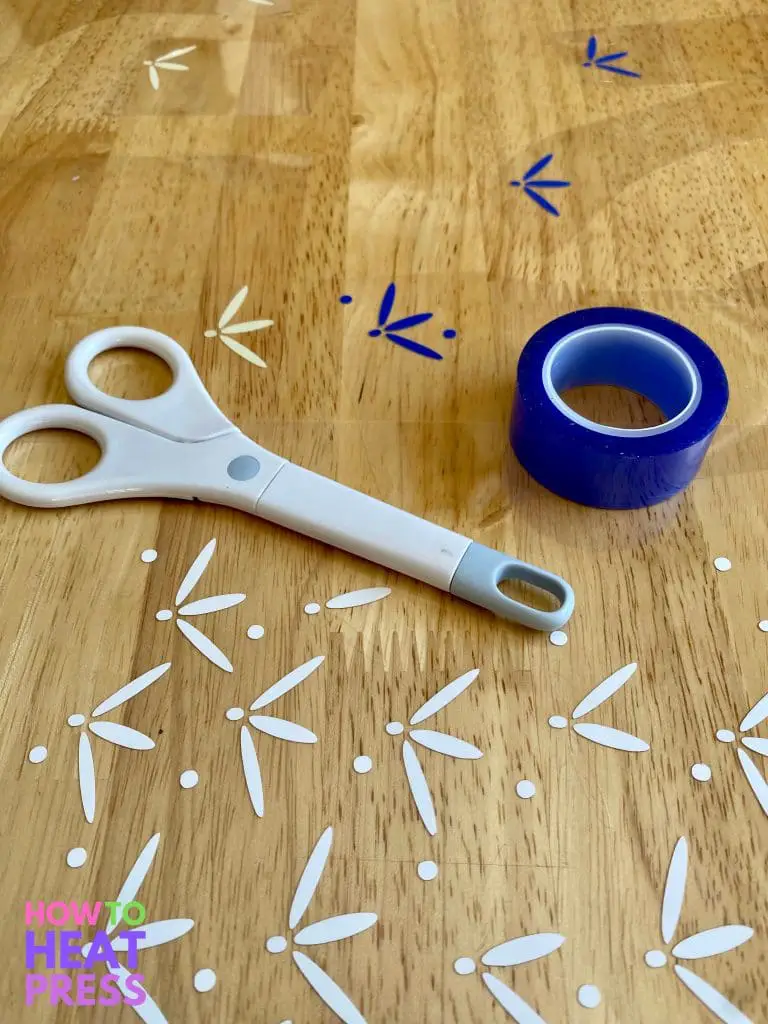
Heat-resistant tape is a must-have on a project like this! Even though the carrier sheet has some adhesive quality it’s not enough to hold such a large piece of HTV in place. It comes in handy when making sure sublimation or Infusible Ink designs stay in place on a traditional heat press project too!
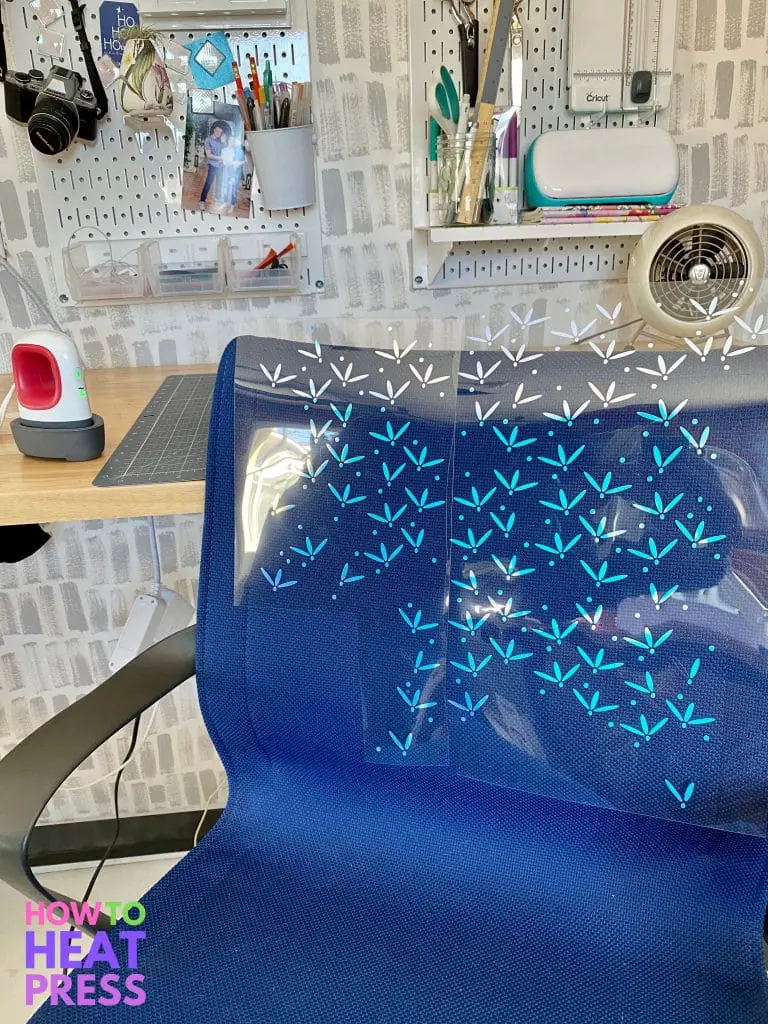
Next, I laid out the two largest sections of my design on my chair to see how they looked. Some of the holes you see above will be filled in with the other two shades of HTV and some will be left blank. You can see at the top of the chair the carrier sheet and a few tracks are popping out above. My plan was to start with the heat press at the bottom of the chair and work my way up, finishing on the top/back of the backrest.
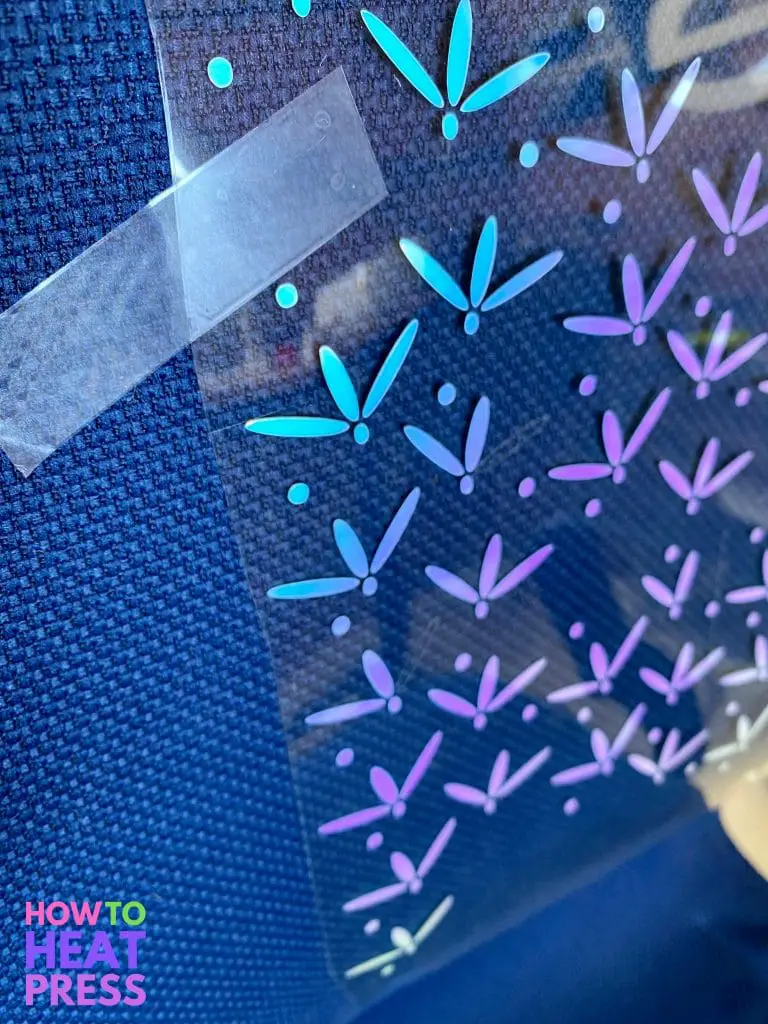
I love how the photo above captured the variety of colors you get with just one sheet of holographic HTV! You can see where the heat-resistant tape was applied to hold my design and carrier sheet in place.
Applying HTV to Upgrade your Office Chair
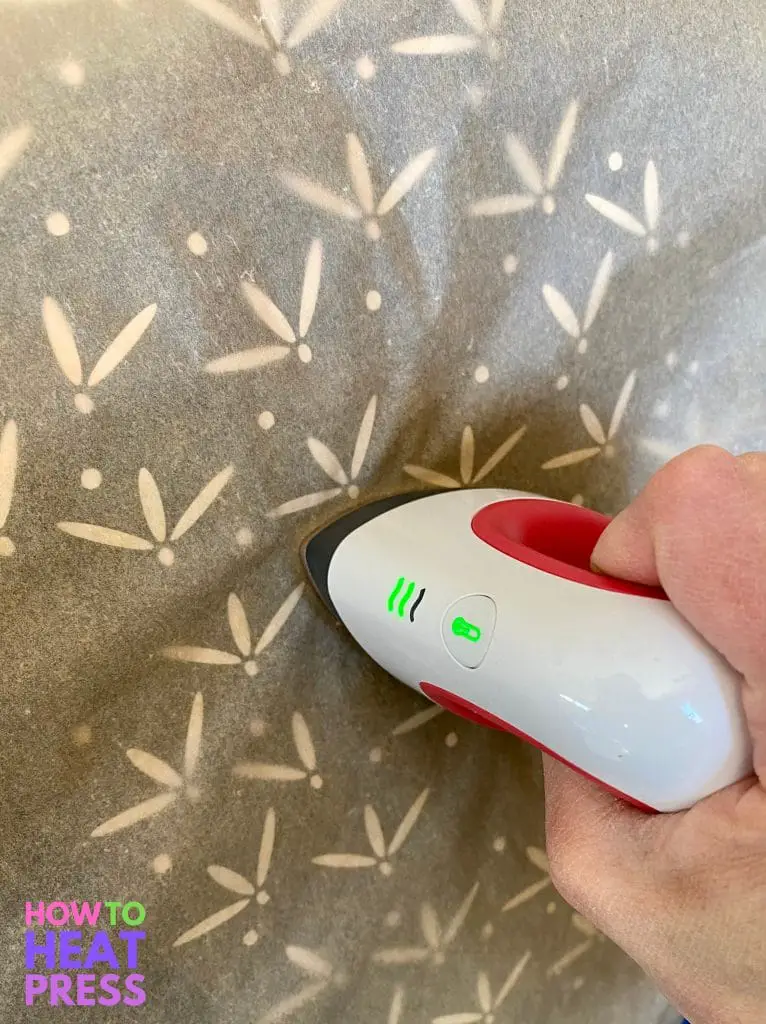
The Cricut EasyPress Mini was the perfect tool for this job. While it’s doable with a normal iron the size of the EasyPress Mini is what makes it so ideal. It’s the diminutive size (but powerful heat) that made it easy to focus on adhering each part of the design without worrying about accidentally melting the arms of the chair or applying uneven heat or pressure.
In the photo above you can see the parchment paper I used between the carrier sheet and the heat press. This is key no matter what type of heat press project you’re doing. Parchment paper works great, and Teflon sheets from Amazon are also an affordable and reusable option.
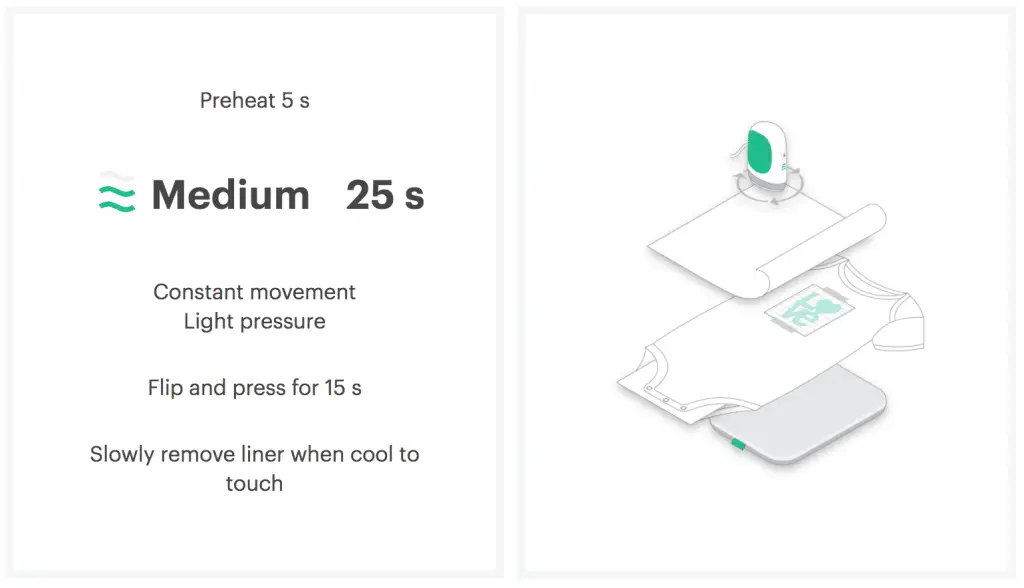
As I mentioned, I couldn’t find the exact material the seat of my chair is made of I assumed from the feel and look that it is polyester. To figure out the correct heat settings for my EasyPress Mini I first consulted Cricut’s Heat Guide that is always soooo so helpful. You can see their suggestions above based on Holographic HTV being applied to Polyester.
Because I’m using Siser HTV, not Cricut HTV, I also consulted their instructions to make sure the temperature recommendations lined up which they did. It would have been best for me to iron the reverse side of my chair as the instructions suggested but I didn’t feel comfortable doing it. The fabric on the backside is not the same as on the front of my chair. I tried on a small spot on the bottom of the chair and it instantly gave off a bit of an odor that told me I shouldn’t push it. It didn’t leave a mark but I just didn’t feel comfortable risking it. Fortunately, the heat press did the job just fine while only pressing the top side of the chair.
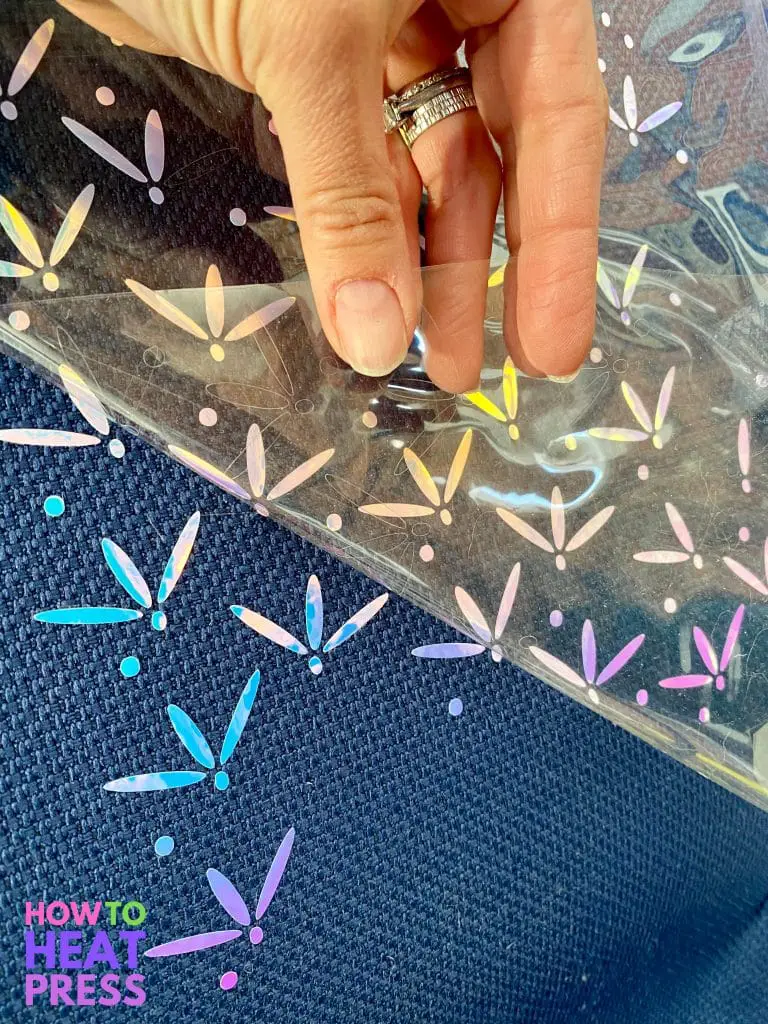
As I worked my way from the bottom of my design to the top I found it helpful to remove parts of the carrier sheet as I moved up. This just made it easier to get each section of my design in solid contact with the old fabric of the chair so that the HTV would adhere nicely. If you’re doing a similar technique be careful to make sure your heat press doesn’t touch any areas of the newly exposed HTV. Again, parchment paper or a Teflon sheet come in handy for this.
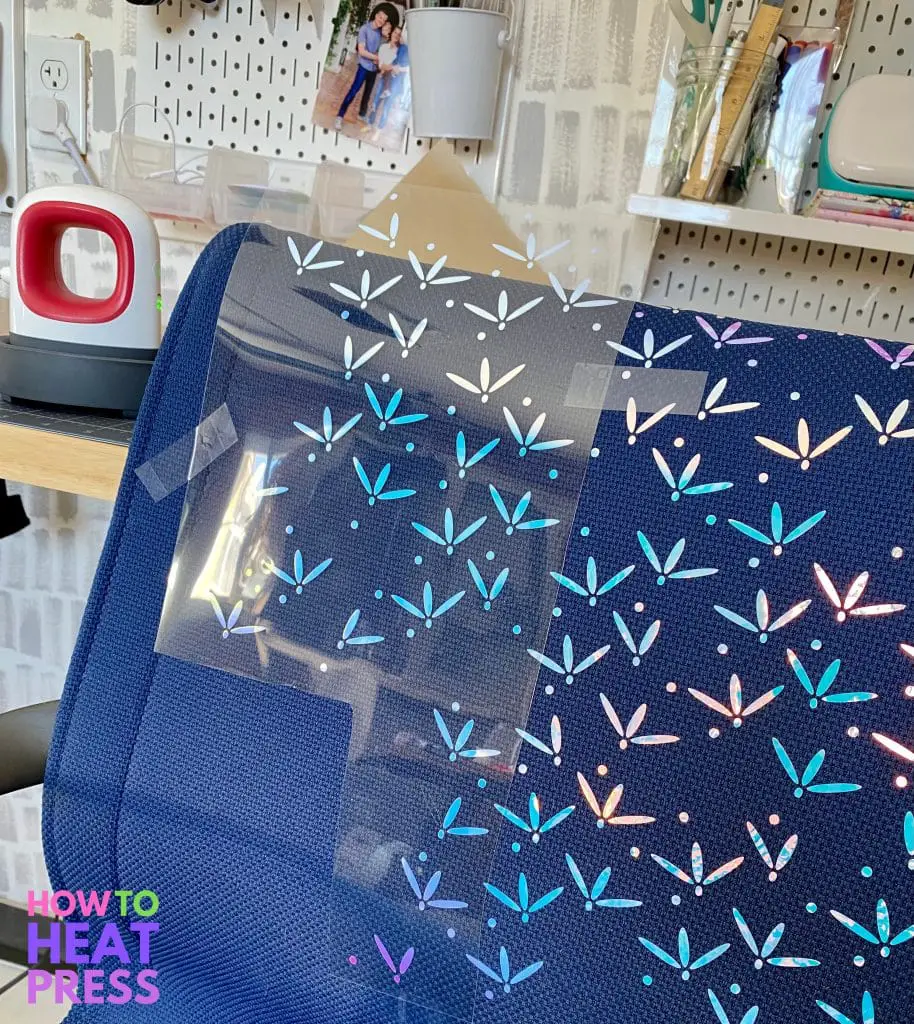
One side of the chair is done with my first color of HTV and it’s time to move to the left side! Again, I worked my way from the bottom to the top with my EasyPress Mini. As you can see in the photo above I didn’t tape the top section of my carrier sheet down until I got to work in that area as it would have created wrinkles down below. Once I made it to the top I cut small notches between each of the bird tracks so that the carrier sheet would fold over easily and attach smoothly to the chair fabric.
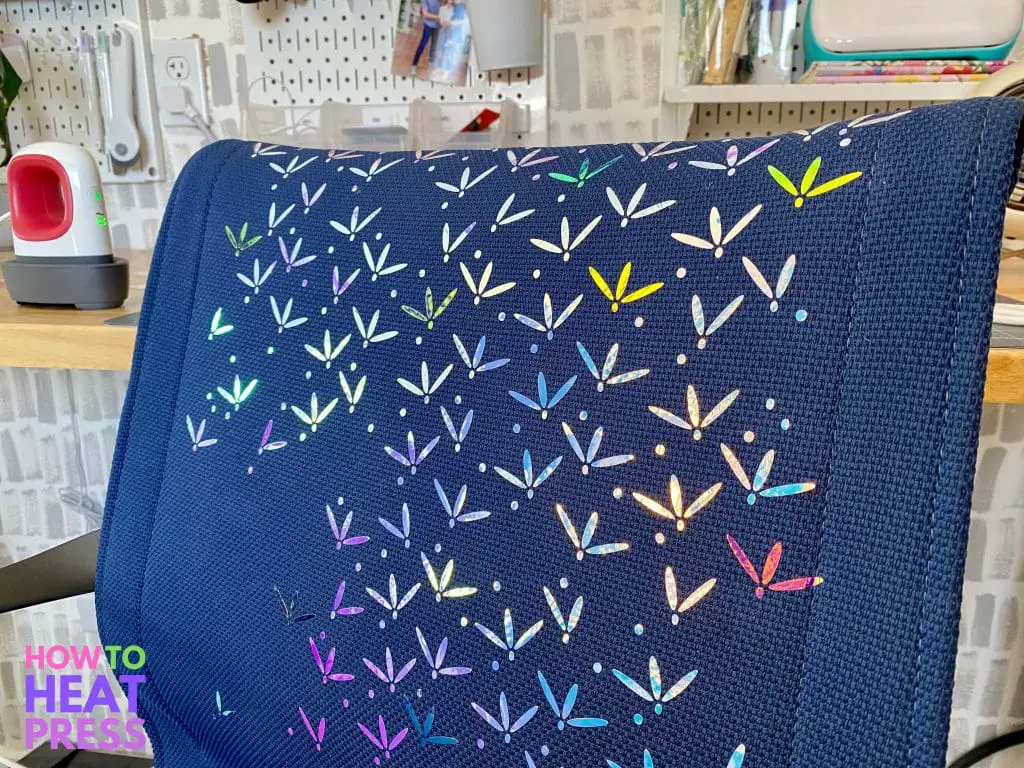
After completing both sides with my main color I went back and added in some bird tracks on the two other shades of Siser Holographic Pearl HTV. In the photo above you can see the tracks that appear to be yellow, green, deep blue, and pink are different shades of HTV.
Completed DIY Office Chair Makeover
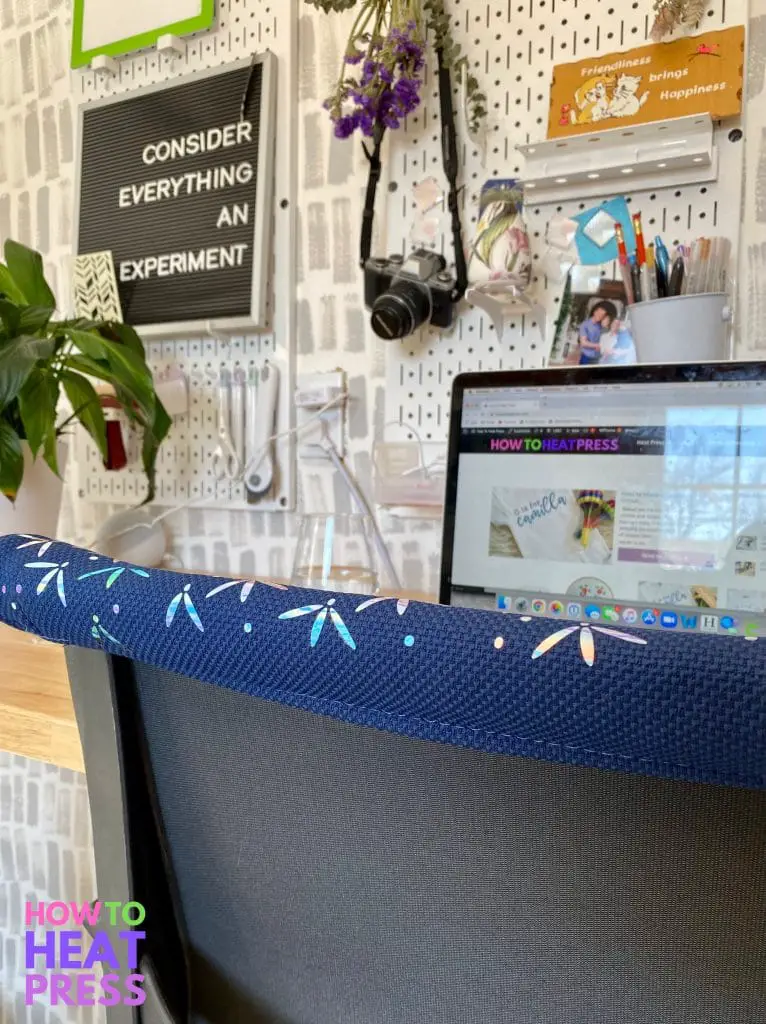
What do you think? The redo is done, and my own office chair has gone from drab to fab! I hope you’ve found this to be a great tutorial and that you’ll give it a try with a chair in your living room or office.
We’d love to see your chair makeover projects! Please share in the comments below. : )
(Please note: This post contains affiliate links. Read our full disclosure policy here.)





Hi there, I have a pleather couch. Where I sweat under my knees and my arm on the side of the couch has completely torn apart. The couch is only 2 yrs old and I have never had this happen before.
My real question is can I use any kind of htv to repair my couch?
Hi Julie, such a bummer to hear your couch is disintegrating after only 2 years! I get why you’d be frustrated. I’ve never used HTV to repair tears before – it’s just not thick enough to expect that it would hold together torn leather or fabric, especially on a couch that gets a lot of stress and stretching when in use. That being said you can absolutely apply HTV to pleather or faux leather. I’d honestly suggest that you first repair the torn area with something like this leather tape – then I’d add some HTV as a form of decoration to mask the fact that it’s been patched up. It sounds like you don’t have much to lose with the couch at this point so giving the repair a shot could give the couch new life! Good luck, I’d love to hear how it turns out!