
How To Cut Glitter Iron On With The Cricut Maker
My little girl is starting preschool soon, so I’ve made her a cute DIY preschool t-shirt.
In this post you will see how to:
- prepare an SVG in Cricut Design Space
- cut and prepare a glitter iron-on design with the Cricut Maker
- heat press a glitter HTV design onto a kids t-shirt
PreSchool Shirt Ideas

For this project we’re using Siser glitter HTV, the Cricut Maker, and the PowerPress heat press.
I’m using this SVG from Creative Fabrica for my t-shirt.
How to cut Siser Glitter HTV:
- Mirror design in Cricut Design Space
- Select Glitter Iron On in custom material settings
- Place Glitter HTV shiny (colored and glittery) side down on the cutting mat
- Once cut, weed away any excess HTV that is not part of your design
How to press Siser Glitter HTV with a heat press:
- Open heat press before turning it on
- Set temperature to 320°F and allow to heat up
- Pre-press your t-shirt for 2-3 seconds (check and adjust the pressure while pre-pressing)
- Place design onto shirt, cover with a Teflon sheet and press with firm pressure for 15-20 seconds
- Peel carrier sheet warm
First Day Of Preschool Shirt
To get started, I’ve uploaded the SVG to Cricut Design Space.
Next, I need to decide on the size I want it for my toddler t-shirt. The design I’m using comes pre-welded, which is a good thing to check before cutting it out. If the design is not welded, it will not cut as one, and will not be suitable for transfer.
The downside to a pre-welded design is that I do not have the option to ungroup the words and change them into different colors. So I’m stuck with using one color of HTV (unless I want to use the contour tool and separate all the elements in the design…).
Nevertheless, I think this design will look awesome in a single color anyway!

Since I’m just using one color of HTV, I’ve just got one mat. I’ve selected the mirror option so that the Maker will cut my design in reverse.

To cut glitter HTV, just search for glitter in your custom material settings and select ‘Glitter Iron-On’.

Place the glitter heat transfer vinyl shiny (glittery) side down on the mat. Leave plenty of room behind your machine if you’re using a Maker, as it will scan through the whole mat before cutting.

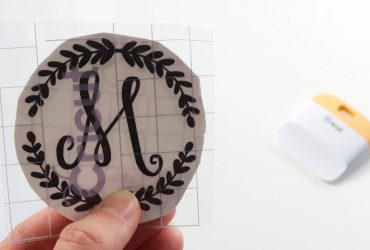
Glitter iron on is a bit challenging to weed…can YOU see any cut lines?! Light pads for weeding are especially handy for these jobs (other weeding tricks).

It’s a very easy type of HTV to work with though, barely any resistance at all! All done!

To press glitter HTV I turned on my heat press and set the temperature to 320°F and allowed it to heat up. Make sure you always OPEN your heat press before you turn it on!!

As well as setting the temperature, I’ve also set my timer for 15 seconds (Siser glitter should be pressed for 15-20 seconds).

Next I pre-pressed my shirt for a couple seconds to remove any wrinkles and moisture from the fabric.

I placed my design onto the shirt, covered it with a Teflon sheet and pressed it for 15 seconds at 320°F using firm pressure.

I allowed it to cool for just a few seconds. The carrier sheet is a warm peel.

Looking good!

An easy heat press project = a very special first official day of preschool for my little girl!

Siser Glitter HTV always comes out looking fantastic.

Leave a comment below and let me know if you decide to make this project as well! It’s the perfect preschool t-shirt SVG, isn’t it?
Cute Preschool T-Shirt
Please let me know your thoughts and questions in the comments below.
Here are some further resources you might like to check out:
Check out these other fun projects make using glitter HTV:


(Please note: This post contains affiliate links. Read our full disclosure policy here.)


Thanks for sharing this it’s really helpful for me.
You are so welcome! Glad it was helpful, happy crafting!
great job i am in 7th grade and i thought this was a really cute project this pictuer is in my project if that is ok
Yes, no problem Izzy 🙂