11 Tips For Weeding Vinyl – Adhesive, HTV, & Iron On Vinyl
Wanting to know some tips for weeding vinyl?
Whether you want to know how to weed vinyl or iron-on, I’m sure these tips will get you weeding faster and with fewer errors!
Even weeding the most intricate vinyl designs can be made easier using these tactics. Let us know if you have any other tricks in the comments below!
How To Weed Vinyl

These vinyl weeding tips are applicable to all types of vinyl, whether that be HTV , iron-on vinyl, or adhesive vinyl.
These tips are especially helpful for weeding small letters and numbers, or weeding intricate Mandala designs.
1. Use The Right Blade
Most vinyl cutting machines have a range of different blades. For example, the range of Cricut blades includes the fine point blade, the deep cut blade, and the rotary blade (among many others). You want to use the correct blade for each material you are cutting.

Check the instructions of the material you’re using to ensure you’ve got the correct blade!
It’s also important to check that there are no bits of paper or vinyl stuck to the cutter blade, and that it is completely clean.
2. Blade Setting

Making Cricut Vinyl Labels
If you cut vinyl with the blade set too low, you will end up pulling away the design with the area to be weeded.
And if you cut too deep, you’ll have to wrestle with a butchered carrier sheet!
Setting the cutting machine to cut at the right depth will make weeding a lot easier. Make sure your dial is turned to the correct material setting. If you’re ever unsure, do a test cut to check if your settings are right for the specific type of vinyl you are using.
I used the Cricut Explore Air 2 for many years, and I don’t know how many times I forgot to set the dial to the correct setting before cutting. These days I mostly use the Cricut Maker, and the material setting is selected on screen before cutting.
3. Use Quality Vinyl
Now that your cut settings are perfect, it’s important to work with great vinyl.
A quality vinyl with a quality carrier sheet will:
- cut better
- weed much easier
- look a lot better
- last longer without cracking or fading
Siser EasyWeed

You will save a lot of time during the weeding process with this vinyl thanks to its easy weeding and pressure sensitive backing.
Cricut Iron On & Vinyl
Cricut iron on is another quality brand you can use for your transfer projects. It is available in a wide variety of colors and various types, including: metallic, glitter and brights.

The label says ‘iron-on’, but Cricut HTV is perfect for use in a heat press machine as well.
Oracal 651

This is a permanent adhesive vinyl, considered by many to be the best craft adhesive vinyl you can buy.
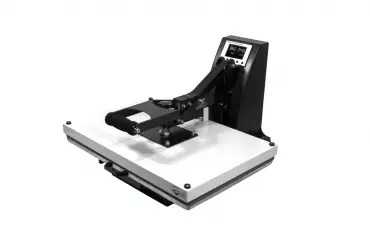
4. Warm Up Weeding Surface

What makes vinyl even more easy to weed, is what Siser calls the “heat press trick”.
Heat up your lower heat press platen for 2-3 seconds (set at around 300°F). Place your HTV on the warmed lower platen and the warmth will loosen up the adhesive on the pressure sensitive backing. This makes it really easy to pull away any excess vinyl. Watch how it’s done in the video below.
*You don’t have to use a heat press for this. Alternatively, you can (safely) warm up a surface with an iron or your Cricut EasyPress.
5. Weed Into Cavities
Let’s start talking about weeding technique!
If you can clearly see where the cut lines are, then it’s a good idea to weed out the inside cavities first before pulling up all your excess vinyl.
If you pull up the excess vinyl first and then try to get the inside cavities, your hand will stick to the carrier sheet.

Having removed the inside cavities of the letters, the next thing is to remove your main piece of excess vinyl. However, there is a right and wrong way to do this as well!
When pulling up your vinyl you need to make sure you are doing it in reverse. Effectively pulling the vinyl backwards and into the cavities of the letters. This results in fewer breaks and speeds up the weeding process!
See these two techniques in action in the video below:
6. Use Weeding Borders
Another way to make weeding even easier is to use weed-borders or boxes.
If you have several different components in one design, then you can place a box around each component in your cutting software. Your cutter will cut a box around each component in your design. Then you will be able to weed your entire design in sections. You will be able to pull your vinyl up in individual strips making weeding less complicated!
If you are cutting multiple designs on one sheet of vinyl, then you can put a box around each design and weed them separately. If you have any really small or delicate details, you can place a weeding box around them so that you can be extra careful when weeding them.
In the video below, Jessica from Expressions Vinyl shows how to put in a weeding box in Silhouette Studio. Remember to flip or mirror-image the design if it is for a t-shirt. See here for how to create a weeding box in Cricut Design Space.
7. Reverse Weeding

While we have an entire post dedicated to reverse weeding on a Christmas mug project, we’ll share the gist of it here.
Reverse weeding is for adhesive vinyl only. It’s where you apply transfer tape across the whole unweeded decal, and then weed the excess vinyl away from the transfer tape, instead of the carrier sheet.
In theory this is easier to weed for smaller decals than doing it the regular way! Check out the extended post for step by step details.
8. The Cricut Bright Pad

When you place a cut vinyl design upon the BrightPad (or other lightpad for weeding vinyl), you are instantly able to see all the cut lines.
The design is made much more visible, and it becomes easy to distinguish the area that needs weeded out. The thicker the vinyl you are working with is, the more the lightpad will help you.
9. Good Lighting

This tiny design on a custom kids shirt
If you don’t want to spend the money on the BrightPad, just make sure you’ve got direct bright light shining onto the cut vinyl.
I sometimes use my cell phone light. It’s super bright and I can see each individual cut clearly. Some people prefer an arrangement where the light is shining up from below, but I personally find it better setting the lighting above where I’m working.
10. Use SVG For Reference

Working with Cricut Foil Iron On
Another thing which helps me A LOT with intricate designs is having the SVG image on my computer in front of me.
Sometimes it’s really hard to tell what is part of the design and what should be weeded away, but having the original image in front of me makes it much easier.
11. Keep Intricate Designs Larger

If there’s a really intricate design that you’ve got your eye on, don’t cut it too small!
When such designs are cut at a small scale there are a few things that can go wrong:
- the cutting machine may not be able to do it and just chew up the vinyl instead
- you will end up with such thin pieces of vinyl that they’re difficult to weed and easily broken
- it’s generally going to be so hard to weed out teeny tiny pieces of excess vinyl!
If you are having trouble cutting small and intricate designs, it might also be the type of vinyl you are using. Glitter vinyl, for example, does not seem to cut as well in this setting as regular vinyl.
12. Weed Outside In Or Inside Out?

Cricut Window Cling is a type of adhesive vinyl
You’ll have to work out which suits you best on this one. Should you weed from the inside of the design to the outside, or from the outside to the inside?
On the one hand, weeding ‘outside in’ helps you to see the main outline of the design and might keep you from weeding the wrong areas.
However, I think I prefer weeding inside out. That way I don’t have the carrier sheet sticking to my hand the rest of the time I’m weeding!
I don’t like seeing fingerprints all over the carrier sheet either, which doesn’t happen as much with an inside out approach. I know that doesn’t actually matter, but I just like my cut and weeded vinyl to look pretty even before it’s pressed!
Vinyl Weeding
Ok, so there were 12 weeding tips instead of the advertised 11 – but 11 has more of a ring to it, right?
And that’s it for now. Work smart in your hobby or business with these weeding tips and tricks.
If you have any other tips you’d like to share, please leave them in the comments below. Thanks for reading!
Pin this post!
(Please note: This post contains affiliate links. Read our full disclosure policy here.)

![The Best Sublimation Printer [UPDATED 2025] Buyers Guide](https://www.howtoheatpress.com/wp-content/uploads/bfi_thumb/sawgrass-virtuoso-sg400-complete-sublimation-printer-kit-compressor-37d6vxwhaluc4553f47tai.png)