10 Awesome Cricut Explore Air 2 Projects!
Watch out: A whole lotta Cricut project ideas ahead!
I’ve got a Cricut Explore Air 2, which is why I’ve titled this Cricut Explore Projects, but of course you can complete these projects with basically any cutting machine (and especially the Cricut Maker).
Cricut Explore Air Projects
I’m listing a few of the Cricut machine projects I have made myself recently, and then below there are project ideas from Cricut’s official Facebook page – like and follow them here for more great Cricut Projects.
If you’re needing any supplies, make sure you first check our Cricut deals & coupon codes post for any current discounts!
1. Cricut Patterned Vinyl T-Shirt

I got a new pack of Patterned Cricut Iron-On and made this patterned HTV project with it. I made the SVG because I wanted to use each of the 3 different patterned Iron On sheets on the one t-shirt design. I used Glitter HTV for the sash.
Tips for making this t-shirt:
- use the free dress SVG linked to above
- if you use glitter & patterned HTV like I did, don’t let them touch
- use heat resistant tape to keep vinyl in place
2. Reverse Canvas Cricut Explore Project

This is another Cricut project with free SVG file dowload. I really enjoyed making this reverse canvas project.
Reverse canvas tips:
- be patient, this project is done over a couple of days
- contrast bold colours
- make sure the paint is dry before heat pressing (or use adhesive vinyl instead)
3. A Baby Bodysuit Cricut Project Idea

Baby bodysuits are my go-to present for newborns. I made this baby bodysuit with Glitter heat transfer vinyl in mind. It is, of course, a quote from Mary Poppins after she has measured herself. Her measurement is ‘practically perfect in every way’.
DIY baby bodysuit tips:
- use heat press pillows for best results
- use Siser glitter HTV
- to make weeding glitter easier, use weeding boxes
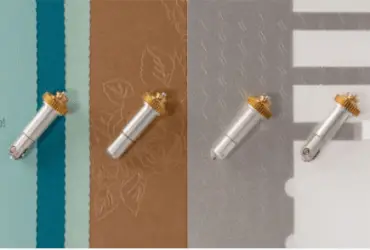
4. DIY Stainless Steel Water Bottles

Another awesome Cricut machine project: custom stainless steel water bottles. They come out looking so spectacular! I think it’s just that stainless steel makes anything look good. But the adhesive vinyl makes them look even more impressive.
Tips for doing this Cricut Explore Air project:
- read-up on how to apply vinyl to a curved surface before attempting the project
- make sure you choose a stylish font to match the surface
- use duplicate corner squares to align the design with multiple colors
5. Cricut Slice Tool Project Idea

It’s another baby onesie, but this time with a Cricut Slice Tool design idea and project. The slice tool cuts text or other design elements out of larger designs. It’s great when you have really pretty vinyl and you want to show it off a bit more!
Tips for a slice tool project:
- don’t forget you’re going to be weeding out what you would usually be keeping!
- think about using Siser foil HTV
- or use another quality heat transfer vinyl that doesn’t peel
6. Make A Save The Date Card Project
In this video we are shown how to make a save the date card, and also how to address envelopes with a Cricut machine.
The project is done using the ios app on an iPad, but can be done on any platform. We are shown the process step-by-step. Thank goodness for video because it makes it much easier to follow!
Tips for making save the date cards:
- This project uses Cricut pens and the Cricut Light Grip Mat – the light grip mat won’t damage lighter products like paper envelopes
- The Design Space app gives plenty of prompts each step of the way making it fool proof!
- When removing cardstock from the mat, bend the mat away rather than the card
- Use the same font for writing the address on the envelope as you use on the card
- Use the ruler on the side of the mat to determine how large your fonts need to be
- You can address more than one envelope at a time – fit as many as you can on the mat!
- Use your Cricut to cut photo borders into different shapes
7. Cricut Reverse Canvas Project
In this video, we are shown how to make a reverse canvas.
Reverse canvas tips & tricks:
- Get yourself a canvas – here are some on Amazon
- Use a craft knife to cut away the canvas from the frame (or use a staple remover to pull the staples out)
- You can stain or paint the frame once the canvas has been removed, or just leave it the way it is!
- Cricut Foil Iron-On is used in this project – if you wanted to paint your canvas first you would need to use adhesive vinyl rather than iron-on
- Fonts as shown in the video: ‘hello there’ is called Bickley Script, while ‘handsome’ is Classic Roman Std Reg – these are both Cricut fonts available in Design Space
- When reapplying the canvas to the frame, you can use a hot glue gun (as shown in the video) or, if you have a staple gun, use that
- Use Command Velcro Strips to hang your canvas
8. How To Make Custom Pillow Cases With Cricut HTV
Custom pillow cases make your home extra special AND they make amazing gifts for friends and family. This video also includes some great tips for weeding vinyl.
Tips & tricks for making a custom pillow case:
- Use a weeding tool to make weeding quick and easy
- In this video an ironing mat is suggested as a good surface to press your iron-on vinyl, however, I personally prefer a wooden chopping board
- The difference between Cricut Iron-On and Cricut Vinyl is that the latter is like a sticker that can go on anything really and it is not pressed on with heat. Iron-On is primarily for clothing & other fabrics and is applied with heat
- Use the blue Light Grip or green Standard Grip Mat to cut Cricut Iron-On Vinyl
- Set the temperature on your iron to the appropriate setting for the fabric you are pressing onto
- Over time, if your vinyl starts to lift, you can simply use your iron to press it back down again
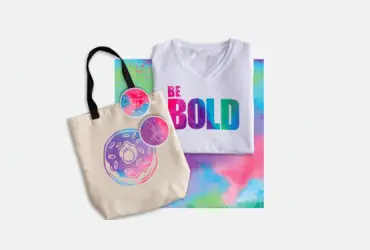
9. How To Make A Custom Tote Bag
Carly Hall teaches how to make a tote bag with the Cricut Explore Air 2 in this video. It is specifically a Halloween tote bag, which you’re not going to be making year round, but of course the steps can be followed for any design.
Here’s what you need to know:
Carly is using the Cricut Explore Air 2 (in mint!)
- She is using the Design Space app for iPhone – there is also a Beta app for Android which can be downloaded from the Play Store, or do as I tend to do and use the computer software!
- You can find blank tote bags ready for your vinyl designs on Amazon

10. Working With Patterns In Design Space
Courtney uses the Cricut Maker and the Cricut EasyPress to make these fantastic little star ornaments. These are specifically for the Christmas season, but as with the Halloween tote above, you can use the same process to make ornaments for any occasion.
Points to remember:
- The material used to make the ornament casing is wool felt. This is cut with the rotary blade which is only made for the Cricut Maker. You can do this same project using a stiffer felt and the deep cut blade with other machines (like the Explore Air 2)
- The pink mat is the Fabric Grip Mat – here is a complete Cricut mat guide
- The EasyPress is an amazing machine!
- Use a hot glue gun to stick the two sides of felt together
Further Cricut Explore Projects
Those are the 10 Cricut projects we’re sharing with you today but visit some of the following sites for more great craft ideas and resources:
- More Cricut project ideas on their Facebook page
- Official Cricut YouTube Channel with a load more project ideas
- Cricut Possibilities – see what you can make!
(Please note: This post contains affiliate links. Read our full disclosure policy here.)